Lets have some History Thread

image.pngThe Alcazar Theatre in Lower Edmonton—then part of Middlesex—was struck by German bombs on 23 August 1940. The blast destroyed the adjoining dance hall, collapsed one wall of the cinema, and caused the roof of the auditorium to cave in.

image.png

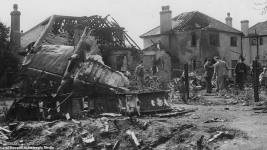
The remains of Stanley Street in Portsmouth following the fourth Luftwaffe raid on the city on 24 August 1940.

This is what the civilian population of Britain faced in the summer and autumn of 1940.

 
Going to this talk at Southwark Cathedral this coming Saturday. The Quakers were one of the many religious organisations that had their roots in the 16th and 17th centuries. It will be interesting to learn about their dark side and troubling behaviours. I've always that the Quakers were pacifists. A book will be on sale and no doubt I'll buy it.

06:00 PM - 07:00 PM

Library | Erica Canela: Zealous: A Darker Side of the Early Quakers'This talk explores the origins of Quakerism in the chaos of the mid-seventeenth century in England. Following the devastating civil wars, the population was left exhausted, traumatised, and living in a shattered landscape. In this context of ruin and uncertainty, a new religious movement emerged in the north of England. The early Quakers, driven by intense spiritual conviction, believed it was their duty to save souls at any cost. Their methods were seen by many as extreme and they repeatedly defied the authorities. Dr Canela’s talk challenges the idealised image of early Quakerism, revealing a group of believers whose fervour sometimes led to deeply troubling behaviour. They stood firm in their beliefs, often risking persecution and death. In doing so, they demonstrated how far people will go, especially in times of crisis, to seek safety, truth, and divine purpose. Even when it meant crossing the line between faith and fanaticism.
An excellent lecture. The speaker concentrated upon one of Quakers, Humphrey Smith who was an itinerant preacher and published a number of books and pamphlets. He was imprisoned on a number of occasions mainly because he held meetings which were not approved by local officials. During the question and answer session Erica Canela answered questions about other Quakers e.g. Penn and Foxe and how they become key figures in society and changed from being outsiders to accepted members of the communities. We only need to think of the great Quaker families such as the Frys, Cadburys and Rowntrees.

Unsurprisingly I bought the book.

 
SATURDAY 24 AUGUST 1940Airfield attacks in south-east; Manston evacuated. Heavy raid on Portsmouth.Night: Heavier attacks over wide area. Minelaying.

Weather: Fine and clear in the south, drizzle in the north.

image.png

The remains of Stanley Street in Portsmouth following the fourth Luftwaffe raid on the city on 24 August 1940.

image.png

image.png

The remains of Messerschmitt Bf 109E-4 (W.Nr. 5587) ‘Yellow 10’ of 6./JG 51 in a scrapyard in Kent. Note the hole in the fuselage where the ‘weeping bird’ badge of II Gruppe has been removed as a souvenir. © IWM (H 4222)

image.png

Ground staff in steel helmets refuelling and rearming a Hawker Hurricane Mark I of No. 32 Squadron, at a dispersal at Biggin Hill, August 1940. © IWM (HU 54515)

Ground Crew we’re an essential part of the RAF Fighter Defence of Britain. The pilots, above any others appreciated them and knew their true worth.

Lest We Forget.

www.battleofbritain1940.com

Enemy Action by DayThe lull of the previous five days had allowed both the RAF and the Luftwaffe to regroup. RAF radar stations damaged in earlier attacks were swiftly restored, and most airfields remained operational despite repeated bombing.

Losses of pilots and aircraft continued to mount on both sides, but the Luftwaffe had failed to achieve the decisive results promised earlier in the campaign.

On 24 August, Göring issued renewed instructions calling for sustained pressure on Fighter Command through repeated attacks, with particular emphasis on RAF airfields. Fighter escorts were ordered to remain close to their bombers, restricting the free-ranging tactics previously favoured by German pilots.

The result was a day of stepped raids, feints, and massed attacks that placed Fighter Command under continuous strain.

Morning Activity over KentAt first light, radar detected enemy formations approaching the Kent coast. Between 06:00 and 08:00 hours, multiple formations—together amounting to more than eighty aircraft—crossed between Dover and Dungeness and flew inland toward North Foreland and Gravesend.

RAF fighters intercepted and dispersed these incursions before they could reach inland targets. Four enemy aircraft were destroyed, and no bomb damage was reported.

At approximately 10:00 hours, Dover and Folkestone were shelled by heavy batteries across the Channel. Four shells fell near Hawkinge aerodrome, though little damage was sustained. The shelling continued intermittently, with intervals of several minutes between rounds.

Late Morning: Manston AttackedAt 11:30 hours, a further enemy formation—comprising Ju 88 bombers of KG 76, escorted by Bf 109s of JG 51—crossed the Channel from the Cap Gris-Nez area targeting Manston. Defiants of No. 264 Squadron were scrambled alongside Hurricanes of Nos. 151 and 501 Squadrons.

As the bombers delivered a heavy attack on the airfield, No. 264 Squadron engaged the formation, claiming one Ju 88 destroyed and another damaged.

The engagement proved costly: three Defiants were lost including the aircraft flown by Squadron Leader P. A. Hunter, the squadron’s commanding officer, who was listed as missing along with his gunner, Pilot Officer F. H. King. Two other aircraft sustained damage.

During this period, Spitfires of No. 610 Squadron were vectored to the Dover area, where for the first forty minutes they made no contact. They later intercepted a flight of six Bf 109s.

The German fighters, already holding a head start, turned away and made for France, and the engagement was broken off. One pilot, Sergeant R. F. Hamlyn, continued the pursuit in defiance of standing orders, chasing a single Bf 109 back across the Channel toward the French coast before returning to base.

Midday Fighting and the Loss of ManstonBy midday, attacks on Manston and Dover resumed. Fresh bomber formations again struck the area under fighter escort, and multiple RAF squadrons were committed to the defence.

Pilot Officer Władysław Głowacki of No. 501 “County of Gloucester” Squadron, flying Hurricane V7234 (SD-A), engaged a formation of Ju 88 bombers that had just attacked Manston, destroying a Ju 88 and an escorting Bf 109.

He had earlier shot down a Bf 109 near Dover and went on to claim two further Bf 109s and another Ju 88 in subsequent engagements over Kent later that day, becoming the first “ace in a day” of the Battle of Britain.

The situation at Manston rapidly deteriorated. Fires spread across the station, buildings were destroyed, and the landing area was rendered unusable. Further attacks followed at 13:11 and again at 15:39 hours.

By the afternoon, the airfield had been evacuated and had ceased to function as a forward operational base.

Afternoon Fighting over Kent and the Thames EstuaryBetween 13:00 and 14:00 hours, additional enemy formations were engaged over the North Foreland and Deal areas, resulting in further dogfights. As the afternoon progressed, bomber streams were tracked approaching London before diverting toward the sector stations at Hornchurch and North Weald.

With multiple engagements already underway along the south-eastern coastline and further enemy formations anticipated, No. 11 Group was stretched to its limits. Hurricanes from Nos. 32, 151, 501, and 615 Squadrons, along with Spitfires from Nos. 54, 65, and 610 Squadrons, were committed in rapid succession, supported by the remaining Defiants of No. 264 Squadron.

As the scale of the fighting expanded across north Kent, the Thames Estuary, and parts of Essex, Air Vice-Marshal Park requested reinforcements from No. 12 Group.

In response, Spitfires of No. 19 Squadron were dispatched from Duxford, while three additional squadrons attempted to form a ‘Big Wing’.

However, by the time they reached the operational area, the German bombers were already withdrawing, leaving behind fires and scattered bomb damage across the Estuary.

North Weald was attacked later in the afternoon, sustaining damage to its wireless station and mains supply, though operations continued. Hornchurch was also struck but remained operational.

German fighter units engaged during this phase included elements of JG 2, JG 3, JG 26, JG 51, JG 52, and Zerstörer units of LG 2. Fighting was intense and often brief. Two Bf 109s of II./JG 2 were destroyed during the fighting—one pilot was killed, and another was wounded after crashing near Le Havre.

At approximately 12:55 hours, a Bf 109E-4 (W.Nr. 5587, “10+”) of 6./JG 51 was shot down by Nos. 32 and 264 Squadrons. The aircraft crashed at East Langdon, and Ofw. H. Beeck was captured. Shortly afterwards, Uffz. Hans Busch and Uffz. Walter Harheim of 2./JG 51 were both killed when their aircraft collided over Ramsgate.

In the same area, a Spitfire of No. 610 Squadron was shot down by Hptm. Josef Fözö of 4./JG 51. Fw. Josef Oglodek of 1./JG 51 was also killed in action after claiming his second Spitfire at 14:12 hours, while off Margate Oblt. Josef Priller of 6./JG 51 shot down two Hurricanes.

At 15:45 hours, Pilot Officer G. D. Gribble of No. 54 Squadron shot down a Bf 109E-1 (“9+”) of 1./JG 52 during combat over the Thames Estuary. The aircraft force-landed at Minster Road, Westgate, and Fw. H. Bischoff was captured. Uffz. W. Kaiser of 9./JG 3 was also captured when his Bf 109E-1 (“12+I”) was shot down and crashed at Broom Hill Farm, Camber, at 16:00 hours. Ten minutes later, a Bf 109E-4 (“8+I”) of the same unit was brought down off Reculver, and Lt. H. Achleitner baled out and was rescued.

Over Hornchurch, several Heinkel He 111s of 9./KG 53 were brought down in a series of engagements.

At 15:50 hours, a He 111H-3 (A1+KT) was shot down by a combination of anti-aircraft fire and Squadron Leader J. R. Kayll and Pilot Officer J. A. P. McClintock of No. 615 Squadron. The aircraft crashed at Clay Tye Hill, Bulphan. Lt. W. Luttigen, Uffz. O. Lackner, Fw. A. Fraas, Uffz. K. Platzer, and Uffz. H. Hermans were all captured.

At 16:00 hours, Sgt W. L. Dymond of Yellow Section, No. 111 Squadron, together with Pilot Officer M. H. Young and Sgt L. P. Russell of No. 264 Squadron, shot down a He 111H-2 while it was bombing Hornchurch. The aircraft crashed at Layer-de-la-Haye. Uffz. A. Kramer, Obgfr. E. Gleissner, and Fw. E. Salomo were killed; Maj. K. Ritscherle baled out but drowned in the South Essex Waterworks; and Uffz. G. Schaffner baled out and was captured.

At 16:10 hours, another He 111H-2 (A1+BT) was shot down by No. 615 Squadron and crashed at Langford Grove Road, Langford. Oblt. G. Huhn, Ofw. J. Schmid, Fw. W. Jäger, and Fw. G. Ultsch were killed, while Gefr. H. Zaunigk was captured.

Five minutes later, Pilot Officer J. L. W. Ellacombe of No. 151 Squadron brought down a He 111H-2 (A1+LT), which force-landed at Samuels Corner, Landwick, Great Wakering. Oblt. G. Winter, Fw. A. Engelhardt, Uffz. O. Wieck, Uffz. H. Schmidt, and Gefr. W. Maurer were all captured.

At 17:20 hours, a He 111H-2 (A1+DT) was shot down by Flight Lieutenant P. S. Weaver of No. 56 Squadron while bombing Hornchurch and crashed into the sea off Brightlingsea. Uffz. L. Dorn, Uffz. O. Schmieding, and Gefr. W. Gollnitz were reported missing, believed killed, while Hptm. H. von Lonicer and Uffz. E. Pegatzki were rescued.

Two fighters of 2./LG 2 were shot down during the fighting.

The first, a Bf 109E-1, was shot down by Flying Officer K. J. Marston of No. 56 Squadron while escorting the Hornchurch attack and crashed at Mackledons Farm, Bobbing. Uffz. H. Möller was killed.

The second aircraft, a Bf 109E-4, was shot down by Pilot Officer B. J. Wicks of the same squadron and crashed near Canewdon RDF Station. Uffz. A. Buschmeyer baled out and was captured.

The Portsmouth RaidUntil mid-afternoon, activity in the south and west had been limited largely to reconnaissance. At approximately 16:00 hours, radar detected a major enemy formation assembling off the Cherbourg Peninsula. Shortly after 16:20 hours, He 111 bombers of KG 55 crossed the coast and attacked Portsmouth.

Spitfires of No. 609 Squadron were scrambled to intercept but encountered the bombers under unfavourable conditions, finding themselves below the main formation and already under fire from coastal anti-aircraft batteries.

The city and dockyard area were heavily bombed. Over 200 bombs were dropped, causing widespread devastation. Naval barracks, factories, shops, and housing were struck, railway services were disrupted, and two naval units in harbour were damaged.

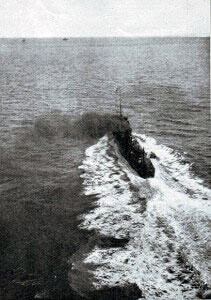
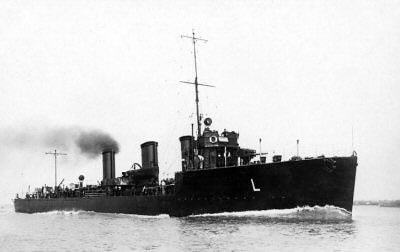
The destroyer HMS Acheronsustained damage. More than one hundred civilians were killed and several hundred injured, making it the heaviest single daylight toll of the battle to date.

RAF interception was limited, and the attack was carried out largely unopposed.

At 16:30 hours, a Bf 109E-4 (10+) of 6./JG 2 was shot down during combat over the Isle of Wight at 16:30 hours and crashed on Shanklin Down. Fw. G. Ebus baled out but drowned; his body was recovered by a Royal Navy launch and buried at St Ann’s Hill Cemetery, Gosport.

Fifteen minutes later, a Blenheim of No. 235 Squadron was mistakenly shot down by a Hurricane of No. 1 (RCAF) Squadron and crashed into Bracklesham Bay, resulting in the loss of its crew.

Evening ActivityAt 18:45 hours, more than 110 enemy aircraft crossed the coast near Dover and Dungeness and penetrated inland as far as Maidstone.

Upon interception by RAF fighters, the formation turned back toward France without attacking further targets.

Enemy Action by NightEnemy activity continued on a widespread scale after dark. Raids were reported across southern and western England, South Wales, the Midlands, East Anglia, and Yorkshire. Bombing occurred in Birmingham, Bristol, Gloucester, Cardiff, Sheffield, Hull, Liverpool, and Middlesbrough.

At St Athan, the RAF hospital was damaged; at Castle Bromwich, the aircraft factory sustained slight damage. Mine-laying operations were reported off the Lancashire coast, in the Channel, and extensively in the Thames Estuary and East Anglian waters.

During the night, He 111 bombers of Kampfgeschwader 1, operating under Luftflotte 3, crossed the Thames Estuary while searching for the Thameshaven oil terminal.

Owing to navigational error, bombs were dropped over parts of London. West Ham and Bethnal Green were hit, warehouses in the West India Docks were set alight, and a serious fire developed from Fore Street toward London Wall.

In total, seventy-six serious incidents were reported across the capital, with nine civilians killed and fifty-eight injured.

One enemy bomber was reported destroyed by fighter action during the night, with another listed as probably destroyed.

SummarySaturday, 24 August 1940 marked a turning point in the air war.

The day demonstrated both the resilience of Fighter Command and the Luftwaffe’s shift towards sustained terror bombing.

For the first time, Londoners endured the shock of a night raid, while Portsmouth paid dearly for the German bomber onslaught.

The RAF remained bloodied but unbroken, and Churchill’s immediate order for reprisal raids on Berlin ensured that the conflict was about to escalate into the Blitz proper.

It was a very, very, very, important day in the Battle of Britain and ultimately the whole of the Second World War.

German Losses:
Airmen: 46 | Aircraft: 41

British Losses:
Airmen: 10 | Aircraft: 20

 
Watched Antiques Roadshow on BBC1 last night. A repeat of a programme broadcast year to mark the 80th anniversary of VJ Day and the campaigns in the Far East and the Pacific during WW2.

A glaring error at the start of the programme. It was stated by the presenter Fiona Bruce that after the attack on Pearl Harbor on 7 December 1941 that British and Empire/Commonwealth Forces in Malaya were attacked on 8 December. Wrong, the Forces in Malaya were attacked before the attack on Pearl Harbor. Those forces were attacked on 8 December and yes the 8th does fall after the 7th. However, Malaya and Hawaii are either side of the International Date Line. Poor research by the BBC. I suspect their excuse was that they didn't want to confuse the viewers. I may be wrong but I suspect that Japanese military planners would have planned for attacks on Pearl Harbor and Malaya to commence on the 8th as that would have been the date in Japan. A similar error to that made by the BBC was made at the end of the film Tora Tora Tora.

Perhaps it's the pedantic historian in me.

 
The brother and sister who tried to pioneer flight
5cb36350-7bfc-11ef-b02d-c5f3b724a1ea.jpg
IMAGE SOURCE, PHILIP JARRETT

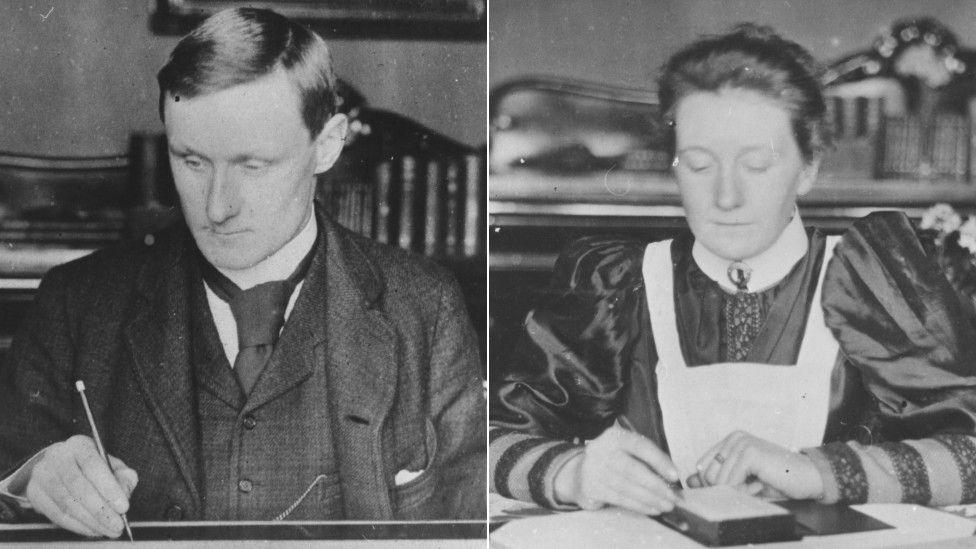
Percy and Ella Pilcher worked together to try to realise the daring and dangerous dream of flight

ByGreig Watson

BBC News, East Midlands www.bbc.co.uk

  • Published 30 September 2024
Powered flight - one of the defining inventions of the 20th Century - was achieved in the US but, if not for a tragedy exactly 125 years ago, it could have been very different.

As aviation pioneer Percy Pilcher soared into the air above Leicestershire, watched by his sister and a group of potential investors, it seemed like the dream of powered flight was within their grasp - but then there was the loud crack of breaking wood.

Percy's journey to this point began in earnest as he honed his engineering skills in Victorian Britain's powerful navy.

But not content with ruling the waves, Percy, along with his older sister Ella, wanted to take to the skies.

f587b940-7b44-11ef-b282-4535eb84fe4b.jpg
IMAGE SOURCE, GETTY IMAGES

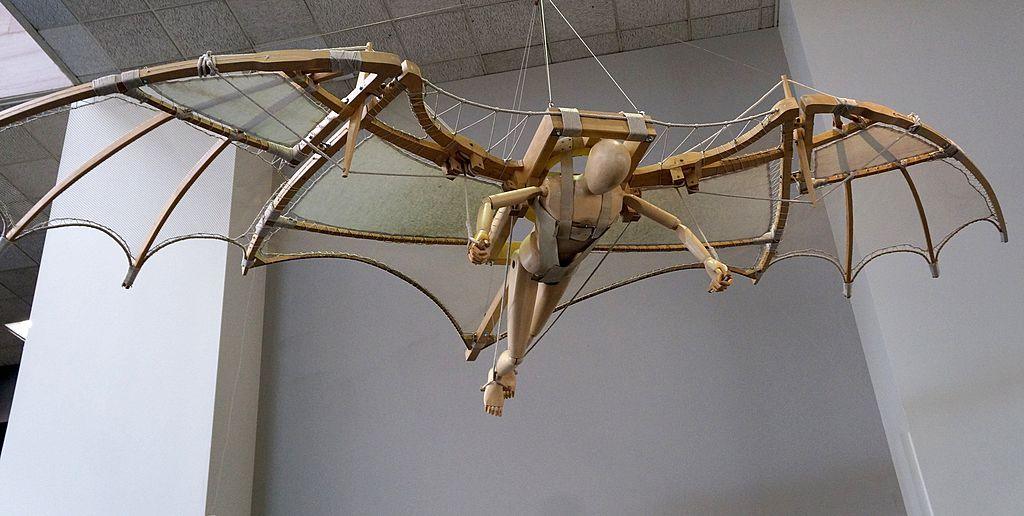
Centuries of failure to achieve powered flight - including by Leonardo da Vinci - did not put off the Pilchers

Percy's biographer Philip Jarrett said: "Ella said he was fascinated by flight from an early age.

"And he, on long navy voyages, watched the birds like the albatross just ride the winds, seemingly without effort.

"But building something to carry a man was anything but effortless.

"There were no textbooks, no calculations or examples, they were, both literally and figuratively, stepping into thin air."

09200670-7cc5-11ef-b6b4-1d56bd31e940.jpg
IMAGE SOURCE, PHILIP JARRETT

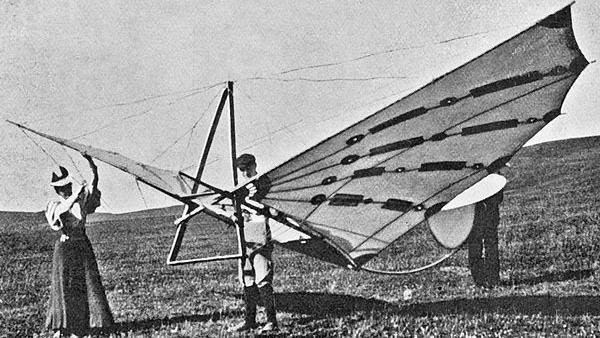
Percy, with Ella alongside, put his ideas to the test through a series of what he called "soaring machines"

The era was marked by an atmosphere of cooperation between pioneers.

Percy corresponded with fellow enthusiasts around the globe including Lawrence Hargrave in Australia, Octave Chanute in the US and Otto Lilienthal in Germany.

Lilienthal freely shared his breakthrough of the aerofoil, the curved surface which produced more lift than drag, which is fundamental to building a successful wing.

Fired with enthusiasm, Percy designed a series of gliders, which he called "soaring machines", built out of sailcloth, bamboo and piano wire.

34251c40-7b42-11ef-b791-bfe2c55bf44d.jpg
IMAGE SOURCE, PHILIP JARRETT

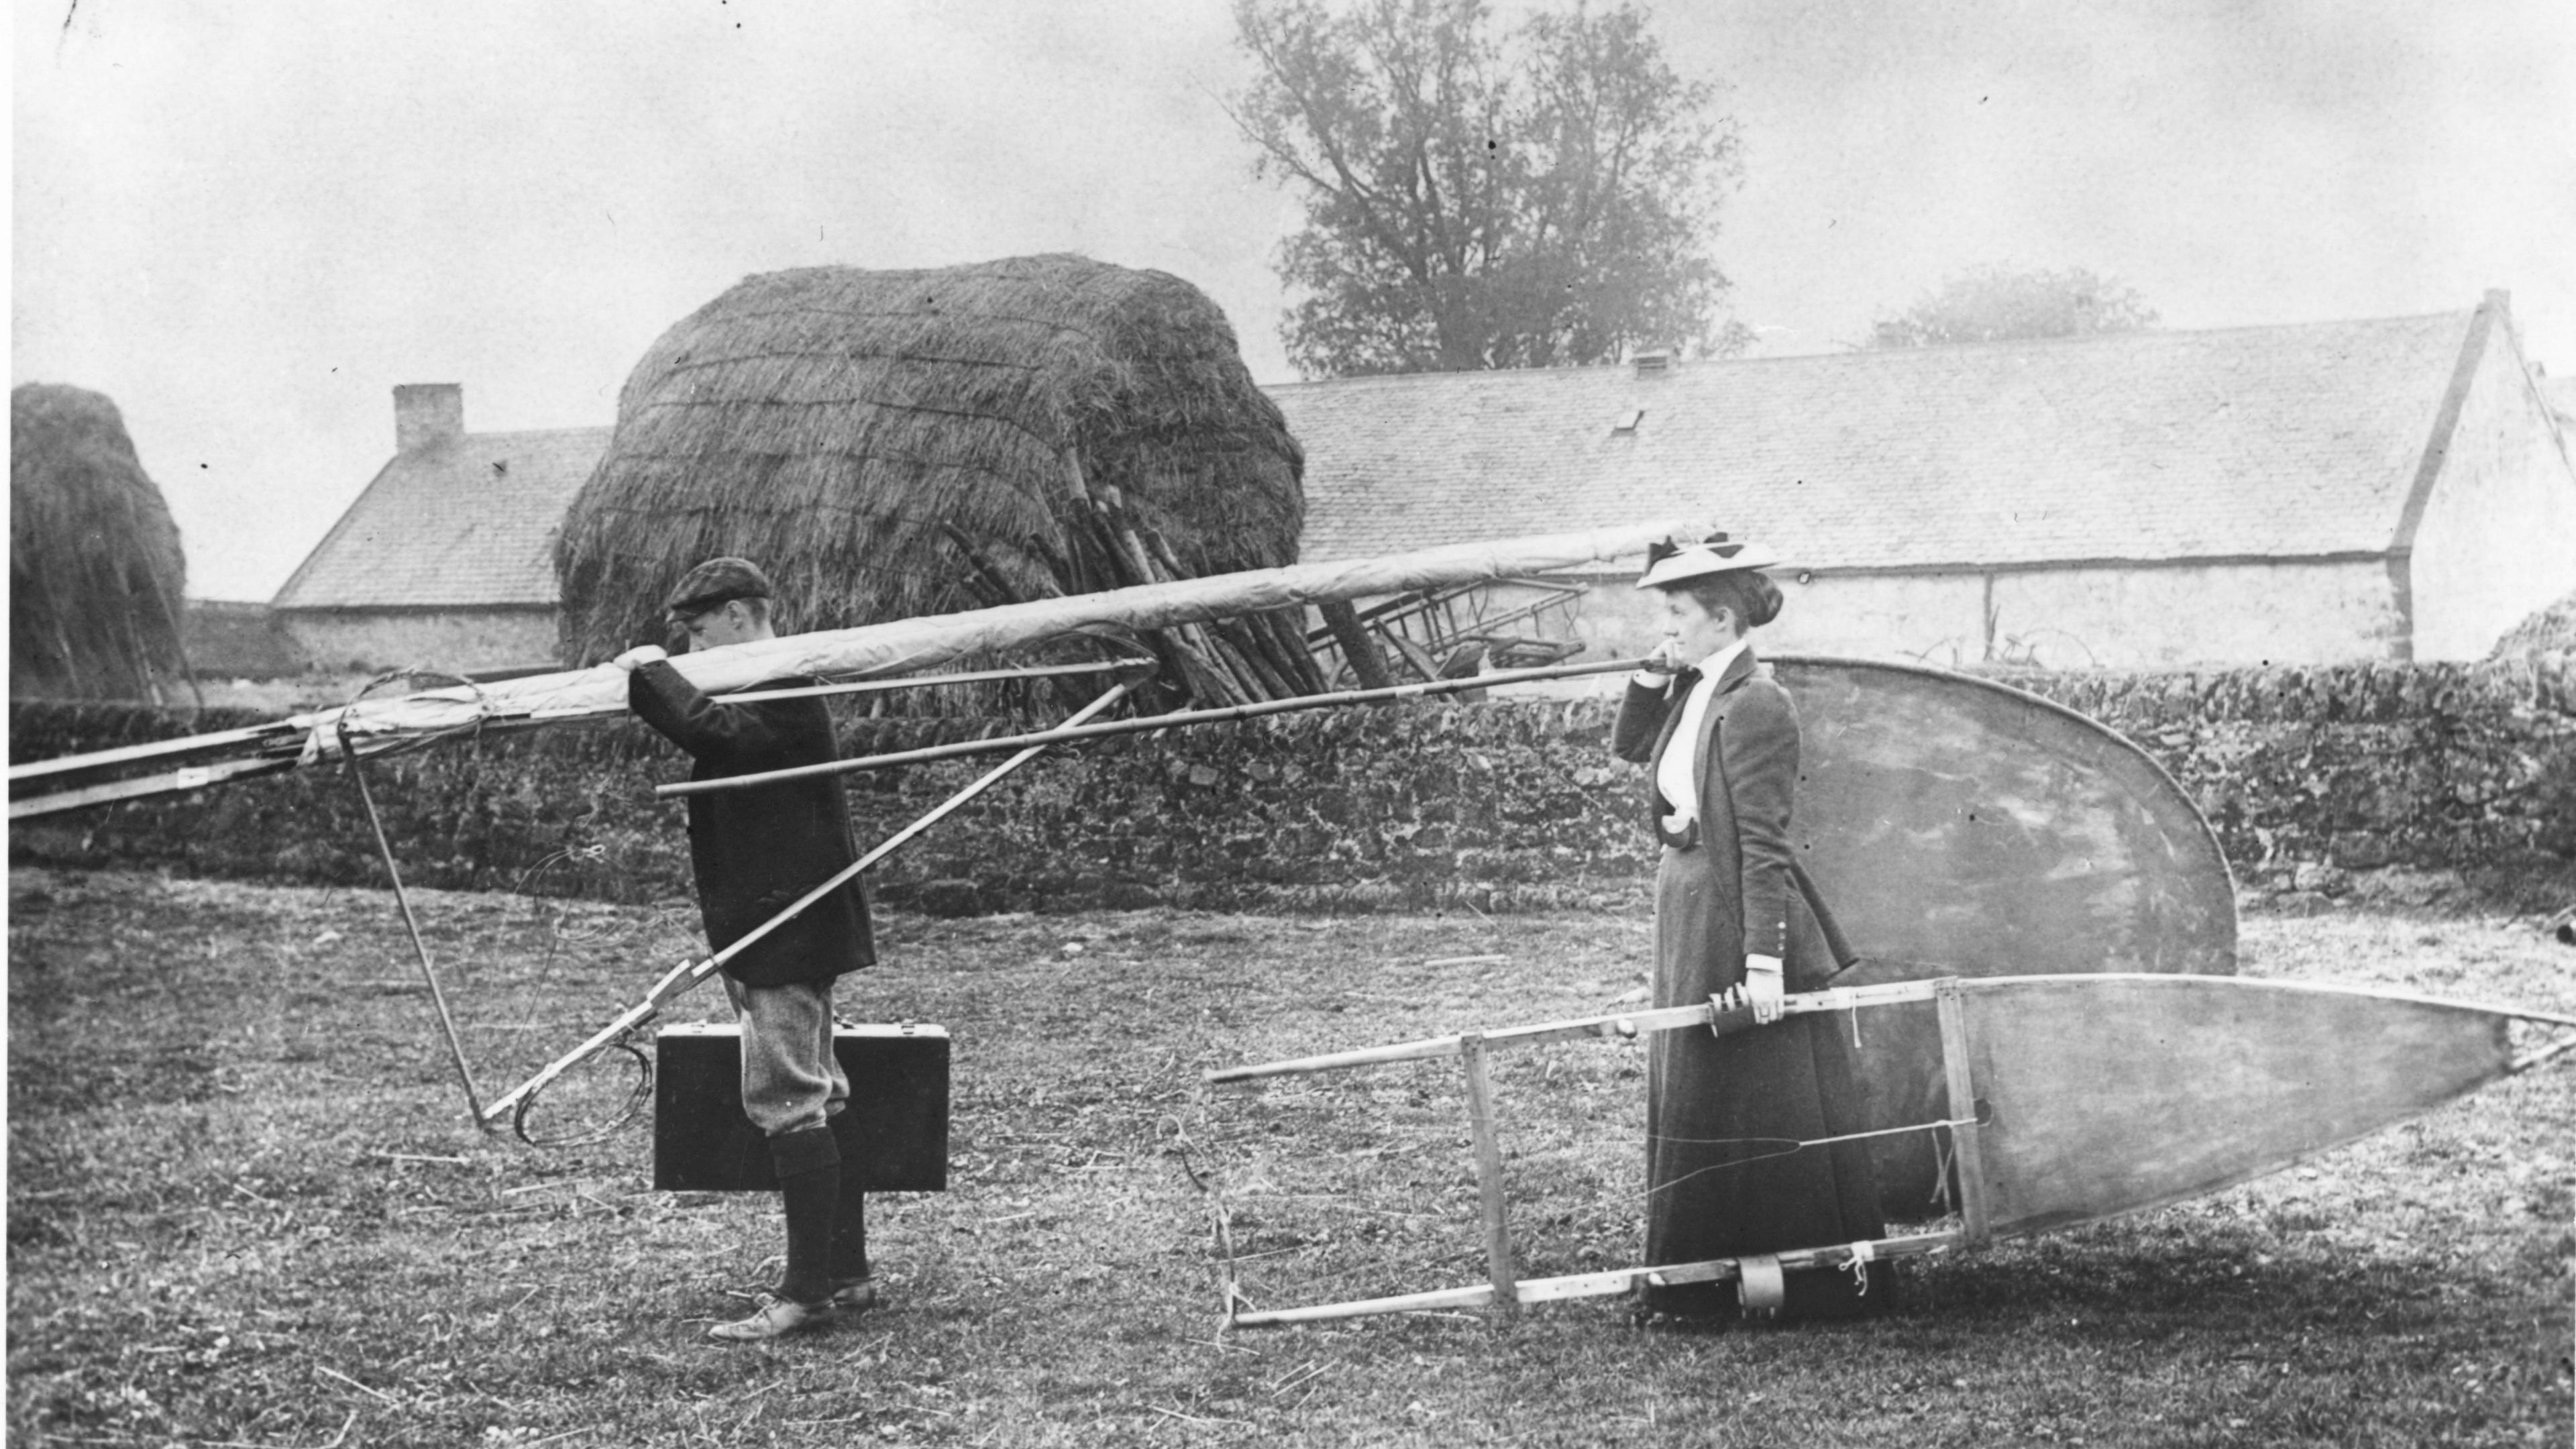
Test flights often involved the Pilchers carrying dismantled gliders to suitable fields

During long hours in rented houses, university rooms and draughty barns, Ella used her sewing skills to create sweeping wing surfaces, carefully engineered to the tolerances Percy required.

Aviation historians say this probably makes her the first woman to be involved in the construction of fixed wing aircraft.

Filmmaker and historian Lily Ford said: "This kind of flying had seen centuries of failure and was kind of seen by some as quite ridiculous and they thought it would never happen.

"And even the chair of Natural History at Glasgow University, Lord Kelvin, who actually was a kind of sponsor of Percy Pilcher, said in 1896 - so this was after Percy and Ella were already experimenting - that he had no faith in flying by any other means [than balloon].

"So I think having somebody as a kind of accomplice, a collaborative, supportive person who believed in you, who believed that you could do it and who was totally prepared to roll up their sleeves, was a huge help to Percy."

b3a6e8d0-7bfc-11ef-ad1c-8daceb2ac32f.jpg
IMAGE SOURCE, GETTY IMAGES

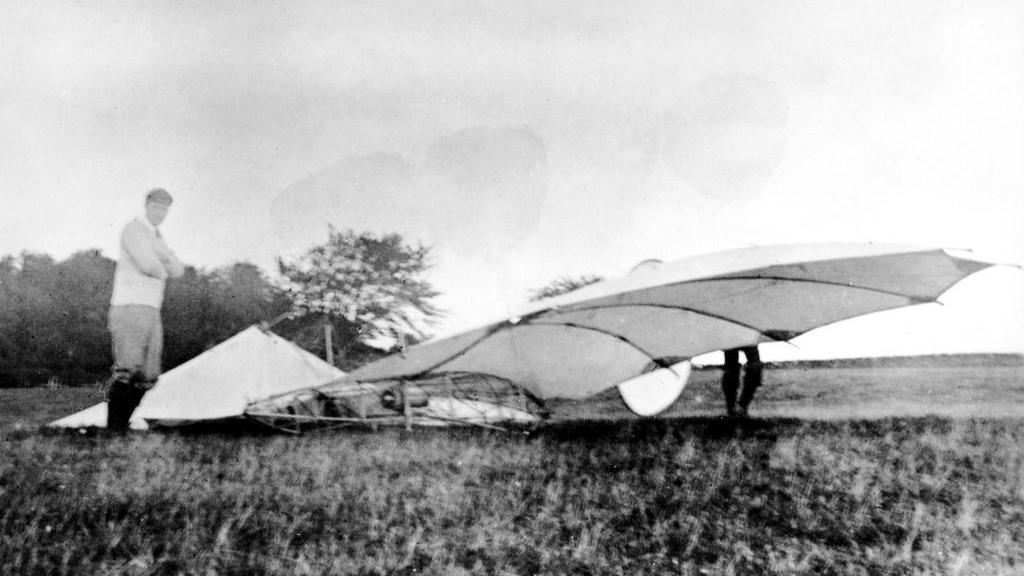
Gliders without mechanical controls or safety features were prone to frequent and dangerous crashes

Percy conducted a series of increasingly ambitious - and therefore dangerous - test flights in Glasgow and Kent.

The risks of operating at the very edge of technical knowledge were emphasised in 1896 with Lilienthal's death during an experimental flight.

But as Percy achieved greater distances - up to 250m (820ft) in 1897 - his reputation grew.

Mr Jarrett said: "He worked through ideas via a series of increasingly sophisticated designs with names like the Bat, Beetle and Hawk.

"He was dogged in working on problems until he had a solution."

fdd237a0-7b4f-11ef-9f51-2df4bcb50c71.jpg
IMAGE SOURCE, PHILIP JARRETT

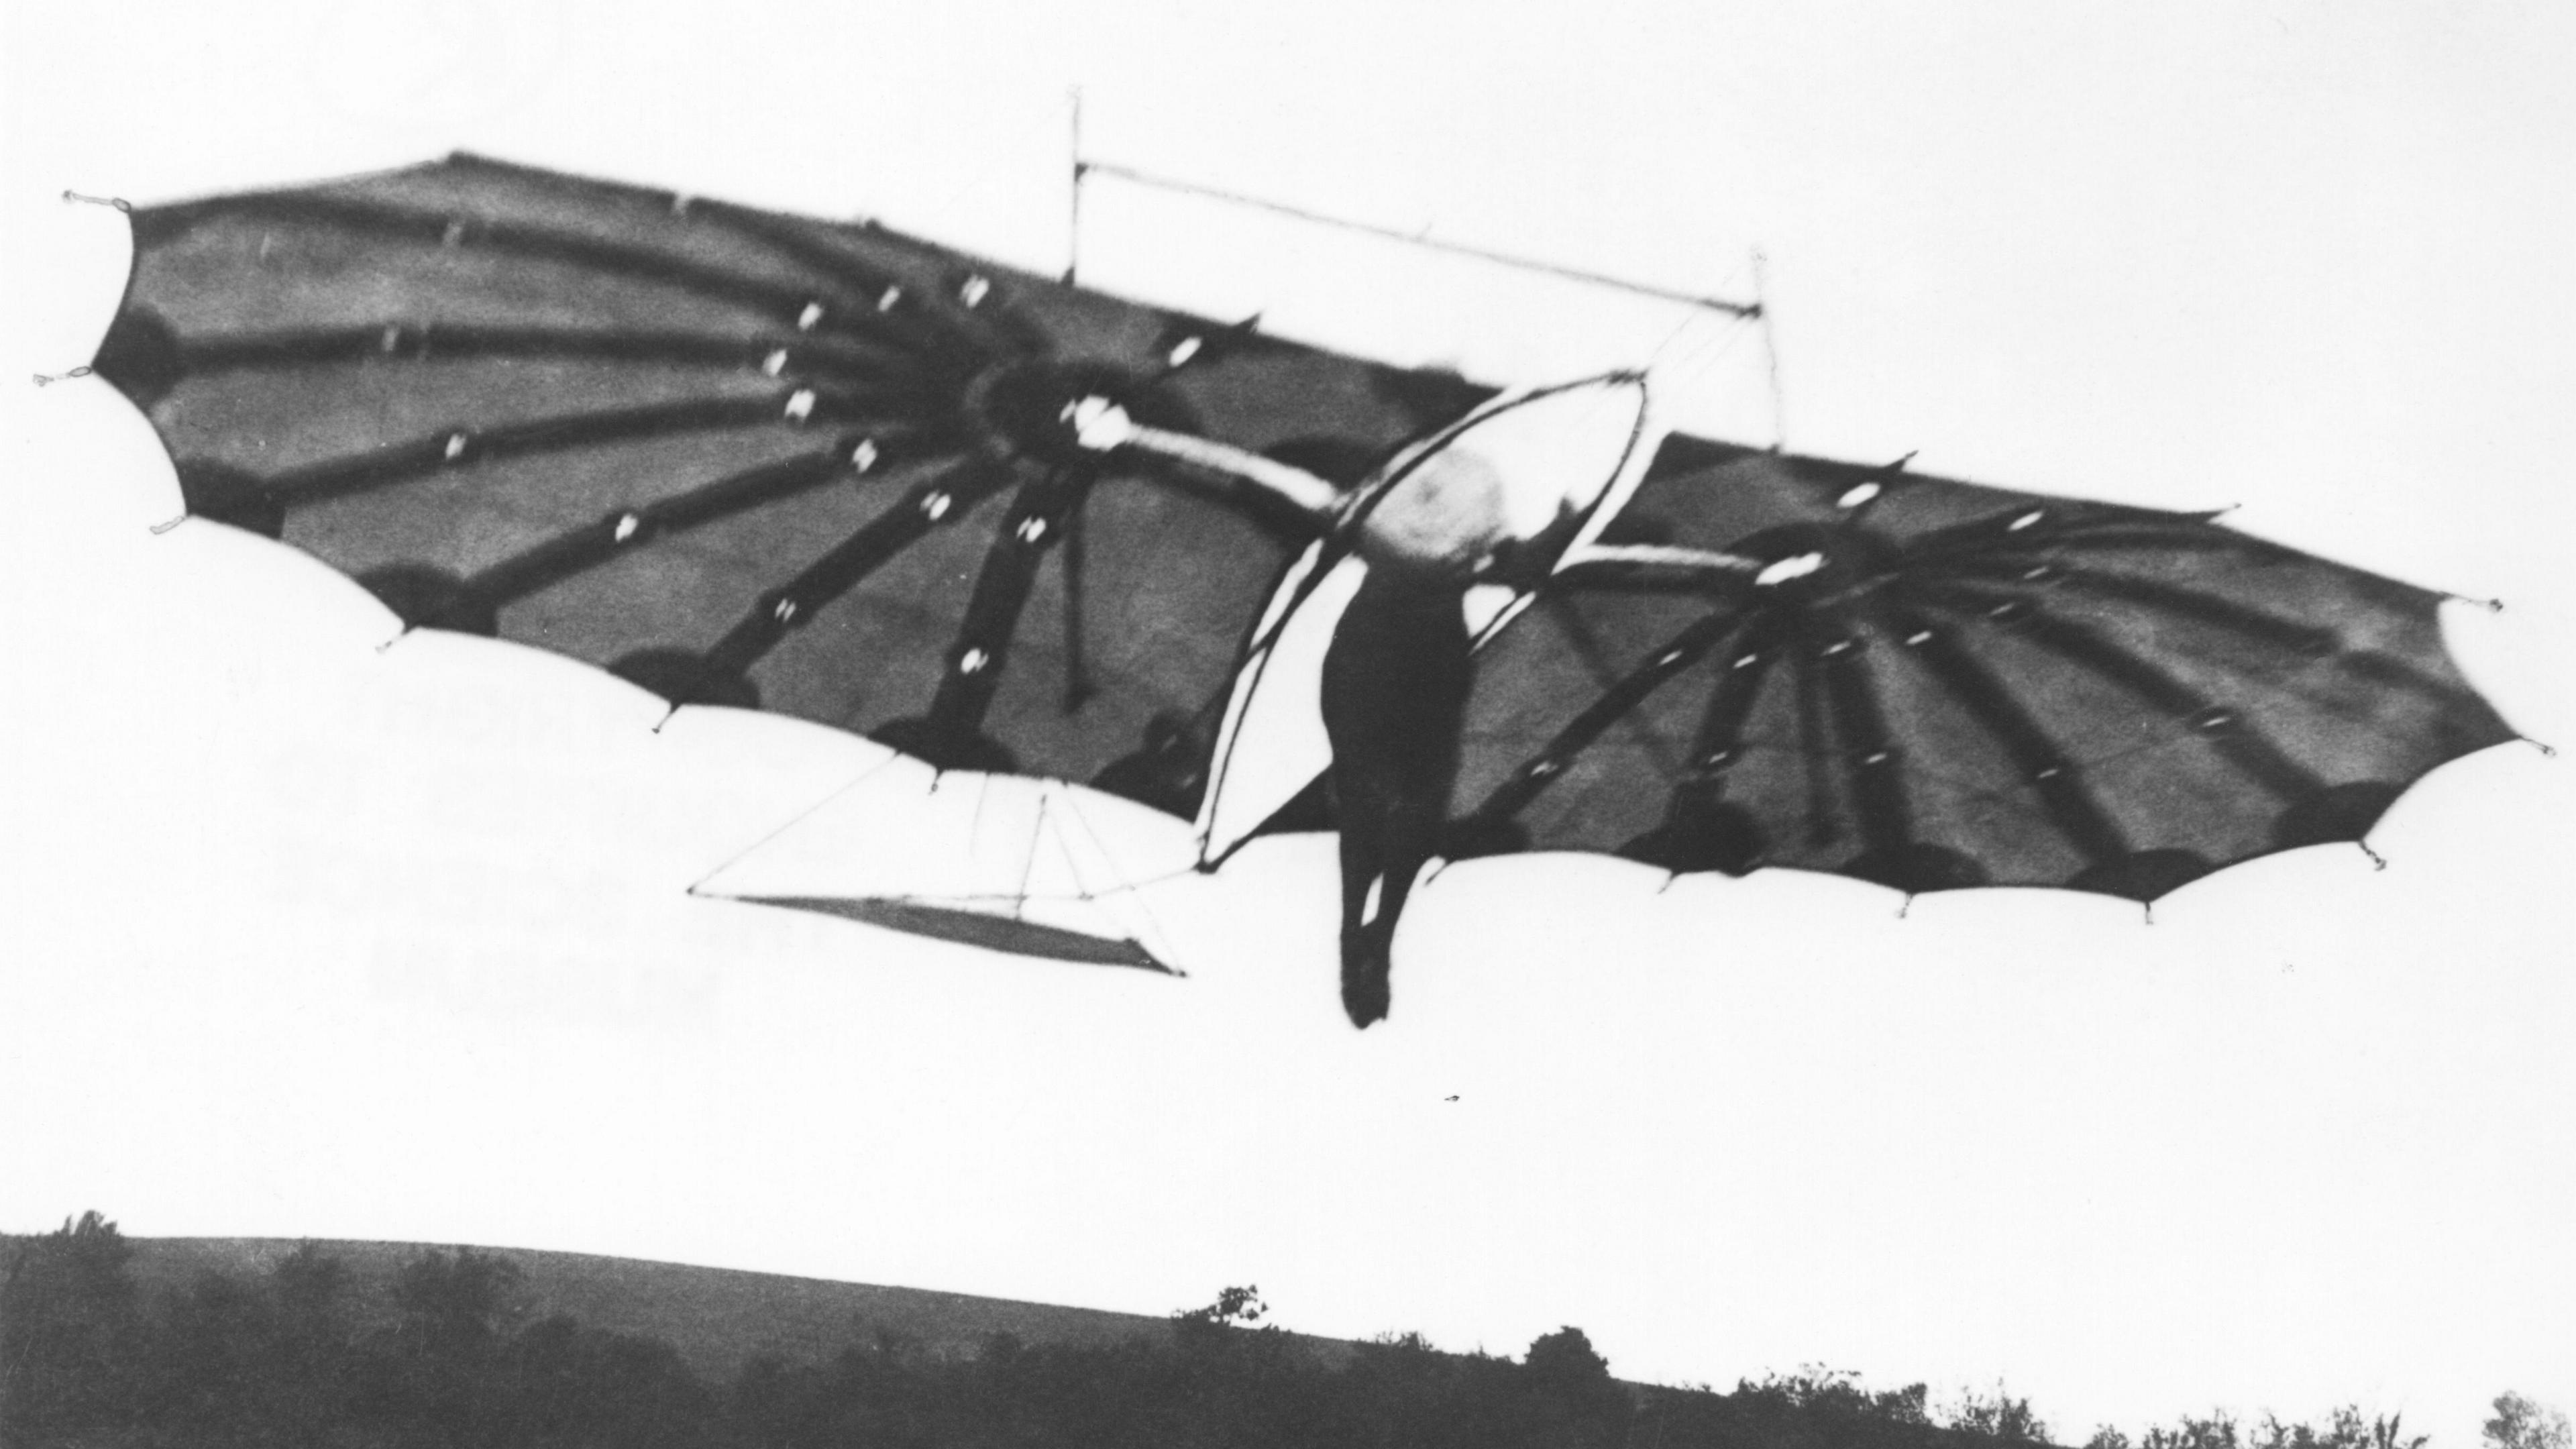
With his Hawk glider, Percy Pilcher achieved distances which brought global attention

During one of these tests, Ella agreed to be strapped in, so becoming the first female glider pilot in the UK, said Dr Ford.

She added: "She managed publicity. She sent people photographs. She may well have organised the photographs to be taken in the first place.

"She's in all the photographs, which is a wonderful thing.

"So she was really his collaborator, but because of how things were for women at that point, there just wasn't scope for her to be seen as a technological pioneer.

"There was no mould that she could fit in."

23a7fc70-7aac-11ef-b282-4535eb84fe4b.jpg


A full-size replica of Hawk is now housed at Stanford Hall, where it frequently flew

But Percy knew the real prize was powered flight, not gliders. This had become a serious possibility with the development of the internal combustion engine.

Mr Jarrett said: "Pilcher initially simply put an engine in the Hawk glider.

"But the extra weight meant he needed bigger wings - but this meant more superstructure, which meant yet more weight. He found himself in a vicious circle.

"Then appeared a letter from Octave Chanute which detailed the use of multiple small wings stacked on top of each other.

"Percy had a way forward and began work on an entirely new aircraft."

69ef0450-7b40-11ef-b791-bfe2c55bf44d.jpg


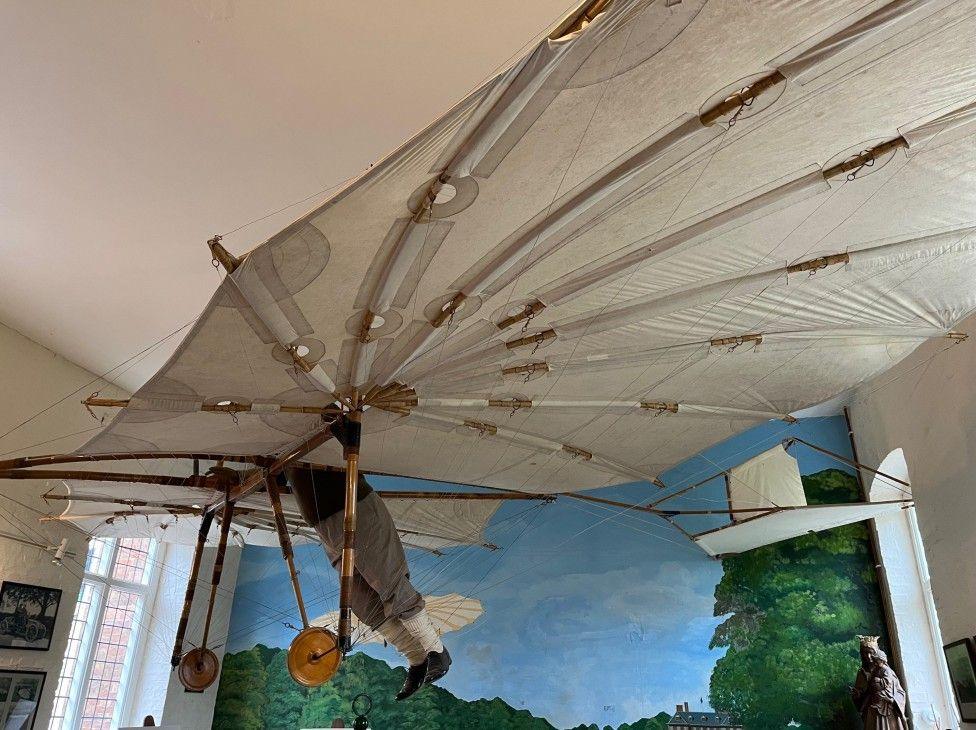
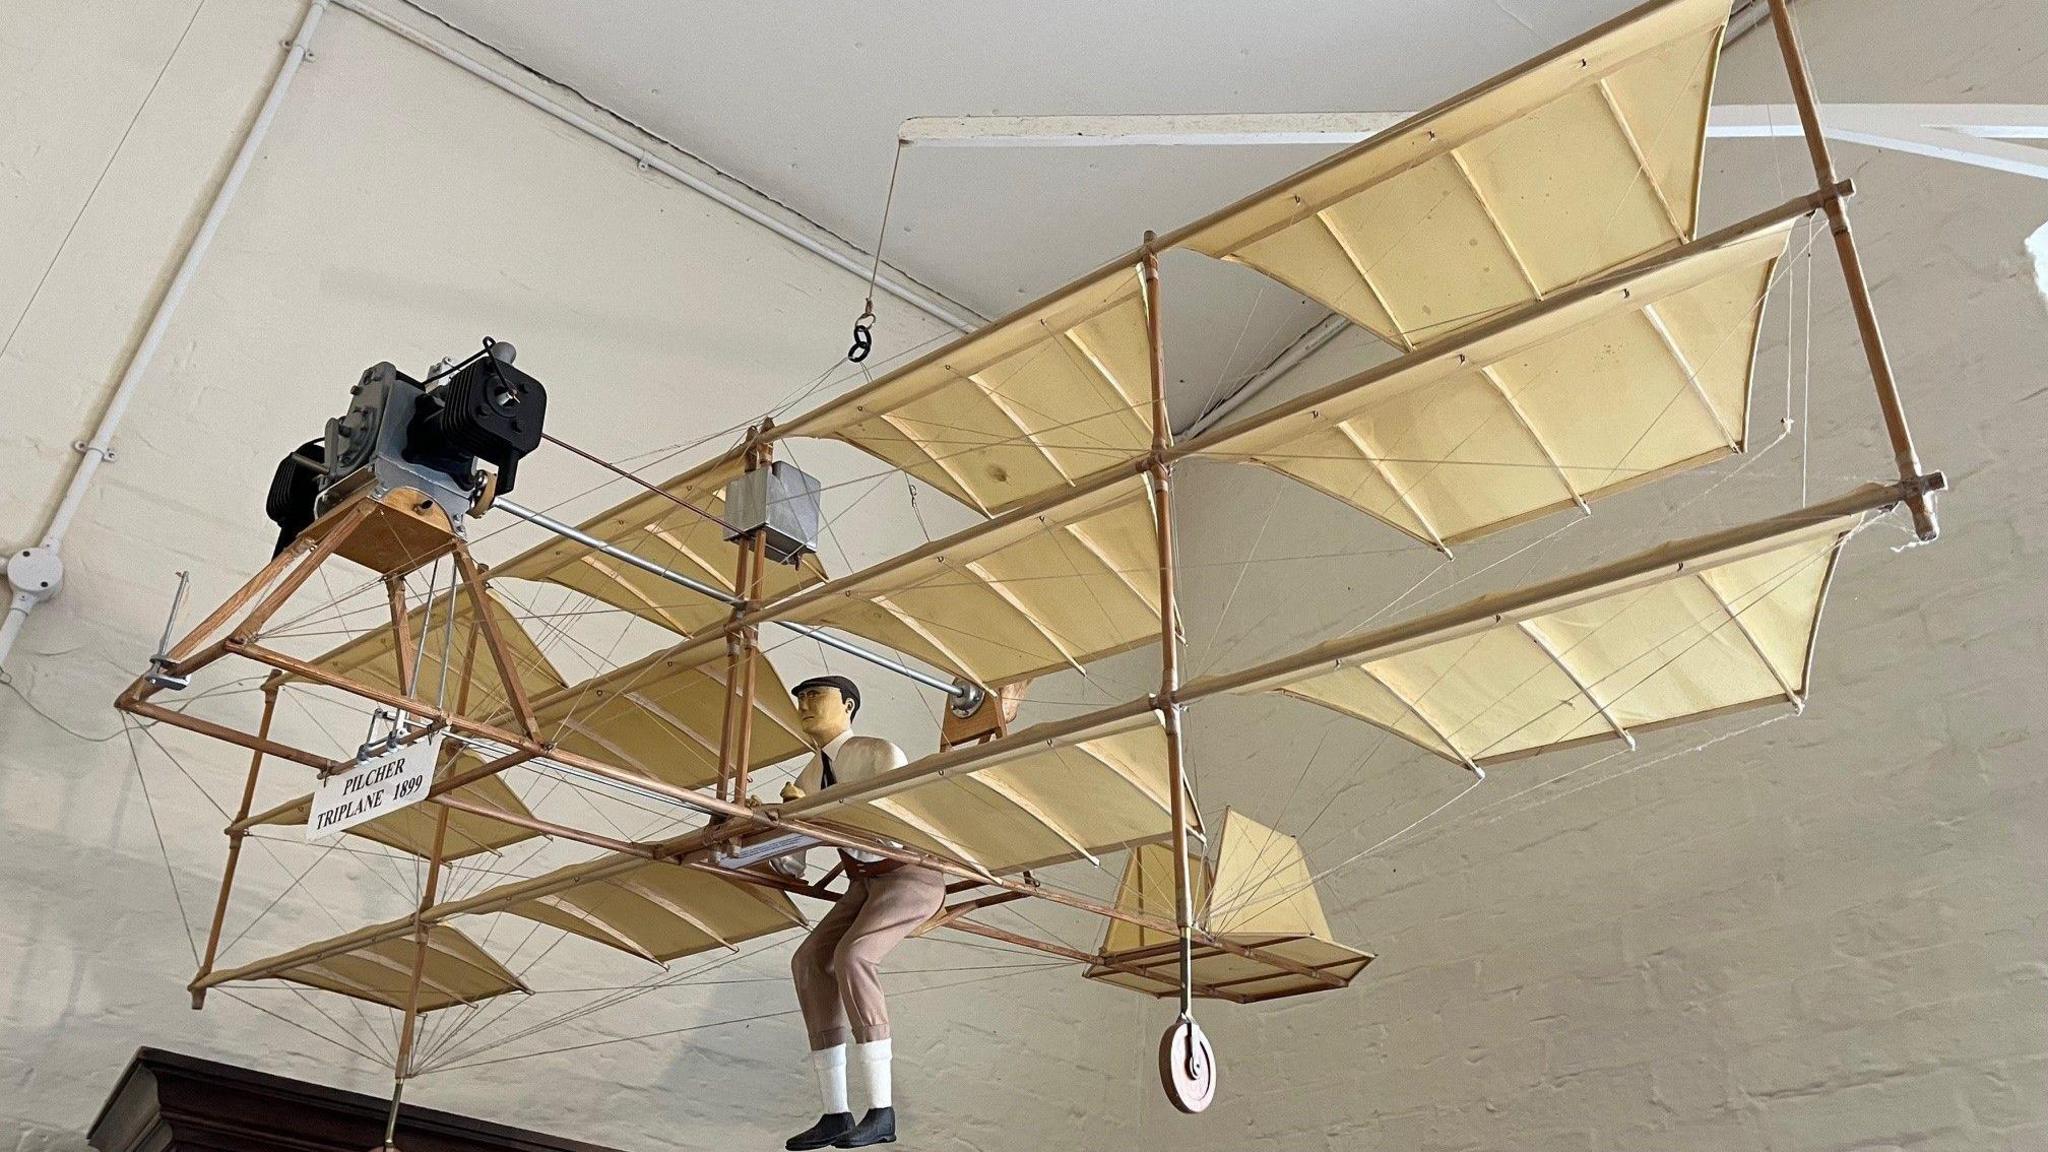
The ground-breaking triplane design was never tested and no photographs are known to exist

After constructing the triplane itself and having an engine built to go in it, Percy, again accompanied by Ella, gathered potential investors at Stanford Hall on 30 September 1899 for what promised to be the first powered flight in history.

After years of struggle, all the Pilchers needed was a fair wind and some luck. But they were to get neither.

Greg Wurr, a guide at the hall, said: "There were some important people present, including an MP, but shortly before the first demonstration of the triplane, part of the engine broke.

"Percy didn't want to disappoint the crowd or lose the opportunity to impress, so he got the Hawk out instead.

"It was a damp, blustery day and the Hawk was hard to handle but Percy got it into the air.

"As he was getting some height, part of the tail broke away and it plunged to the ground.

"Percy was badly injured and died at the hall three days later, aged just 32, with Ella by his side."

a50b07c0-7b48-11ef-977c-ffbce4b2a32d.jpg
IMAGE SOURCE, GETTY IMAGES

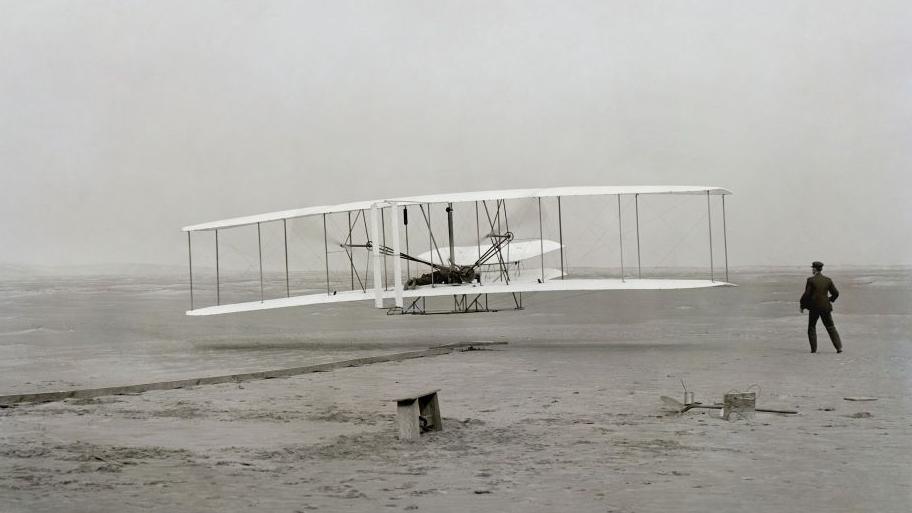
The Wright brothers achieved powerful flight in December 1903 at Kittyhawk in the US

Within weeks of Percy's death, Ella, who had worked so hard and so closely with her brother, left England, sailing to South Africa to work as a nurse in the Boer War.

She continued to promote her and Percy's work, writing to the Royal Aeronautical Society, saying: "I should not like our name to be taken off your lists.

"As I always helped my dear brother in his experiments, I am able to take great interest in the subject."

Soon after, a vote at the society made Ella Pilcher its first honorary member.

c38aff70-7b3e-11ef-b791-bfe2c55bf44d.jpg


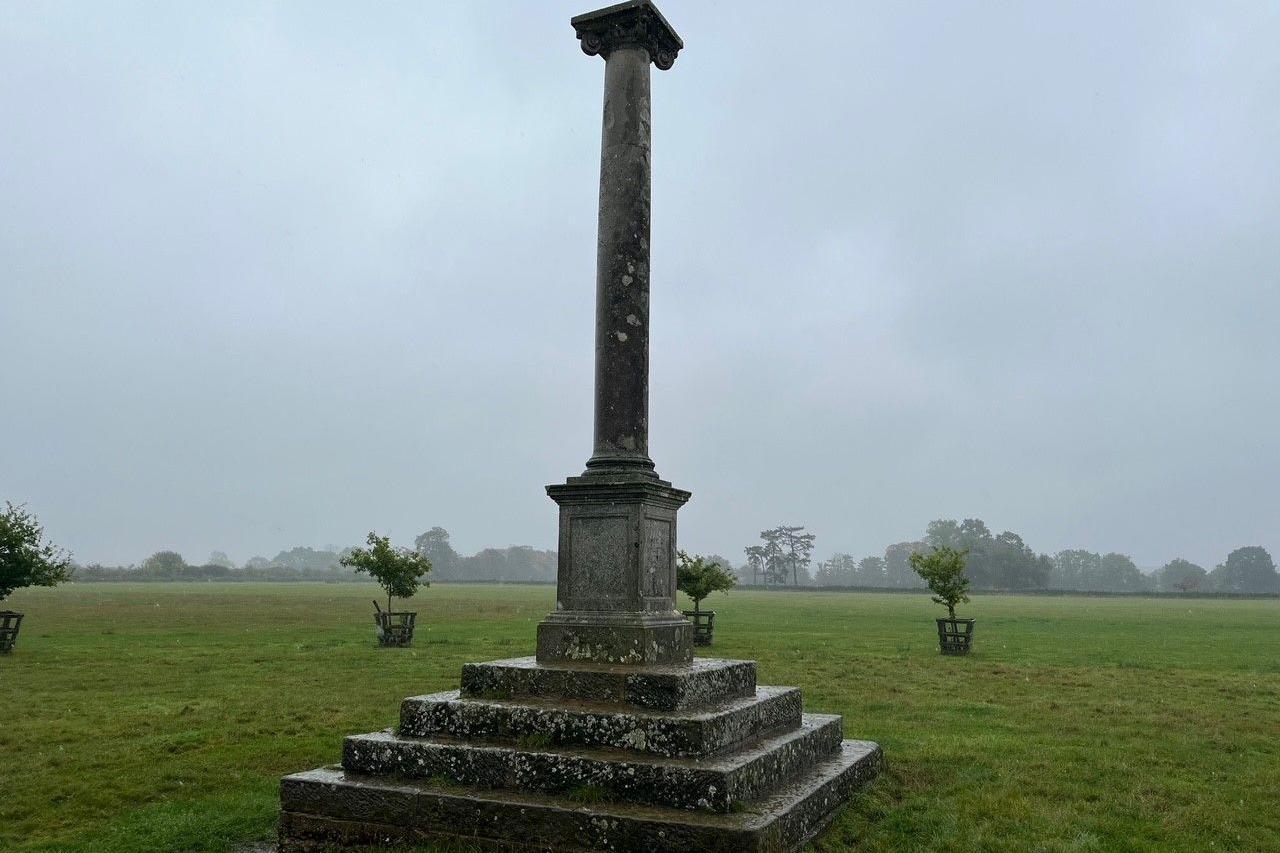
The monument built where Percy Pilcher crashed describes him as "the other Icarus"

The untested triplane was put into storage and, neglected, slowly fell to pieces and was lost.

The fate of the specially designed engine is also unknown.

So how close was Percy to achieving the centuries old dream of powered flight, a full four years before the Wright brothers claimed the prize?

In 2003 a team, including Mr Jarrett, pieced together the fragmentary evidence for Percy's triplane.

p0jt0j6r.jpg


00:50

Figure caption,

A triplane, based on drawings left by aviation pioneer Percy Pilcher, takes to the air

Dr Bill Brooks, an aircraft designer, was part of the project and actually piloted the reconstruction.

He said: "The basic configuration was remarkably good but there were a few things about it which weren't.

"There were cut-outs in the wings which reduced lift and his control system of just shifting his weight hanging from his arms was very limited.

"Also the power from his engine, which would have been between two and four horsepower, wasn't sufficient.

"So we had to surmise he would have recognised these and worked his way round them - the pace of development at the time was rapid.

"He had made more progress on a shoestring budget than people with big wallets had and, with time, I think he would have been the first, or among the first, to succeed."

After just two days of testing, the triplane achieved a flight time of one minute 25 seconds - beating the Wright brothers' best initial time by 19 seconds.

Can’t remember if this article has already been posted.

Well worth a read, in my humble opinion.

 
FFI uprising in Paris on 19 August 1944

Battle_for_paris_FFI1.png


*French resistants firing in a skirmish during the battle for Paris.


Liberation of Paris. 25th August 1944. Armoured vehicles of the Division Leclerc fighting before the Opera.

A German tank is going up in flames.


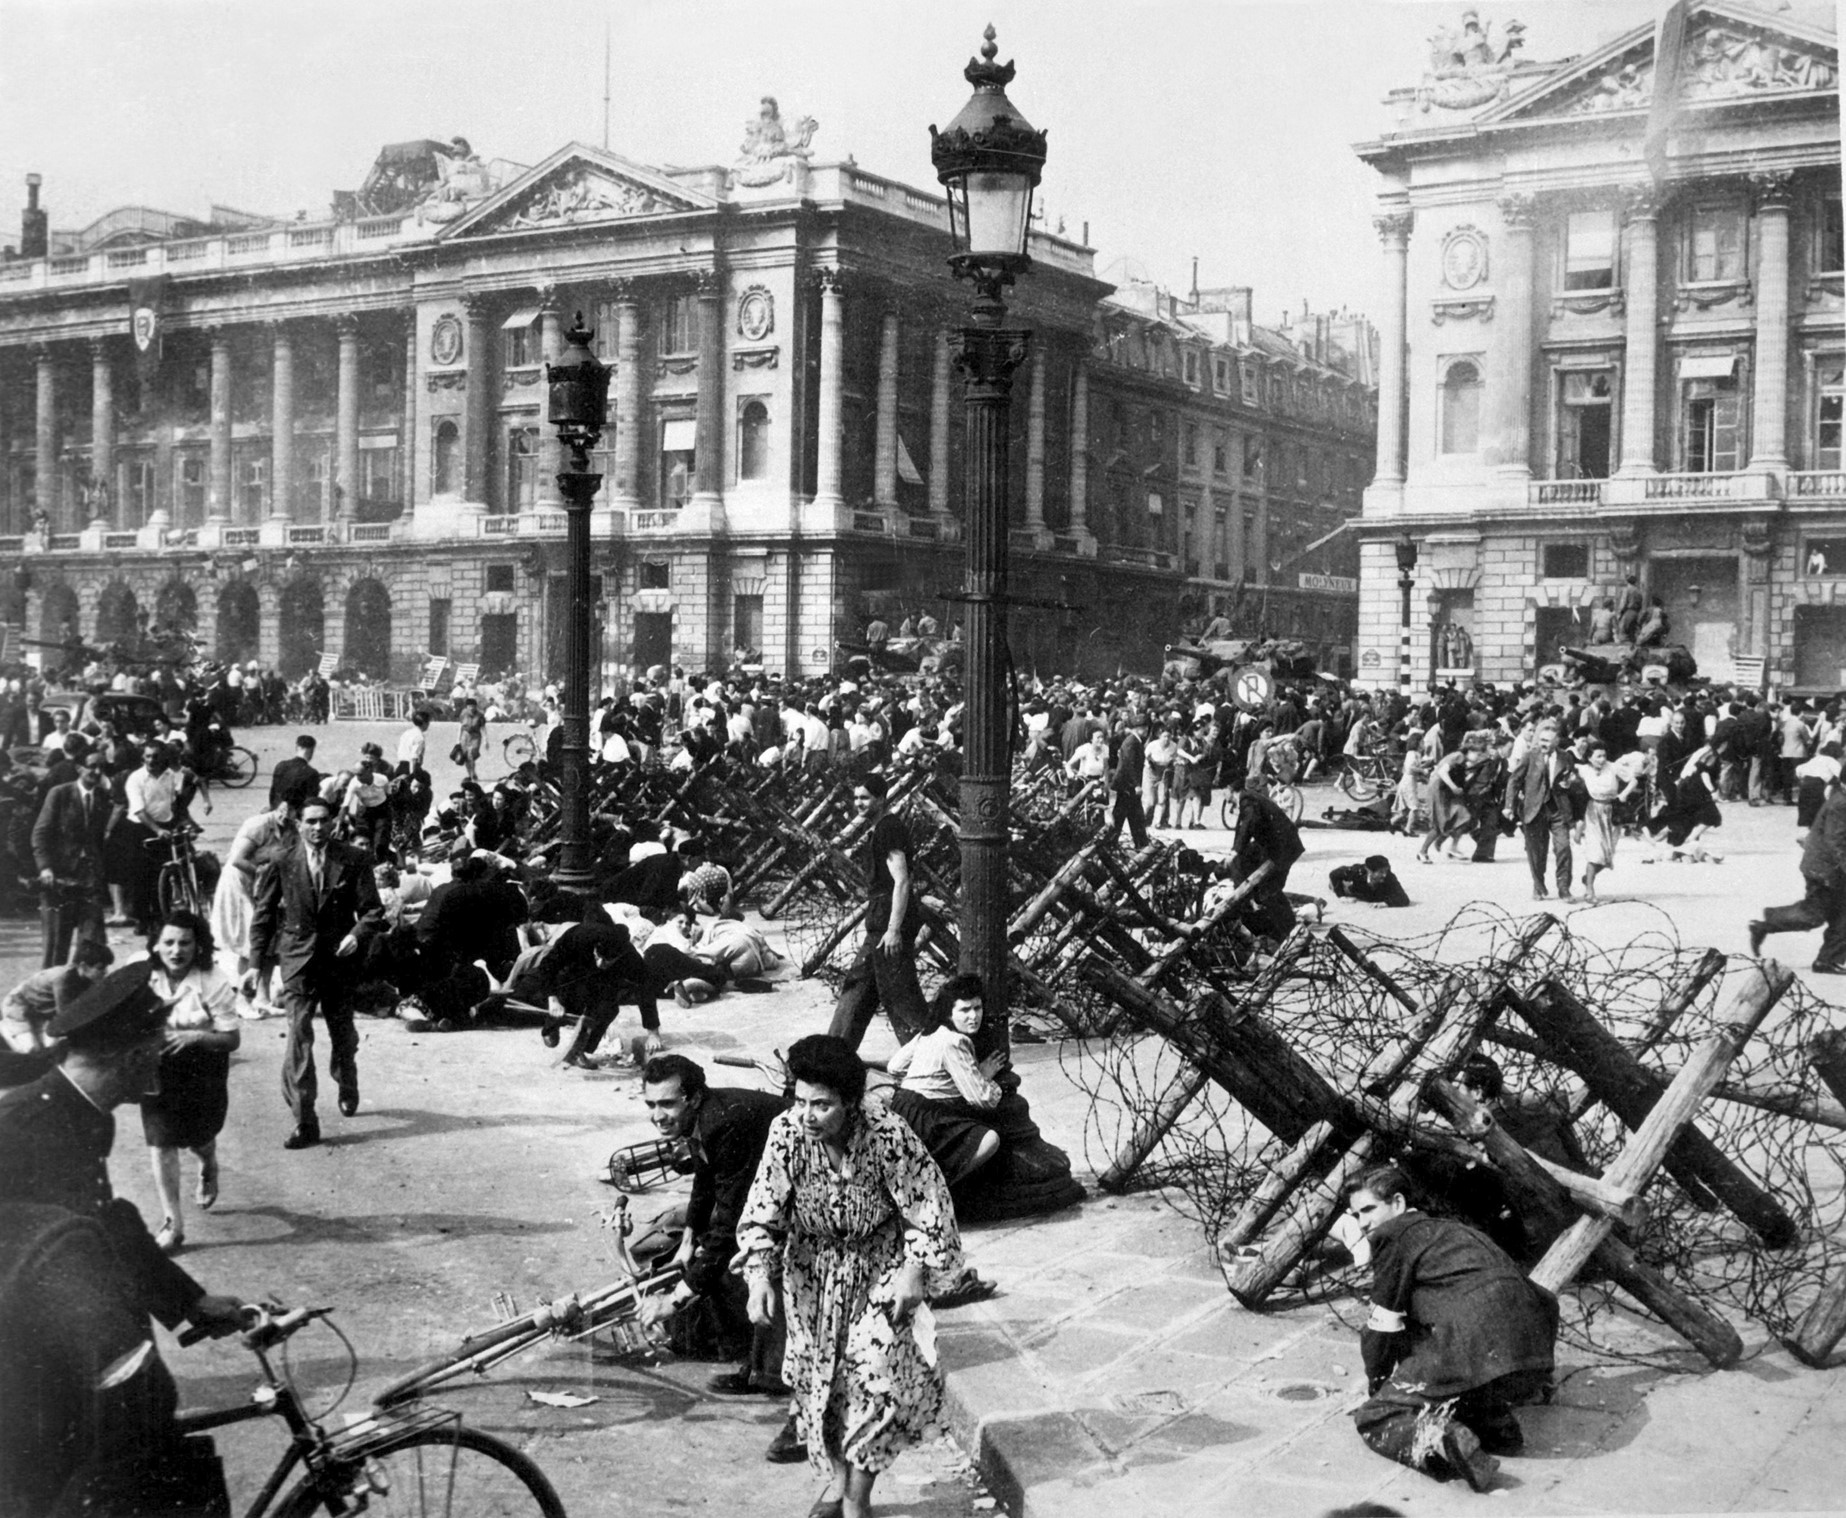
Crowds of Parisians celebrating the entry of Allied troops into Paris scatter for cover as a sniper fires from a building on the place De La Concorde. Although the Germans surrendered the city, small bands of snipers still remained. 26th August 1944.

AP_44082511133.jpg


American soldiers who took part in the liberation of Paris halt their jeep to look at the Eiffel Tower on 25 August 1944, from which the Tricolor flies again.

AP_44082611061.jpg


Members of the French Forces of the Interior (FFI) shoot at German snipers from a window in Paris on 26 August 1944.

AP_4408300145.jpg


A German officer standing beside one of the columns of the Chamber of Deputies building, in Paris, France on 30 August 1944.

He holds white flag of truce, as he negotiates surrender of German forces within the building with a French soldier carrying the Tricolor.

Frenchman waits to hoist flag over the building, where one of the last armed clashes took place before the capital was cleared of the Germans.

 
The Liberation of ParisDespite the impending defeat of the Wehrmacht in France, the victory over Germany would not be complete until the capital of France was liberated, and the Vichy government replaced.

August 25, 2023

liberationofparis.png


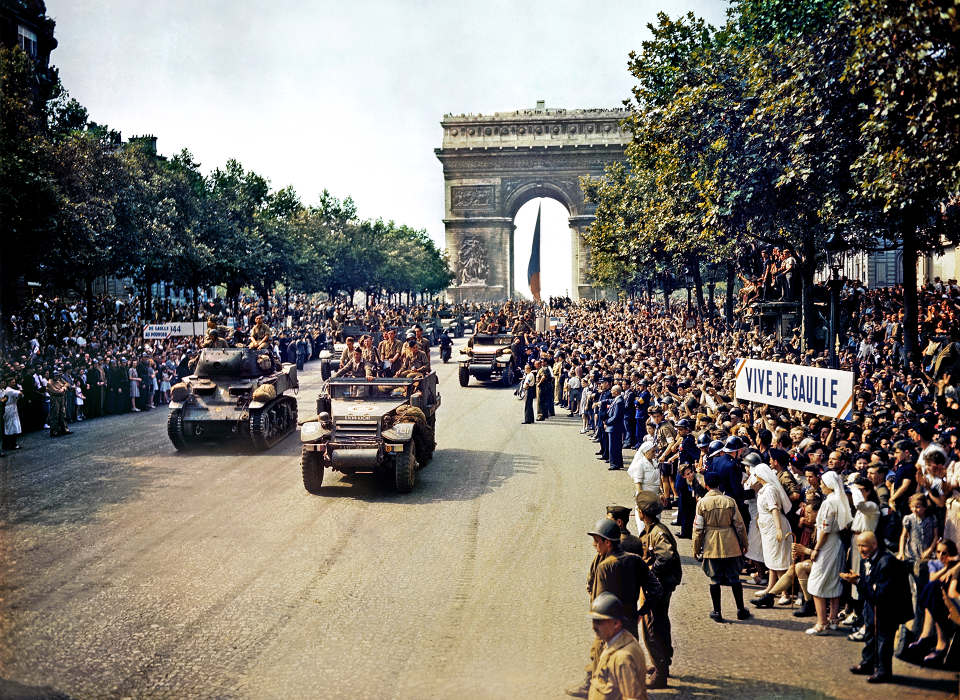
Top Photo: Crowds of French patriots line the Champs-Élysées to view Free French tanks and halftracks of General Philippe Leclerc's 2nd Armored Division pass through the Arc de Triomphe, after Paris was liberated on August 26, 1944. Among the crowd can be seen banners in support of General Charles de Gaulle. Courtesy US Library of Congress. 

In August 1944, as the Allies gained the upper hand in the battle of France, Supreme Allied Commander General Dwight D. Eisenhower had to decide what to do about Paris. When the Allies invaded France on June 6, 1944, they intended to bypass the historic city. Engaging in a protracted urban battle in Paris would risk destruction of the city’s key historical and cultural sites, slow down the advance toward Germany, and require significant resources to secure and sustain the civilian population.

Bypassing Paris and its garrison would leave the German soldiers in the city isolated, with no outside support and few options. From a military standpoint, liberating Paris offered no advantage to the Allies. 

The French people, however, saw it differently. Despite the impending defeat of the Wehrmacht in France, the victory over Germany would not be complete until the capital of France was liberated and the Vichy government replaced. The taste of imminent victory led to labor strikes, attacks on Wehrmacht patrols, and, on August 14, a rebellion led by Communist resistance.

Despite the rising violence and casualties, Paris police left their posts to join the rebellion the next day. General Charles de Gaulle, who arrived on the Continent on August 20, warned that a determined German effort would surely defeat the rebels. Moreover, he argued that the ongoing insurrection strengthened the French communists. Eisenhower realized they had to intervene: on August 22, he ordered General Omar Bradley, commander of the 12th US Army Group, to seize the city.

Picture2.jpg


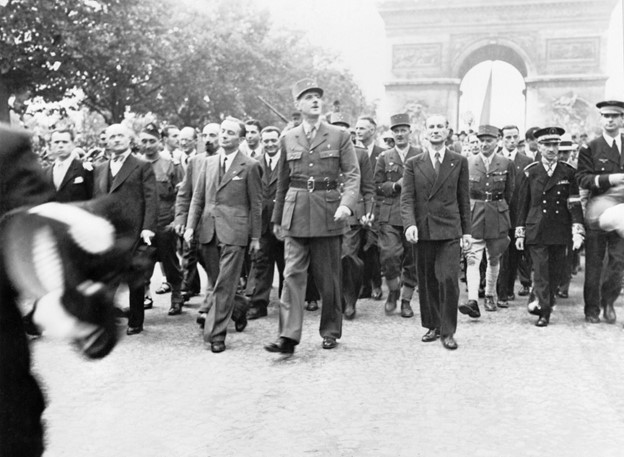
General Charles de Gaulle and his entourage proudly stroll down the Champs-Élysées to Notre Dame Cathedral for a Te Deum ceremony following the city's liberation on August 25, 1944. Courtesy Imperial War Museum. 

Bradley gave the mission to Major General Leonard T. Gerow, V Corps commander. As Eisenhower had promised de Gaulle, Free French forces would liberate the city; specifically, General Philippe François Marie Leclerc de Hauteclocque’s French 2nd Armored Division.

Gerow assigned Major General Raymond O. Barton’s 4th Infantry Division the task of securing the Seine River crossings south of Paris while serving as a reserve for Leclerc’s forces. Barton’s division was already in a reserve status integrating replacements when he received his orders on August 23.

That night, the division left its encampment at Carrouges in a steady downpour and headed toward Paris. By the evening of the 24th, Barton’s troops had occupied an assembly area about 40 miles southwest of the city, ready to move when ordered to do so.

Meanwhile, Leclerc’s advance into Paris quickly ran into trouble. Ignoring Gerow’s orders to enter the city from the west, Leclerc chose to attack from the south. He outran his artillery support before encountering the strongest portion of the German defense, making little progress.

Roadblocks and ambushes chipped away at the French forces, and by the evening of August 24, Leclerc’s formations had suffered 300 casualties, with 35 tanks and 117 other vehicles destroyed.

Gerow complained to Bradley, who was equally irritated by Leclerc’s behavior, ordering Barton to move past the French troops and enter the city from the southeast. Still, despite Leclerc’s slow progress, word moved quickly through the populace that the French 2nd Armored Division had entered the city, spreading joy among the long-suffering Parisians.

German resistance had been moderate so far, and largely unorganized. The commander of the German garrison, General Dietrich von Choltitz, had a respectable combat record and long military pedigree.

Still, he knew that his small force of 20,000 had no chance against three million French citizens, especially now that Allied forces had entered the city.

And, like the Allies, Choltitz did not desire to see Paris reduced to rubble. While reporting to his superiors on imaginary operations, Choltitz could do little more than hope for reinforcements that were not coming.

On the morning of August 25, the liberation gained momentum. Leclerc resumed the attack and, by 10:00 a.m., the French 2nd Armored Division was in the city, reducing strongpoints and taking increasing numbers of German prisoners. While French resistance fighters and police fired on enemy barricades and captured fleeing Germans, French infantry assaulted Choltitz’s headquarters in the early afternoon, taking the garrison commander prisoner. His captors took Choltitz to Leclerc at 3:00 p.m., where the men signed a formal surrender document. Paris was finally liberated after four long years of German occupation.

Picture3_0.jpg


As Allied troops enter Paris on August 26, celebrating crowds on place De La Concorde scatter for cover from small bands of remaining German snipers. Courtesy US National Archives. 

As word moved through the city of the German surrender, citizens sought their own justice against collaborators by conducting thousands of summary executions.

Meanwhile, the military operation wound down, with 15,000 German prisoners of war captured in Paris and another 4,200 killed or wounded.

The process of retribution and reconciliation would go on for years, but for now a celebratory mood took hold .

De Gaulle entered the city in the late afternoon of August 25, declaring Paris liberated by the French while barely mentioning the Allied forces, which had lost 50,000 troops since June 6. As de Gaulle cemented his hold on the political leadership of France, GIs, French troops, and resistance fighters hunted the remaining snipers and holdout defenders around the city.

Despite his snubbing of the American effort in the city’s liberation, de Gaulle asked Eisenhower for two US divisions to remain in Paris to provide security and deal with any unexpected enemy activity, but the Supreme Commander was in no position to hold back such a large force with combat operations continuing east of the city.

Regardless, he would not have placed American troops under French command.

Uploading Attachment...

Uploading Attachment...

As a compromise, he diverted the US 28th Infantry Division through Paris on the way to the front so the troops could make a show of force while taking part in the Victory Parade on 29 August.

It was a grand spectacle, and a moment of celebration, but with the war waiting to the east, it was a fleeting moment.

image.png

image.png

 
image.png

A Wellington bomber and crews of No. 149 Squadron after their return from Bomber Command’s first attack on Berlin on the night of 25-26 August 1940. © IWM (HU 104669)

image.png

German Propaganda Minister Joseph Goebbels inspects a bomb damaged street in Berlin following the first RAF raid on the city. © IWM.

This raid showed that Germany was not invincible and that Berlin could be attacked!

 
image.png

A Junkers Ju 88 A-1 bomber and crew of I./KG 51 “Edelweiss“, Channel Islands, 1940. Bundesarchiv, Bild

image.png

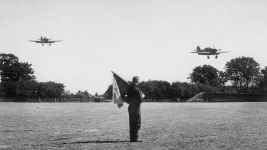
Two Hawker Hurricane Mk Is of No. 32 Squadron coming in to land for refueling and rearming at Biggin Hill, watched by an airman standing with a signalling flag in the foreground, August 1940. © IWM.

image.png

Groundcrew refueling a Hawker Hurricane Mk I of No. 32 Squadron from a refuelling truck whilst the pilot waits in the cockpit, Biggin Hill, August 1940. © IWM

www.battleofbritain1940.com

 
image.png

The controlled detonation of a German bomb, which fell on the parade ground at RAF Hemswell, Lincolnshire, on 27 August 1940. The bomb did not explode, but buried itself deep in the ground where it was subsequently destroyed by the Station Armament Officer. © IWM.

image.png

The remains of Heinkel He 111H-2 (Werke/Nr. 5367 V4+CD) of Stab III./KG 1, which crashed into houses at Manor Avenue in Caterham, Surrey on the night of 26/27 August 1940 after suffering a direct hit from anti-aircraft fire during a night mission to bomb factories in the Coventry area.

www.battleofbritain1940.com

 
Americans-Battle-Britain-Fiske-1024x861.jpg


Billy Fisk’s passport contains the stamped note that “This passport is not valid for travel to or in any foreign state in connection with entrance into or service in foreign military or naval forces.” (RAF Museum/Hendon)

In the summer of 1940 the Second World War had been under way for nearly a year. Hitler’s Germany was triumphant. The United States was neutral. It was a time, Winston Churchill later observed, when “the British people held the fort alone till those who hitherto had been half blind were half ready.” Some Americans, however, did not remain on the sidelines.

That summer and fall, eight American pilots fought against the Nazis in the Battle of Britain. This remarkable bunch of rogue flyers included ex-barnstormers, a Minnesota farm boy, and the greatest bobsled champion in American Olympic history.

All had defied strict neutrality laws—thereby risking loss of their citizenship and imprisonment if they dared return home—in order to join what they regarded as the best flying club in the world: Britain’s Royal Air Force.

With only minimal training, they dueled with some of the Luftwaffe’s finest aces in the greatest man-on-man contest in the history of aviation and, by October 1940, had helped save England from Nazi invasion.

Dozens more Americans soon joined them, enough to fill three squadrons—all of this months before Pearl Harbor marked America’s belated entry into the Second World War.

The first American to enlist in the RAF during World War II was no ordinary American.

Twenty-nine-year-old Billy Fiske was one of the most remarkable sportsmen in Olympic history. He spent much of his adolescence in Europe, graduated from Cambridge University, and went on to work as a banker in London and New York.

In his spare time, he completed the Le Mans 24-hour auto race when he was only 19 and earned the unofficial title “The King of Speed” by dominating bobsledding between the wars.

In 1928, Fiske became, at age 16, the youngest-ever winner of a Winter Olympics gold medal for the bobsled.

In 1932, at the Lake Placid Winter Games, he carried the Stars and Stripes for the Americans at the opening ceremonies, presided over by Governor Franklin D. Roosevelt of New York.

Billy Fiske was posted to 601 (County of London) Auxiliary Air Force Squadron at Tangmere, on England’s south coast. Also known as the Millionaires’ Squadron, it had been composed since the 1920s of mostly wealthy aristocrats, recruited at the elite gentleman’s club, White’s, by Lord Edward Grosvenor.

There was some apprehension in 601 about “the untried American adventurer,” according to the squadron’s official record book.

But Fiske made no pretensions about his flying skill and was soon popular with the squadron’s other flamboyant and daring pilots. When not on duty, he invariably beat them in races to local golf courses and pubs in his 4.5 liter open Bentley, painted British racing green, complete with bonnet strap and projecting supercharger.

On July 20, Fiske flew for the first time in a 601 plane, making two patrols. Over the coming weeks, he would fly with the same exceptional skill that he guided bobsleds, pushing his plane to its operational limits without being reckless.

When the call to scramble sounded, Fiske was often first to sprint to his “kite,” so eager was he to test himself in the ultimate thrill ride.

In May 1940, Tobin and Mamedoff had braved the U-boat threat and crossed the Atlantic in a convoy with the smallest man ever to fly in the RAF’s dark blue uniform: 4 foot 10 inch Vernon Keough, 28, who had introduced himself to his fellow American adventurers as “Shorty.” A stunt pilot, Keough was one of America’s first professional skydivers. At fairs and air shows around New York, he had jumped out of biplanes more than 500 times.

In early July 1940, the three pilots were assigned to 609 Squadron at Middle Wallop airfield in southern England, where they were quickly accepted as honorary Brits. To the young British pilots, the lanky and wisecracking “Red” Tobin seemed like a cowboy out of a Hollywood movie.

The charming and roguish Andy Mamedoff loved to gamble and wagered small fortunes on games of bridge; between scrambles, he also taught the Brits in the squadron how to play stud and Red Dog poker.

Shorty earned plenty of laughs as he ran to his Spitfire on practice scrambles, a cushion under each arm; he needed to sit on two to see out of the plane’s cockpit.

If it was action the Americans were looking for, they could not have arrived in England at a better time. Just days after the men reached their frontline squadron, on July 10, 1940, the Luftwaffe opened a daylight bombing campaign against Britain. The Battle of Britain was on.

Aside from Fiske and the American trio in 609 Squadron, four other American citizens served in the RAF during the Battle of Britain. Twenty-eight-year-old Philip Leckrone, from Salem, Illinois, flew more than two dozen sorties over the English Channel as a “tail-end Charlie”—the rear plane in a formation—in 616 Squadron.

Minnesotan Art Donahue, 27, was perhaps the most experienced of all the Americans who flew in the RAF during the summer of 1940, having logged over 1,000 hours in the air before joining.

He was posted to 64 Squadron just six weeks after leaving his farm in St. Charles, Minnesota. The very next day he destroyed his first bandit: an Me 109,

But then, barely a week later, he was shot down, his face and hands severely burned.

He would spend the rest of the Battle of Britain recuperating. (And was shot down over the English Channel two years later, his body never found.)

Americans_in_the_battle-1024x682.jpg


Striking a classic pose, pilots from No. 19 and No. 616 Squadrons pose alongside a Spitfire at Fowlmere, September 21, 1940. American Philip Leckrone (616 Sqn) is at the far right. (IWM CH 1400)

Pilot Officer Hugh Reilley, who had been born in Detroit, Michigan, served with 66 Squadron.

It was only after he had  been shot down and killed by the legendary German ace, Werner Molders, that RAF personnel discovered that Reilley, who had passed himself off as a Canadian, was in fact an American citizen.

His squadron leader recalled that when Reilley was buried, the families of dockhands in the riverside town where the squadron was based lined the streets and graveyard “in large numbers to pay their respects as the cortege went by.”

According to RAF rosters of the period, the only other American known to have served during the battle was 19-year-old John K. Haviland from Mount Kisco, New York, the son of an American navy officer and English mother. Haviland was one of many green pilots brought into decimated squadrons that summer; pilots who had not even practiced deflection shooting and had less than 20 hours on fighters. Raw and scared, many crashed their planes and died or were wounded in accidents rather than combat. This was the case with Haviland, who collided with another Hurricane during formation practice the very day after he joined 151 Squadron. Thankfully, he was able to bring his Hurricane down in a paddock; he would see no further significant action in the Battle of Britain.

On August 13, 1940, the Luftwaffe launched its first all-out mass attack, codenamed Eagle Day. More than 50 Stuka dive-bombers attacked airdromes in the area of Portland naval base on England’s south coast. Spitfires of 609 Squadron shot down five enemy planes for a record haul. Above the English Channel, 601’s Billy Fiske shot up a German bandit’s underbelly but was unable to claim the kill because he did not see the German crash or burst into flames.

Americans-battle-britain-andy-combat.jpg


A lucky Andy Mamedoff shows off damage to his 609 Sq. Spitfire after his encounter with an Me-110. (Historynet Archives)

Three days later, on August 16, the Luftwaffe singled out Fiske’s base at Tangmere for attack. RAF Fighter Command ordered 601 to patrol over Tangmere at about 12,000 feet: Ju 87 dive-bombers had been detected as they crossed the English coast at nearby Selsey Bill.

Soon, the Stukas started to dive on Tangmere, killing several ground staff and badly damaging the airfields. Fiske and his fellow 601 pilots chased the Germans out to sea just to the south around Pagham Harbor and downed several enemy planes.

Then someone spotted Fiske’s Hurricane returning to the base. It was badly damaged and was seen to “glide over the boundary and land on its belly.” Medical and fire crews rushed to the plane.

The squadron’s operations record book recorded what happened next: “Pilot officer Fiske was seen to land on the aerodrome and his aircraft immediately caught fire. He was taken from the machine but sustained severe burns….”

Fiske was rushed to the Royal West Sussex Hospital in Chichester but died the following morning from shock. He was just 29, the first American pilot to be killed during the Battle of Britain.

 
Americans-Battle-Britain-Fiske-1024x861.jpg


Billy Fisk’s passport contains the stamped note that “This passport is not valid for travel to or in any foreign state in connection with entrance into or service in foreign military or naval forces.” (RAF Museum/Hendon)

In the summer of 1940 the Second World War had been under way for nearly a year. Hitler’s Germany was triumphant. The United States was neutral. It was a time, Winston Churchill later observed, when “the British people held the fort alone till those who hitherto had been half blind were half ready.” Some Americans, however, did not remain on the sidelines.

That summer and fall, eight American pilots fought against the Nazis in the Battle of Britain. This remarkable bunch of rogue flyers included ex-barnstormers, a Minnesota farm boy, and the greatest bobsled champion in American Olympic history.

All had defied strict neutrality laws—thereby risking loss of their citizenship and imprisonment if they dared return home—in order to join what they regarded as the best flying club in the world: Britain’s Royal Air Force.

With only minimal training, they dueled with some of the Luftwaffe’s finest aces in the greatest man-on-man contest in the history of aviation and, by October 1940, had helped save England from Nazi invasion.

Dozens more Americans soon joined them, enough to fill three squadrons—all of this months before Pearl Harbor marked America’s belated entry into the Second World War.

The first American to enlist in the RAF during World War II was no ordinary American.

Twenty-nine-year-old Billy Fiske was one of the most remarkable sportsmen in Olympic history. He spent much of his adolescence in Europe, graduated from Cambridge University, and went on to work as a banker in London and New York.

In his spare time, he completed the Le Mans 24-hour auto race when he was only 19 and earned the unofficial title “The King of Speed” by dominating bobsledding between the wars.

In 1928, Fiske became, at age 16, the youngest-ever winner of a Winter Olympics gold medal for the bobsled.

In 1932, at the Lake Placid Winter Games, he carried the Stars and Stripes for the Americans at the opening ceremonies, presided over by Governor Franklin D. Roosevelt of New York.

Billy Fiske was posted to 601 (County of London) Auxiliary Air Force Squadron at Tangmere, on England’s south coast. Also known as the Millionaires’ Squadron, it had been composed since the 1920s of mostly wealthy aristocrats, recruited at the elite gentleman’s club, White’s, by Lord Edward Grosvenor.

There was some apprehension in 601 about “the untried American adventurer,” according to the squadron’s official record book.

But Fiske made no pretensions about his flying skill and was soon popular with the squadron’s other flamboyant and daring pilots. When not on duty, he invariably beat them in races to local golf courses and pubs in his 4.5 liter open Bentley, painted British racing green, complete with bonnet strap and projecting supercharger.

On July 20, Fiske flew for the first time in a 601 plane, making two patrols. Over the coming weeks, he would fly with the same exceptional skill that he guided bobsleds, pushing his plane to its operational limits without being reckless.

When the call to scramble sounded, Fiske was often first to sprint to his “kite,” so eager was he to test himself in the ultimate thrill ride.

In May 1940, Tobin and Mamedoff had braved the U-boat threat and crossed the Atlantic in a convoy with the smallest man ever to fly in the RAF’s dark blue uniform: 4 foot 10 inch Vernon Keough, 28, who had introduced himself to his fellow American adventurers as “Shorty.” A stunt pilot, Keough was one of America’s first professional skydivers. At fairs and air shows around New York, he had jumped out of biplanes more than 500 times.

In early July 1940, the three pilots were assigned to 609 Squadron at Middle Wallop airfield in southern England, where they were quickly accepted as honorary Brits. To the young British pilots, the lanky and wisecracking “Red” Tobin seemed like a cowboy out of a Hollywood movie.

The charming and roguish Andy Mamedoff loved to gamble and wagered small fortunes on games of bridge; between scrambles, he also taught the Brits in the squadron how to play stud and Red Dog poker.

Shorty earned plenty of laughs as he ran to his Spitfire on practice scrambles, a cushion under each arm; he needed to sit on two to see out of the plane’s cockpit.

If it was action the Americans were looking for, they could not have arrived in England at a better time. Just days after the men reached their frontline squadron, on July 10, 1940, the Luftwaffe opened a daylight bombing campaign against Britain. The Battle of Britain was on.

Aside from Fiske and the American trio in 609 Squadron, four other American citizens served in the RAF during the Battle of Britain. Twenty-eight-year-old Philip Leckrone, from Salem, Illinois, flew more than two dozen sorties over the English Channel as a “tail-end Charlie”—the rear plane in a formation—in 616 Squadron.

Minnesotan Art Donahue, 27, was perhaps the most experienced of all the Americans who flew in the RAF during the summer of 1940, having logged over 1,000 hours in the air before joining.

He was posted to 64 Squadron just six weeks after leaving his farm in St. Charles, Minnesota. The very next day he destroyed his first bandit: an Me 109,

But then, barely a week later, he was shot down, his face and hands severely burned.

He would spend the rest of the Battle of Britain recuperating. (And was shot down over the English Channel two years later, his body never found.)

Americans_in_the_battle-1024x682.jpg


Striking a classic pose, pilots from No. 19 and No. 616 Squadrons pose alongside a Spitfire at Fowlmere, September 21, 1940. American Philip Leckrone (616 Sqn) is at the far right. (IWM CH 1400)

Pilot Officer Hugh Reilley, who had been born in Detroit, Michigan, served with 66 Squadron.

It was only after he had  been shot down and killed by the legendary German ace, Werner Molders, that RAF personnel discovered that Reilley, who had passed himself off as a Canadian, was in fact an American citizen.

His squadron leader recalled that when Reilley was buried, the families of dockhands in the riverside town where the squadron was based lined the streets and graveyard “in large numbers to pay their respects as the cortege went by.”

According to RAF rosters of the period, the only other American known to have served during the battle was 19-year-old John K. Haviland from Mount Kisco, New York, the son of an American navy officer and English mother. Haviland was one of many green pilots brought into decimated squadrons that summer; pilots who had not even practiced deflection shooting and had less than 20 hours on fighters. Raw and scared, many crashed their planes and died or were wounded in accidents rather than combat. This was the case with Haviland, who collided with another Hurricane during formation practice the very day after he joined 151 Squadron. Thankfully, he was able to bring his Hurricane down in a paddock; he would see no further significant action in the Battle of Britain.

On August 13, 1940, the Luftwaffe launched its first all-out mass attack, codenamed Eagle Day. More than 50 Stuka dive-bombers attacked airdromes in the area of Portland naval base on England’s south coast. Spitfires of 609 Squadron shot down five enemy planes for a record haul. Above the English Channel, 601’s Billy Fiske shot up a German bandit’s underbelly but was unable to claim the kill because he did not see the German crash or burst into flames.

Americans-battle-britain-andy-combat.jpg


A lucky Andy Mamedoff shows off damage to his 609 Sq. Spitfire after his encounter with an Me-110. (Historynet Archives)

Three days later, on August 16, the Luftwaffe singled out Fiske’s base at Tangmere for attack. RAF Fighter Command ordered 601 to patrol over Tangmere at about 12,000 feet: Ju 87 dive-bombers had been detected as they crossed the English coast at nearby Selsey Bill.

Soon, the Stukas started to dive on Tangmere, killing several ground staff and badly damaging the airfields. Fiske and his fellow 601 pilots chased the Germans out to sea just to the south around Pagham Harbor and downed several enemy planes.

Then someone spotted Fiske’s Hurricane returning to the base. It was badly damaged and was seen to “glide over the boundary and land on its belly.” Medical and fire crews rushed to the plane.

The squadron’s operations record book recorded what happened next: “Pilot officer Fiske was seen to land on the aerodrome and his aircraft immediately caught fire. He was taken from the machine but sustained severe burns….”

Fiske was rushed to the Royal West Sussex Hospital in Chichester but died the following morning from shock. He was just 29, the first American pilot to be killed during the Battle of Britain.
@erskblue Thanks for posting. A memorial to Billy Fiske was unveiled in St. Paul's Cathedral on 4 July 1941. The date was chosen by Winston Churchill. I've mentioned the unveiling of the memorial to American visitors to the Biggin Hill Memorial Museum and some were surprised that there was a memorial to Fiske in St. Paul's.

A joint U.K. and U.S.A foundation was setup.

https://billyfiskefoundation.org/

 
RAF Museum
The Forgotten Father of the Royal Air Force - RAF MuseumVolunteer George Mason looks at the forgotten life of one of the founders of the Royal Air Force
For someone who played such a significant role in shaping the Royal Flying Corps, and hence the Royal Air Force, David Henderson appears somewhat overlooked by history. There is limited biographical information about him, but he receives numerous mentions from several contemporaries in their biographies and memoirs. Here I attempt to sketch out something of his life.

Henderson’s early years did not suggest the course he would eventually take: he was born into a fairly affluent family where his father was a joint owner of a Clydeside ship building business, David and William Henderson & Company. The younger David entered Glasgow University at the age of fifteen, to read engineering – presumably in preparation for a role in the family business. In his fourth year he was reading civil engineering, mechanics, office and field work, but left university without graduating.

Almost directly, Henderson entered the Royal Military College from where he was commissioned into the British Army in August 1882, joining the 1st Battalion Argyll and Sutherland Highlanders the following year. In 1884-1885 Henderson took part in the Nile Expedition as ADC to General Wolseley, in what proved an unsuccessful attempt to relieve the besieged city of Khartoum. (Khartoum had become the refuge for General Gordon’s forces following his failed campaign to rid Sudan of the Mahdi Muhammad Ahmad)

715.jpg
Henderson was serving as an intelligence officer in South Africa during the Boer War when he was besieged at (November 1899 – February 1900) here he was wounded whilst leading an assault on enemy guns: this episode earned him a Mention in Despatches and promotion to Lieutenant-Colonel. About a year later he was appointed Director of Intelligence under Field Marshal Kitchener, a post he held until 1902 at which time he was awarded the DSO. In the following years Henderson wrote two military handbooks, Field Intelligence: Its Principles and Practice (1904), and The Art of Reconnaissance (1907). These volumes earned Henderson his reputation as the Army’s authority on tactical intelligence. Subsequently Henderson undertook Staff Officer duties to the C-in-C Mediterranean and the Inspector-General of Forces, adding to his already impressive record.

720.jpg
In 1911 Henderson was being troubled by wounds he had received during the Boer War and he underwent an operation to remove some shrapnel, while recuperating in Harrogate he had a chance meeting with a pilot who was competing in the round Britain air race, with whom he had a long talk, this chance meeting opened Henderson’s mind to the opportunities that aeroplanes could offer the military; on his return to London he quickly enrolled as a student at the Bristol Flying School at Brooklands, so as to avoid special favours he enrolled under the pseudonym of Henry Davidson, he promptly passed and was awarded RAeC Certificate 118 on 17th August, aged 49, making him the oldest pilot in Great Britain. His enthusiasm for flying was to prove important in the following years.

731.jpg
The British government had in the first decade of the twentieth century shown a remarked indifference toward aviation, but in response to developments in aviation in France and Germany and pressure from the press the government asked the Committee of Imperial Defence to examine Britain’s military aviation capabilities and to consider the establishment of an aviation service. A technical sub-committee was appointed in December to examine and report on the matter. The chairman of the committee was Col J Seely but the actual work was conducted by three officers Brig Gen David Henderson, Captain Frederick Sykes (another pioneer aviator) and the Director of Military Training Maj-General Duncan MacInnes. Henderson was recommended to Col Seely by Sir John French saying of him

‘Without doubt David Henderson – for two reasons, the first that he has learned to fly, a very rare thing nowadays- and I suppose an air sense to an airman is important as sea sense to a seaman- secondly, he is a faithful man. He will not fail you in a tight corner’.

The report was completed in February 1912 advocating the formation of a dedicated air corps, it was approved by the Committee of Imperial Defence at the end of April, and the Royal Warrant forming the corps was signed by King George V on 13th May 1912.
Henderson briefly returned to his work as a staff officer, in July he was appointed Director of Military Training which also oversaw the new aeronautics branch. Henderson’s background in reconnaissance and his open minded attitude to aircraft ensured that the new service was nurtured. In September 1913 a newly created department for military aviation was created and Henderson was appointed as its first leader in the role of Director General of Military Aviation in this role he was responsible for all aspects of military aviation including aircraft procurement that had previously been the domain of the Master-General of the Ordnance.

Despite meagre budgets and continuing opposition from various diehards the search for, and development of, suitable aircraft got underway. Henderson’s initial objectives were founded in his knowledge of tactical reconnaissance: he fully recognised the value of providing information about enemy troop positions to land-based forces.

In 1914, in addition to his role as Director of Military Aeronautics, Henderson took command of the Royal Flying Corps in France. Although he made frequent journeys between France and England it was not possible to carry out both jobs effectively, and his absences in France allowed some parties to undermine his directorial authority in England. In August 1915 Henderson handed command of the RFC in the field to Brigadier-General Hugh Trenchard. This allowed Henderson to resume his fight for the RFC’s autonomy, and limit the damage caused by rival demands for resources from the Royal Naval Air Service.

FA01462.jpg
In June 1917 the first of the day light bombing raids on London was made coupled with revolution in Russia, mutinies in the French Army and heavy losses incurred by U-boats on merchant vessels supplying Britain the new government under David Lloyd George were worried that the tide of the war may be flowing against them. A South African politician Jan Christian Smuts was appointed to investigate and report on the state of Britain’s air defences, the Air Board and the dual air forces of the RFC and RNAS and to make recommendations for improvements. It was obvious that Smuts would seek the advice of those most experienced in air power for help, one of who was Henderson. Henderson had already sent his thoughts to Smuts, when he wrote

It is difficult to indicate any method of overcoming the present illogical situation of divided responsibility in aeronautics, except by the formation of a complete united service dealing with all operations in the air, and with all the accessory services which that expression implies. A department would have to be formed on the general lines of the Admiralty and the War Office, with a full staff, and with a full responsibility for war in the air.

The Smuts report was largely accepted by the government in which a single unified air force was advocated along with an air ministry to organise it. Henderson left his post in August 1917 as DGMA to concentrate on the work of the Air Organisation Committee, helping Smuts draft the Air Force (Constitution) Act 1917. The act was placed before parliament in November and passed without opposition, receiving Royal assent on 29 November. The Air Ministry and Air Council came into being in January 1918, the RAF being established in April 1918 with the amalgamation of the RFC and RNAS.

777.jpg
Henderson suffered a personal tragedy shortly after when in June his only son, Ian, was killed in a flying accident at Turnberry, the death affected him greatly. In August he was appointed Area Commandant, British Forces in France a post he held until October, when he was made Military Counsellor at the British embassy in Paris serving on the Peace negotiations, when his work had finished in Paris he moved to Geneva to take up the post of Director-General at the newly created League of Red Cross Societies, he relished the new post where he sought to bring unity of purpose and direction to the old International Committee of the Red Cross, with his diplomacy, tact and administrative skills Henderson succeeded in so doing and received much acclaim for his efforts, it was thought that Henderson would occupy this role until his retirement, however less than a week after his 59th birthday, in August 1921 and ten years to the day on which he qualified as a pilot, he died. Many felt that the stress of the war years had taken its toll, his passing did not go unnoticed, the Times said that he was ‘The maker of the RAF’ the editor of the aeroplane Charles Grey an often fierce critic of Henderson’s, wrote of him

There will ever remain as a memorial to Sir David Henderson the fact that it was he who among General Officers realised the vital importance of Military Aviation, and took steps to set up a separate corps to develop the new arm. Whether as a third service or as branches of the senior service, British ai power will always owe its first debt of gratitude to him. As an adversary he was to be respected and feared, as a man he was to be respected and admired.

Henderson’s ashes were scattered at Girvan cemetery in Ayrshire where his son was buried, he was given a Commonwealth War graves headstone being deemed as to have died due to the effects of the war.

729.jpg
In the course of Henderson’s career as a ‘flier, it seems that his star often flared and faded: this brief account of his military life omits many of his ups and downs. In the memoirs of some of his contemporaries there are suggestions that he was ruthlessly ambitious, and abrupt and incommunicative. At times he upset both the military establishment and Government officers; nonetheless he was instrumental in defining the shape of an air force that has remained largely unchanged for almost a century.

​
The Museum has a large collection of papers and artefacts that belonged to both David and Ian Henderson.

71D954.jpg


Our First World War in the Air exhibition is supported by BAE Systems and the Heritage Lottery Fund

 
731.jpg
David Henderson doesn’t, to me anyway, look very safe on the ground in the picture above.​
Never mind actually flying the aeroplane he’s sitting in !​
Boyne: Good article you’ve posted regarding him.​
 
Last edited by a moderator:
image.png

David Hemery winning the 400m Hurdles, in a new world record of 48.12.

1968 Olympic Games Mexico City. John Sherwood of Great Britain was third.

image.png

image.png

image.png

 
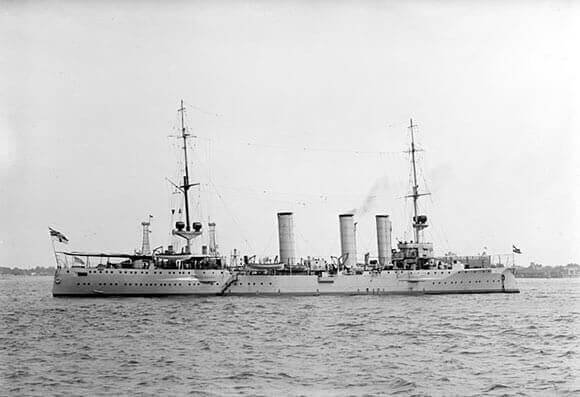
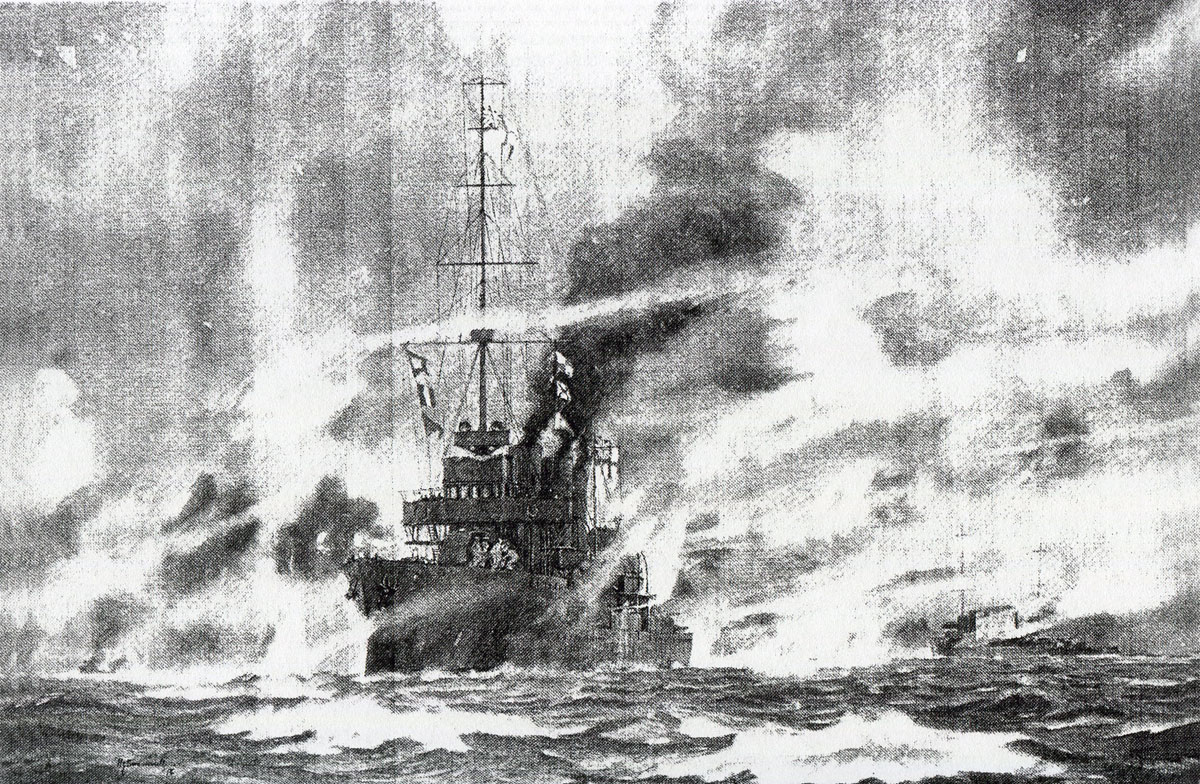
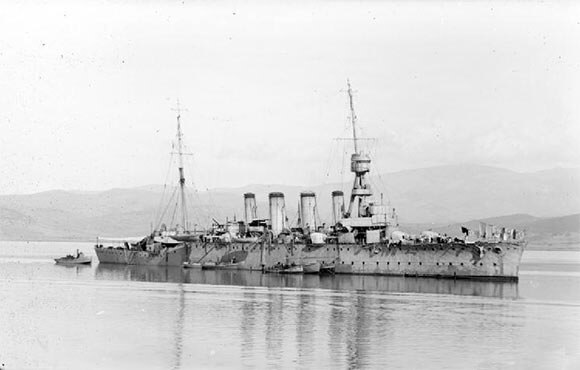
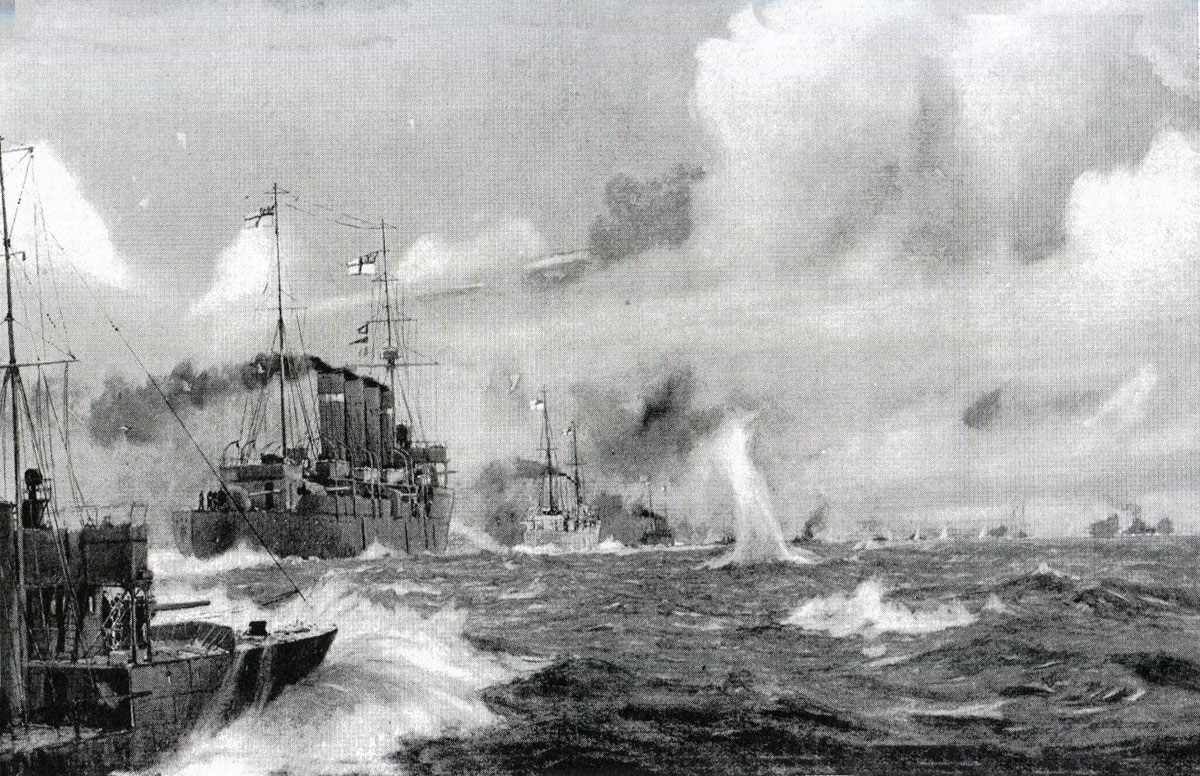
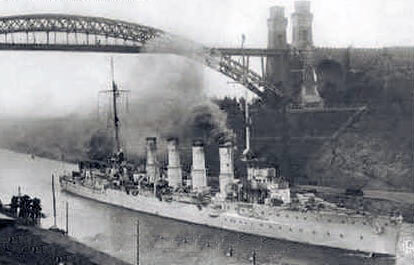
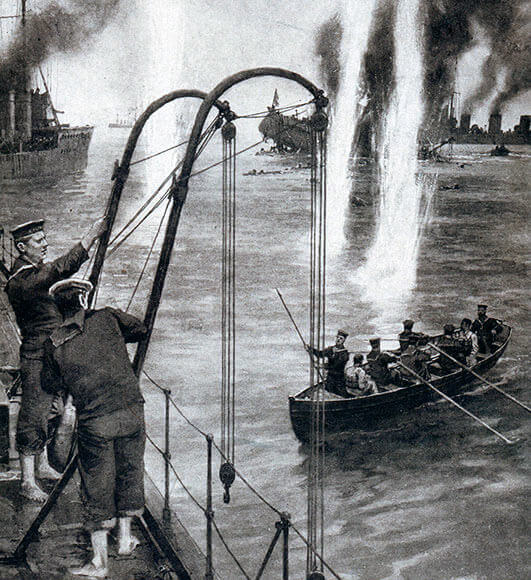
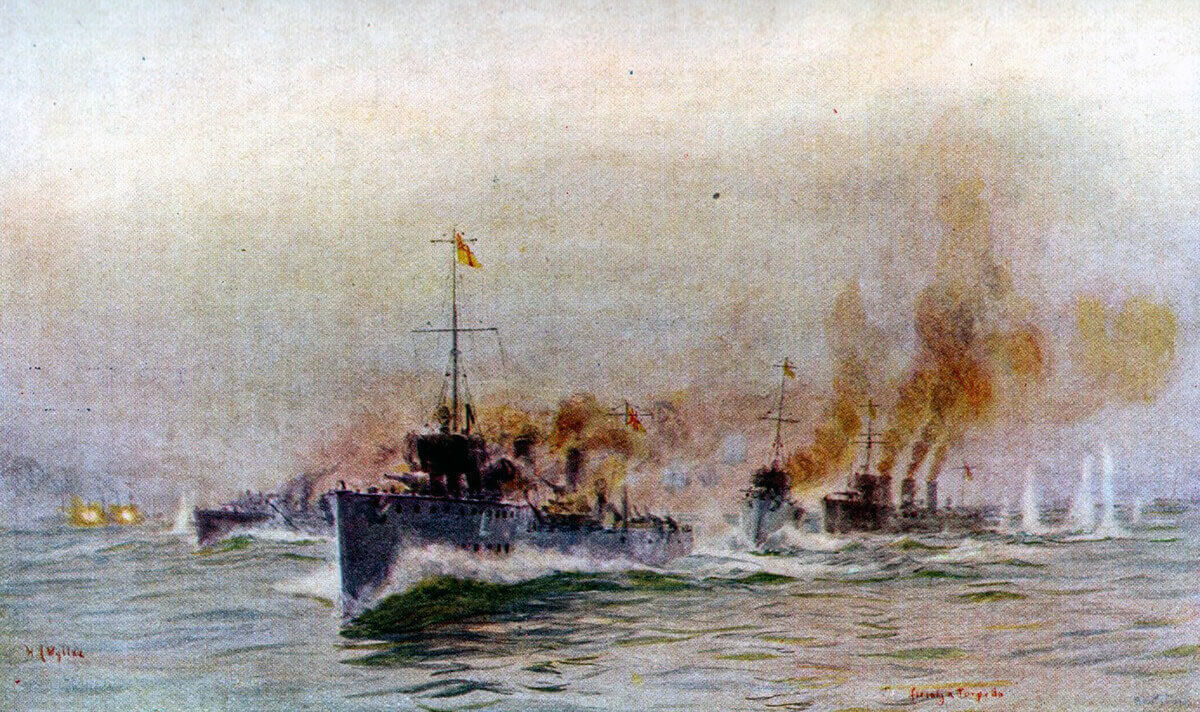
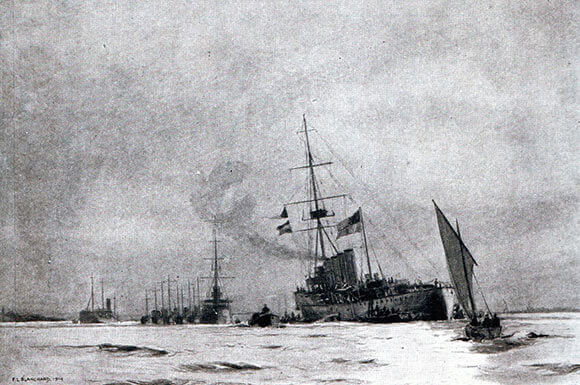
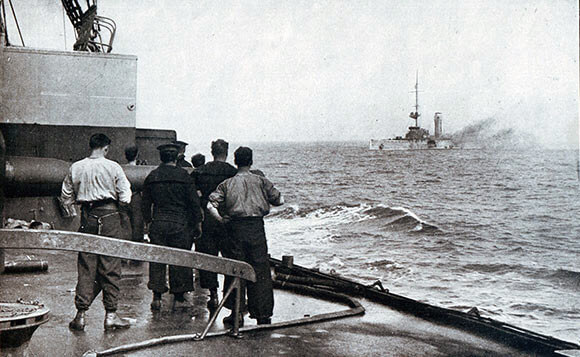
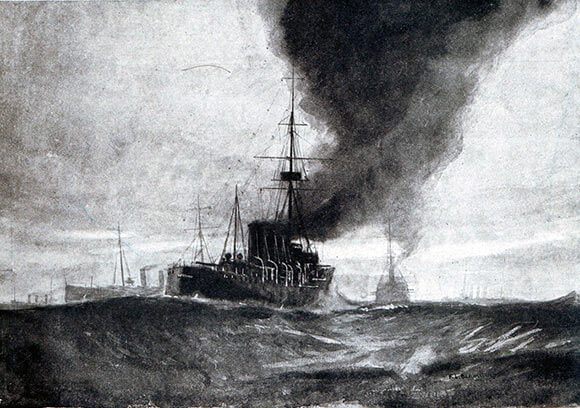
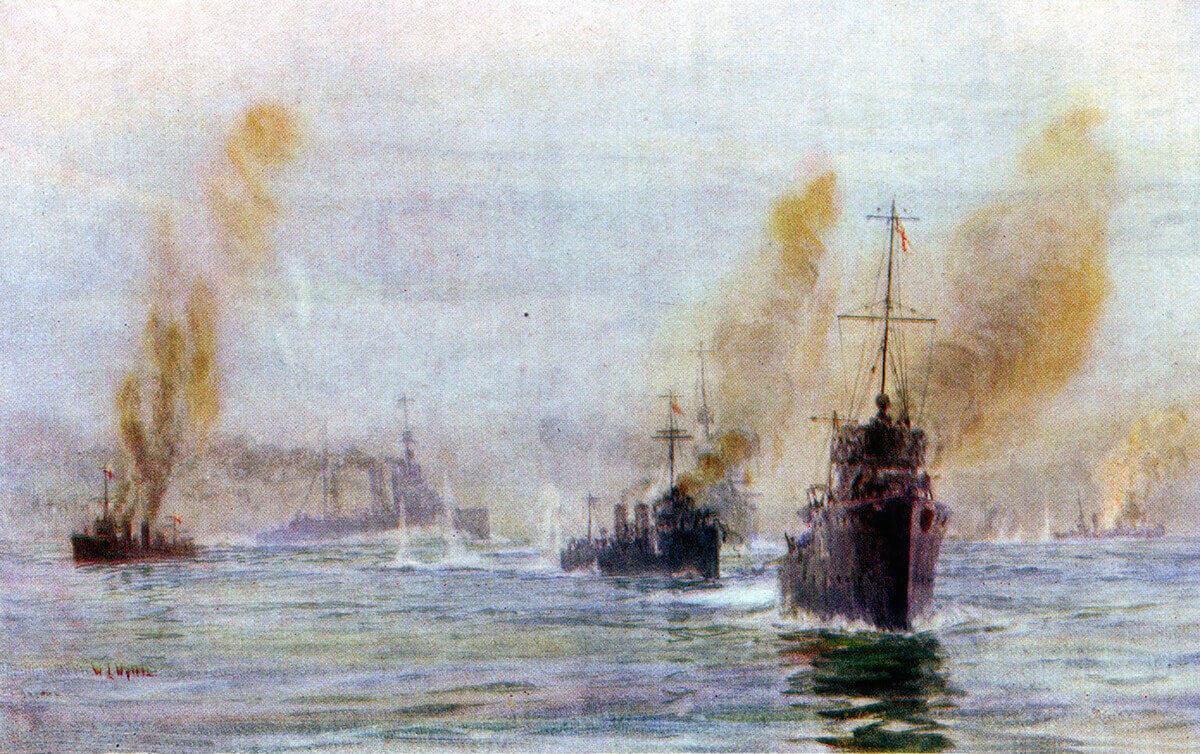
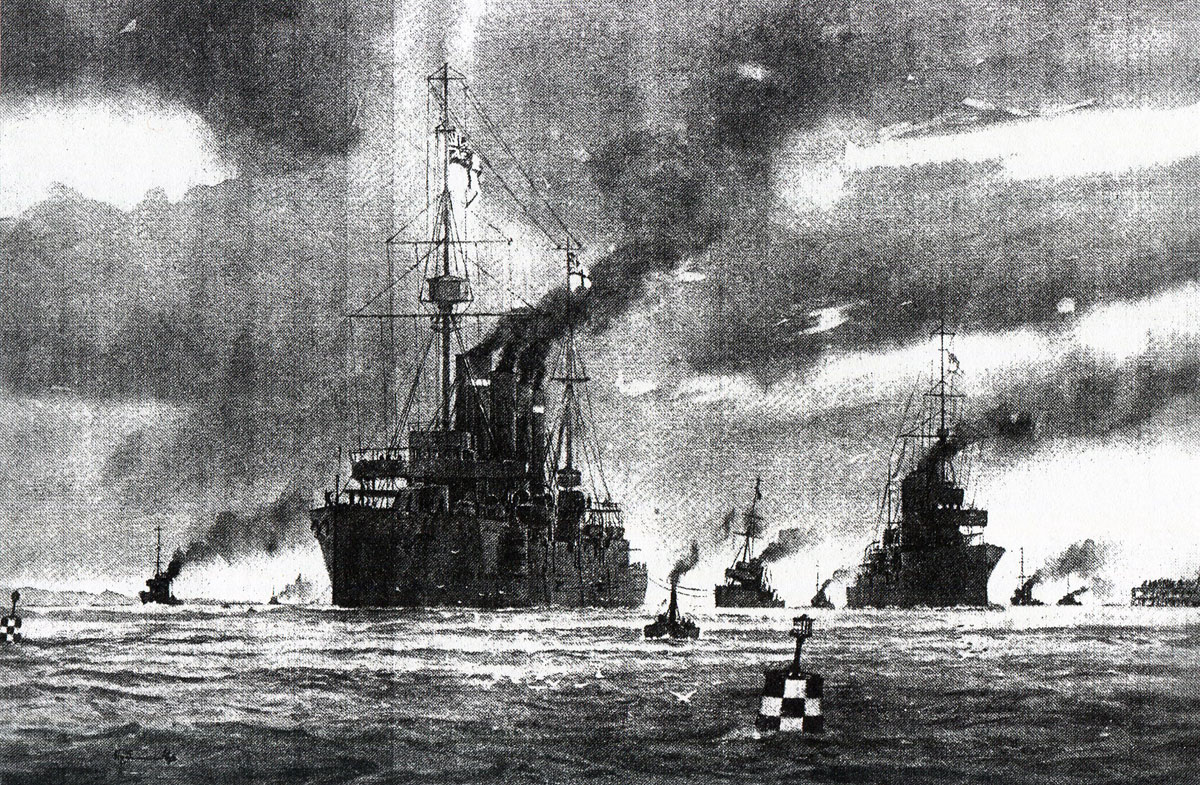
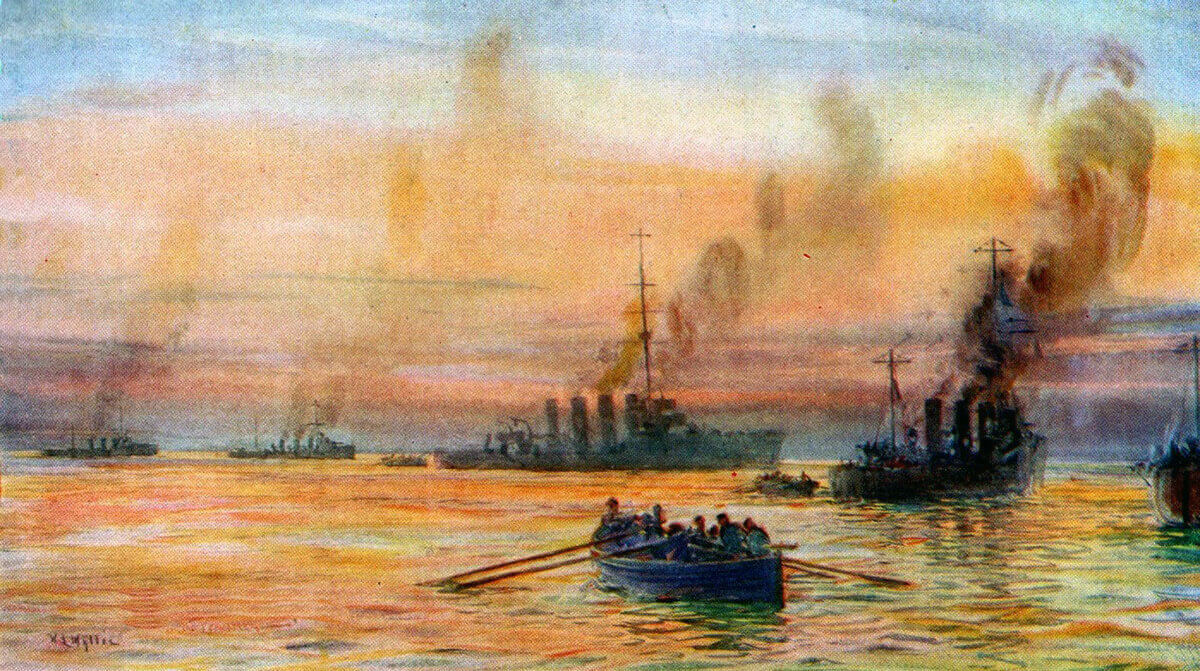
Battle of Heligoland BightThe first naval encounter of the First World War, on 28th August 1914, between the British and German fleets, in the North Sea off the North German coast
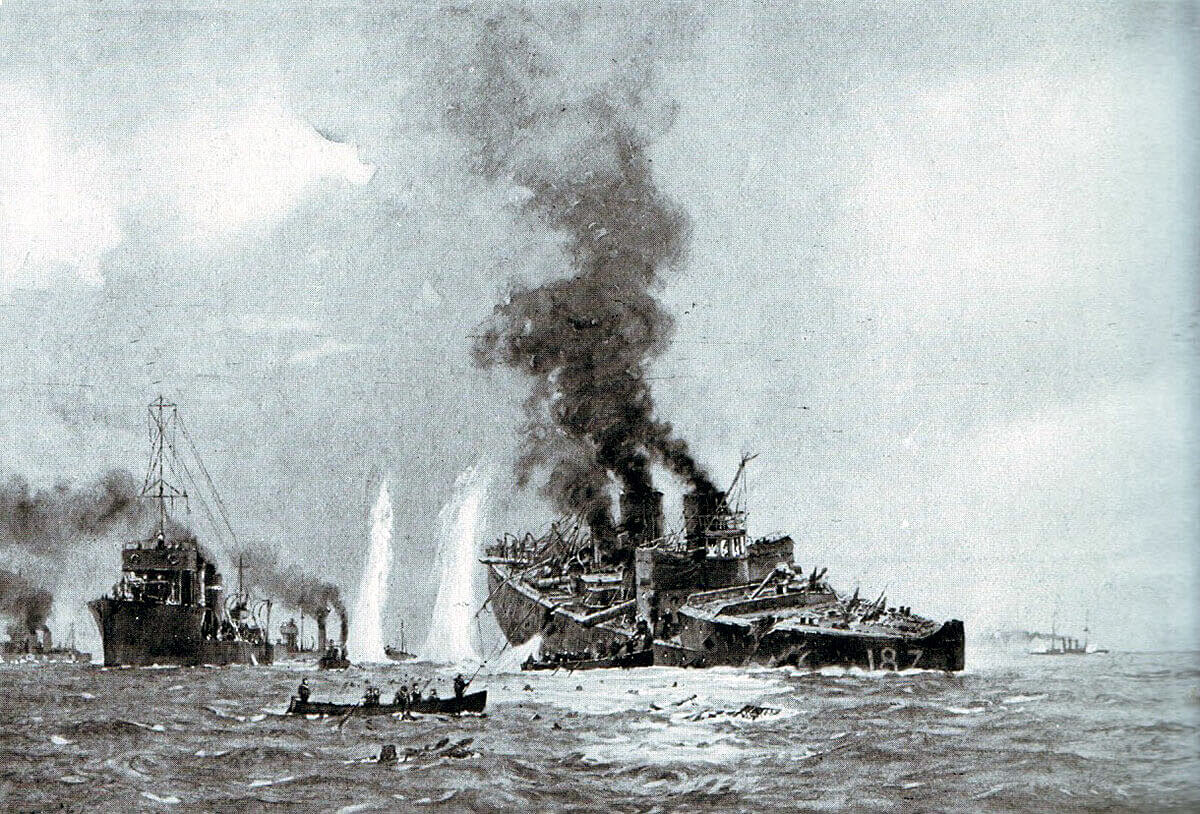
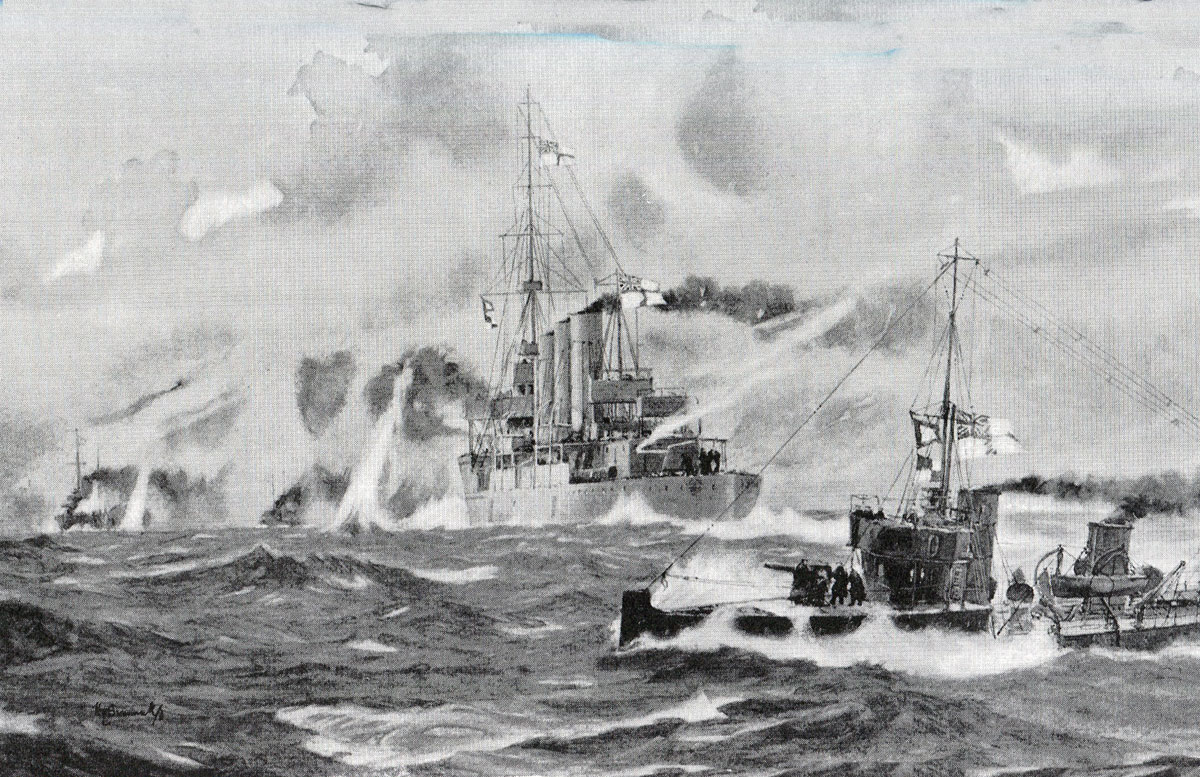
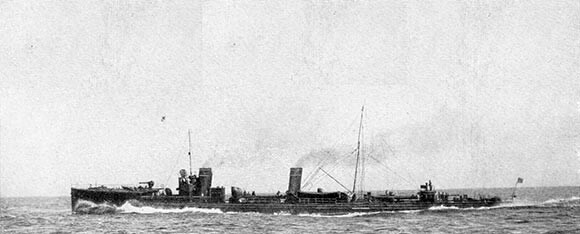
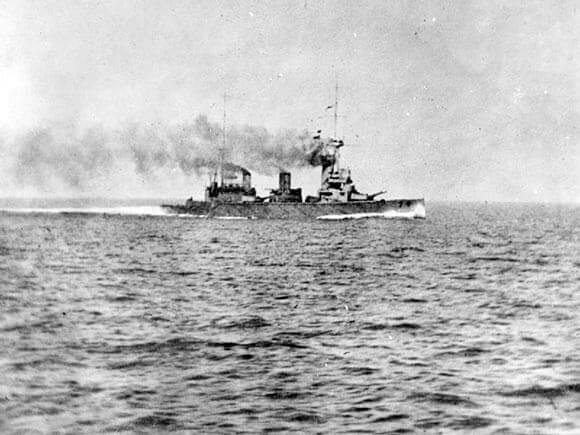
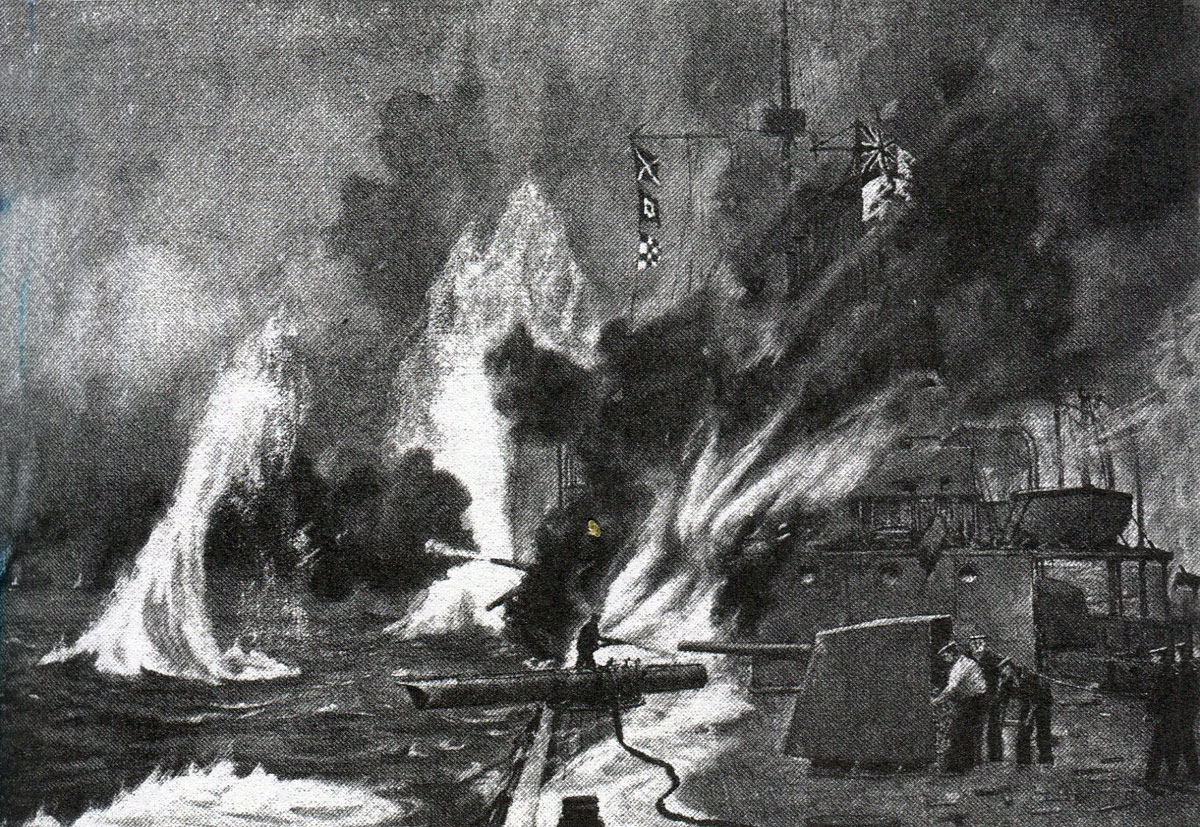
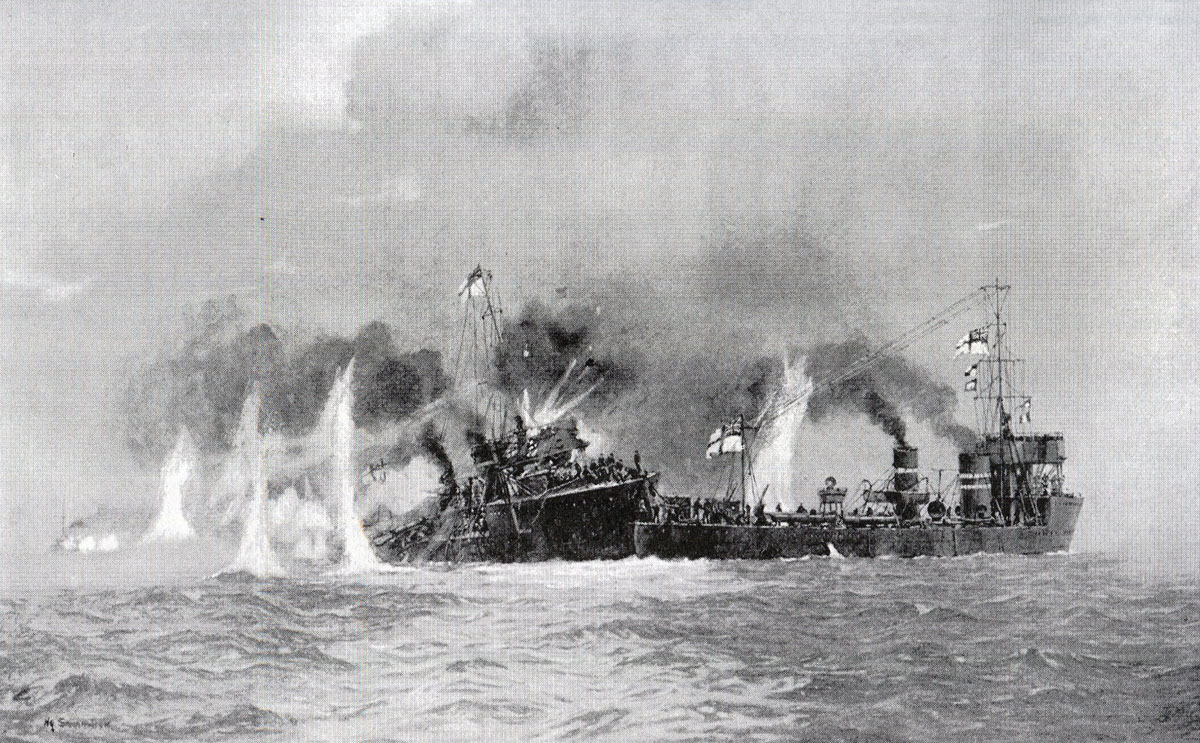
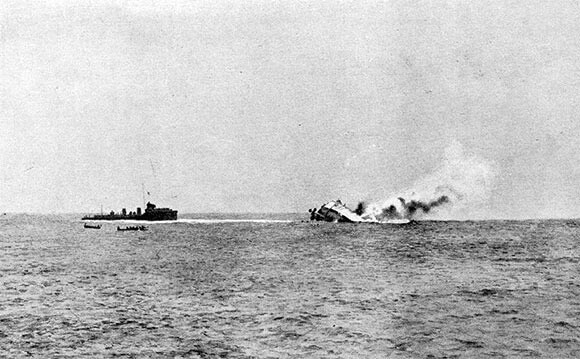
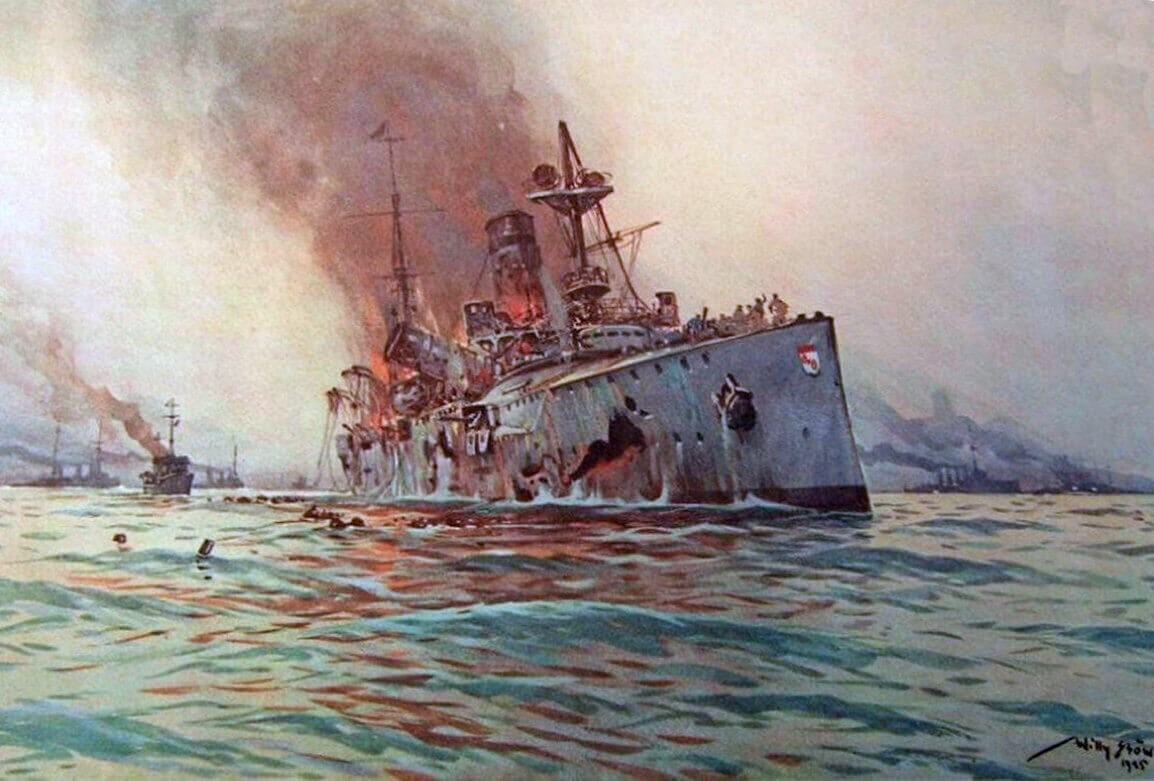
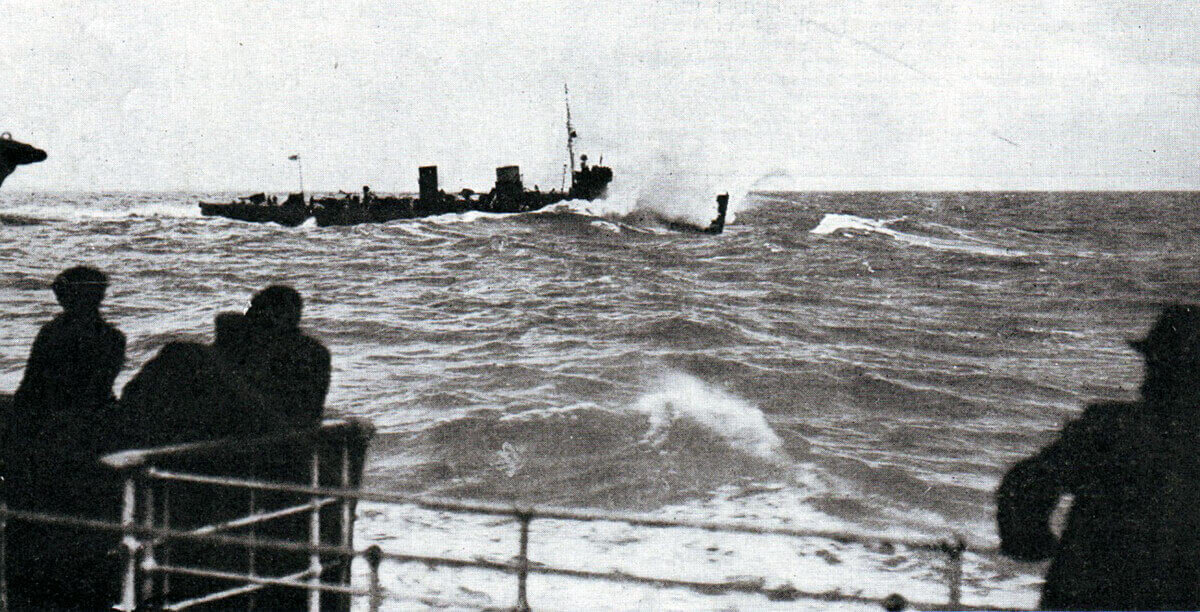
German destroyer V187 sinking during the Battle of Heligoland Bight on 28th August 1914.​
Battle: Heligoland Bight

Date of the Battle of Heligoland Bight: 28th August 1914

Place of the Battle of Heligoland Bight: In the North Sea, to the west of the Island of Heligoland, which guards the entrances to the main German naval bases.

War: The First World War, also known as ‘The Great War’.

www.britishbattles.com
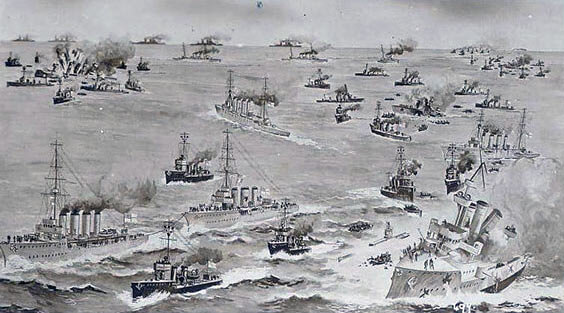


British post card commemorating Battle of Heligoland Bight on 28th August 1914 in the First World War​
Contestants at the Battle of Heligoland Bight: The British Royal Navy against the Imperial German Navy.

Ships involved in the Battle of Heligoland Bight:

Royal Navy ships
Note: In the Royal Navy, the class of ship originally termed ‘torpedo boat destroyer’, by the Great War, was abbreviated to ‘destroyer’. The German navy did not have an equivalent term. The smaller vessels were referred to as ‘torpedo boats’, whether they were what the Royal Navy would have classed as torpedo boats or destroyers. Smaller vessels in the Imperial German Navy were given an initial and a number and not a name, as with Royal Navy submarines.

8th ‘Oversea’ Submarine Flotilla, comprising the destroyers, HMS Lurcher (Commodore Keyes) and Firedrake (both 2 X 4 inch guns), and submarines: D2, D3, E4, E5, E6, E7, E8 and E9.
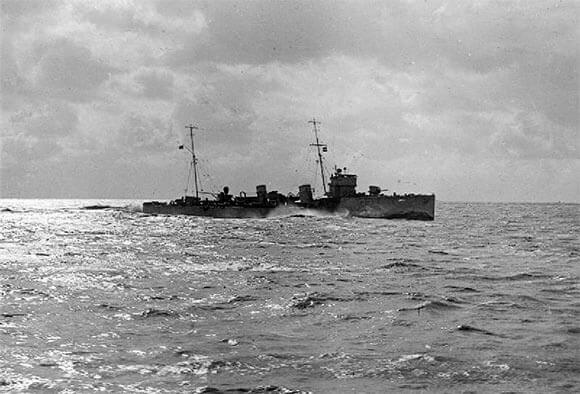


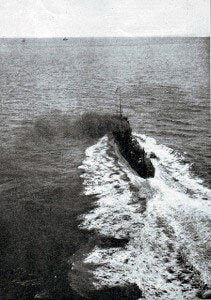
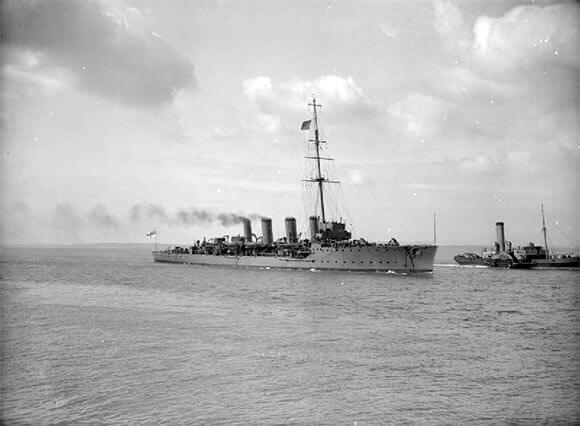
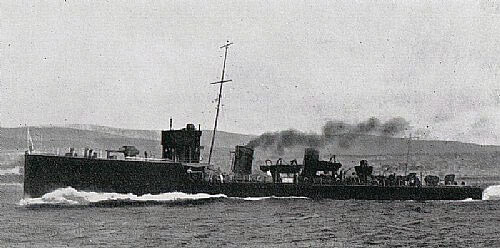
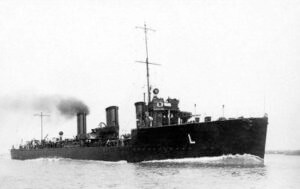
British destroyer HMS Firedrake, one of the two destroyers that acted as ‘flotilla leaders’ for the submarines of 8th ‘Oversea’ Submarine Flotilla, and took part in the Battle of Heligoland Bight on 28th August 1914 in the First World War​
1st Flotilla, comprising HMS Fearless (8 X 4 inch guns) (Captain Blunt), light cruiser, and destroyers: Division 1; Acheron, Attack, Hind and Archer (all 2 X 4 inch guns): Division 2; Ariel (2 X 4 inch guns), Lucifer and Llewellyn (3 X 4 inch guns): Division 3; Ferret, Forester, Druid and Defender (all 2 X 4 inch guns): Division 4; Badger, Beaver, Jackal and Sandfly (all 2 X 4 inch guns): Division 5; Goshawk, Lizard, Lapwing and Phoenix (all 2 X 4 inch guns).
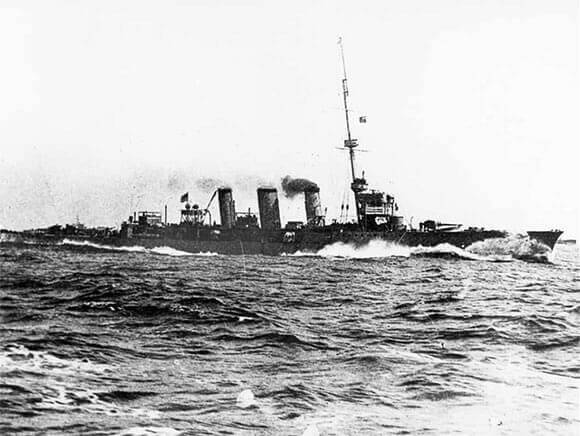


British light cruiser HMS Arethusa, Commodore Tyrwhitt’s flagship in the Battle of Heligoland Bight on 28th August 1914 in the First World War​
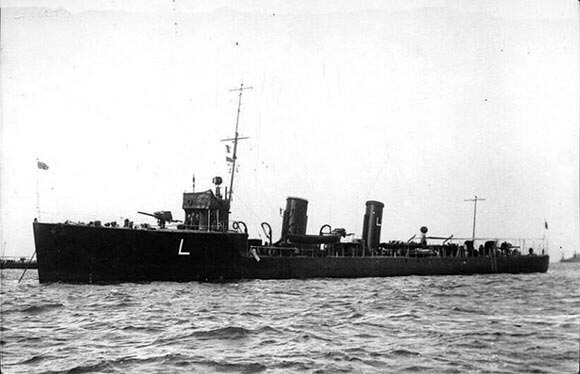
3rd Flotilla, comprising HMS Arethusa, light cruiser (3 X 6 inch and 4 X 4 inch guns) (Commodore Tyrwhitt), and destroyers: Division 1; Lookout, Leonidas, Legion and Lennox (all 3 X 4 inch guns): Division 2; Lark, Lance, Linnet and Landrail (all 3 X 4 inch guns): Division 3; Laforey, Lawford, Louise and Lydiard (all 3 X 4 inch guns): Division 4; Laurel, Liberty, Lysander and Laertes (all 3 X 4 inch guns).


HM Destroyer Lark, one of the ships of the British 3rd Flotilla in the Battle of Heligoland Bight on 28th August 1914 in the First World War​
Light Cruiser Squadron, comprising Division 1; HMS Southampton, (8 X 6 inch guns) (Commodore Goodenough) and Birmingham (9 X 6 inch guns): Division 2; Falmouth (8 X 6 inch guns) and Liverpool (2 X 6 inch and 10 X 4 inch guns): Division 3; Nottingham and Lowestoft (both 9 X 6 inch guns).

Armoured Cruisers: HMS Euryalus (2 X 9.2 and 12 X 6 inch guns) (Admiral Christian) and Amethyst, light cruiser, (2 X 6 inch and 8 X 4 inch guns): HMS Bacchante (Rear-Admiral Campbell), Cressy, Hogue and Aboukir (all 2 X 9.2 inch and 12 X 6 inch guns).
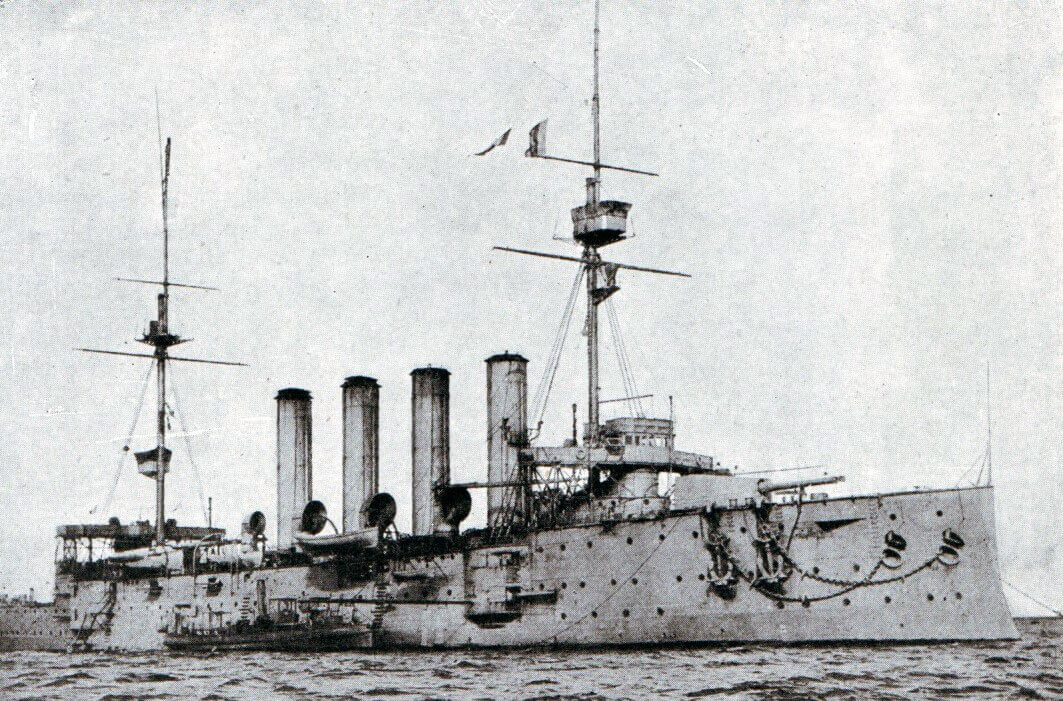


HMS Aboukir, one of the British Armoured Cruisers that took part in the Heligoland Bight operation on 28th August 1914. Aboukir, Cressy and Hogue were all sunk by the German submarine U9 on 22nd September 1914: Battle of Heligoland Bight on 28th August 1914 in the First World War​
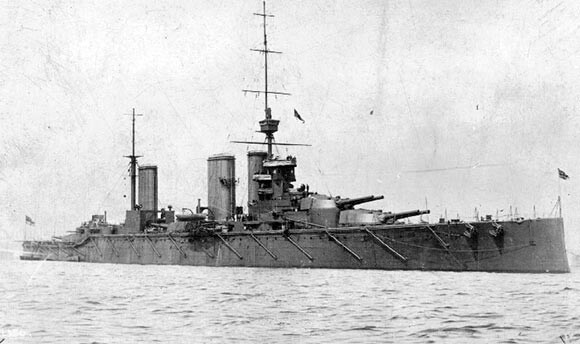
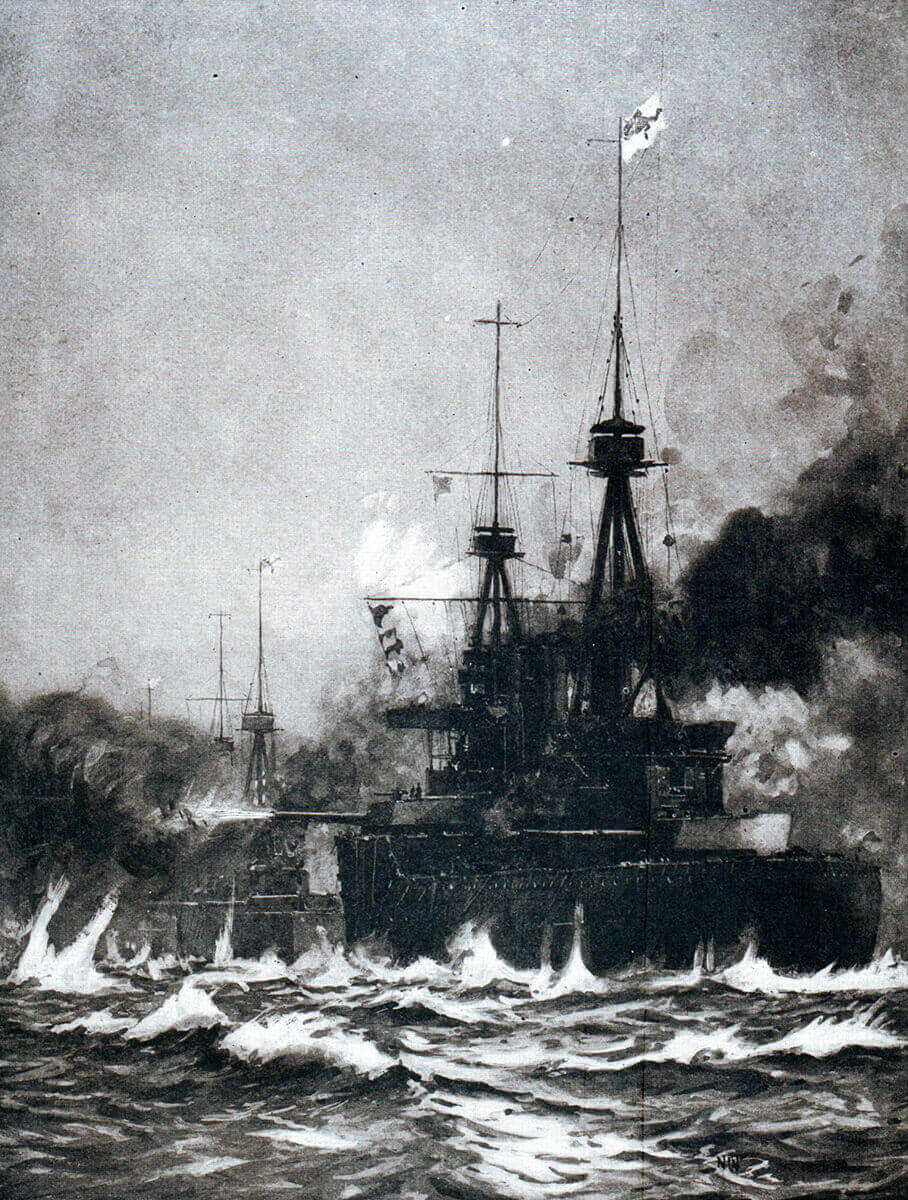
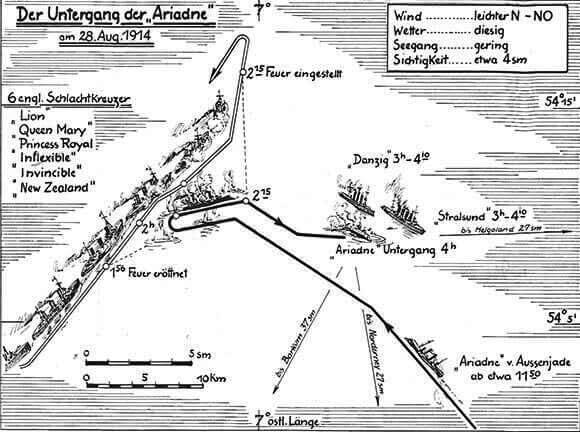
Battle Cruisers: HMS Invincible and New Zealand (both 8 X 12 inch and 12 X 4 inch guns) from the Humber (Hull) and HMS Lion (Admiral Beatty), Queen Mary and Princess Royal (all 8 X13.5 inch guns).
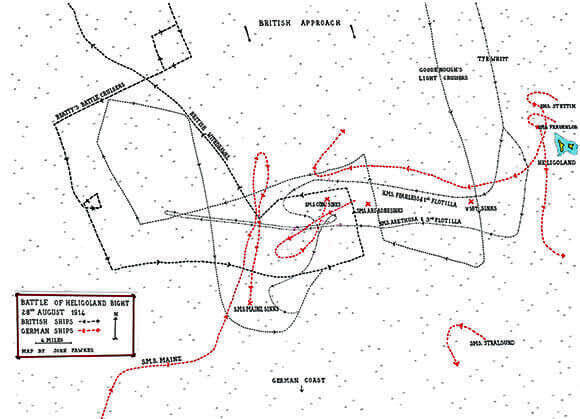


Map of the Battle of Heligoland Bight on 28th August 1914 in the First World War: map by John Fawkes​
German ships:
Outer Patrol Line
I Torpedo Boat Flotilla
V187 (Commander Wallis), V188, V189, V190, V191, G197, G196, G193 and G194.

Inner Patrol Line
III Minesweeping Division
D8 (Lieutenant-Commander Wolfram), T25, T29, T31, T33, T34, T35, T36, T37, T49, T71 and S73.

Reinforcement
V Torpedo Boat Flotilla
G12 (Commander von dem Knesebeck), V1, V2, V3, V6, S13, G7, G9, G10 and G11.
(V187 and the other destroyers probably all 2 X 8cm guns),

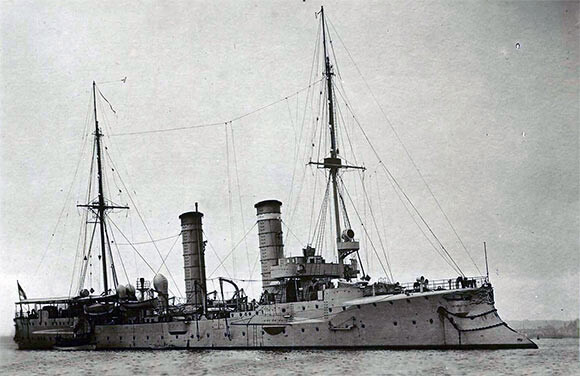
Light Cruisers: SMS Stettin (10 X 10.5 cm guns), Frauenlob (10 x 10.5 cm guns), Stralsund (12 X 10.5 cm guns), Mainz (12 X 10.5 cm guns), Cöln and Ariadne (10 X 10.5 cm guns). (10.5cm = 4.1 inches).
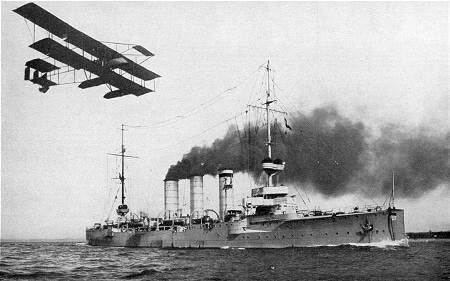


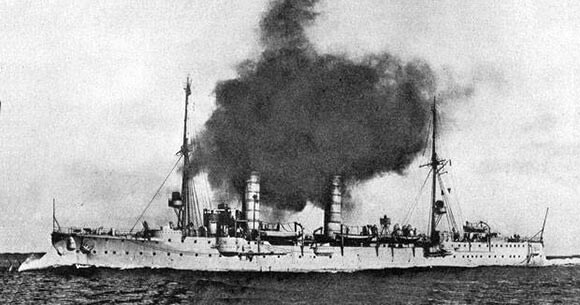
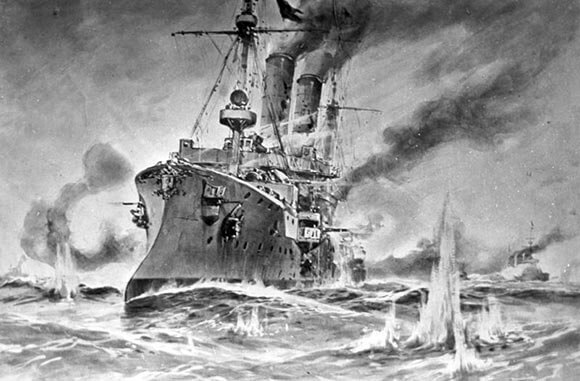
German light cruiser SMS Cöln, flagship of Admiral Maass in the Battle of Heligoland Bight on 28th August 1914 in the First World War, sunk by Admiral Beatty’s battle cruisers​
All ships were equipped with ancillary armaments, including anti-aircraft guns and torpedo tubes.

With engines powered by coal, or in the case of the more modern ships oil, speeds of around 25 knots were achievable by the battle cruisers and newer light cruisers and destroyers, with the older ships significantly slower depending on their condition.

Communication was by radio, known then as wireless.

Guns were capable of firing up to several miles, but gun control was by sight.
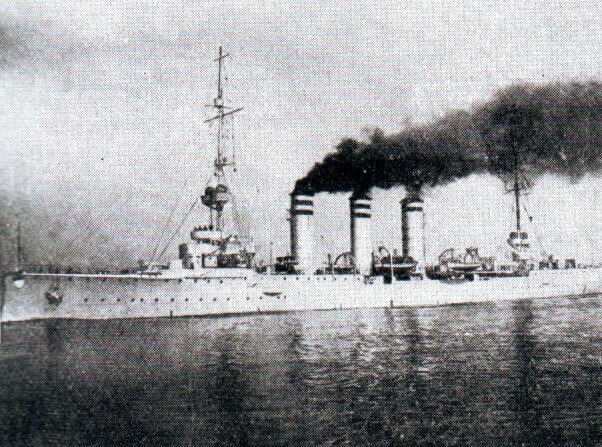


SMS Mainz, the German light cruiser sunk during the Battle of Heligoland Bight on 28th August 1914 in the First World War​


Commodore Reginald Tyrwhitt RN, commander of 1st and 3rd Destroyer Flotillas in the Battle of Heligoland Bight on 28th August 1914 in the First World War​


Admiral Maass, commander of the German light cruiser squadron in the Battle of Heligoland Bight on 28th August 1914 in the First World War. Maas went down with SMS Cöln, sunk by Admiral Beatty’s battle cruisers​
Commanders at the Battle of Heligoland Bight:There was no clear command structure for the British ships. Commodore Tyrwhitt commanded the force of destroyers that conducted the sweep.

Commodore Keyes commanded the decoy submarines from his destroyer, HMS Lurcher. Rear Admirals Christian and Campbell commanded the supporting cruisers, which took no active part.

Rear Admiral Beatty commanded the battle cruisers, with Commodore Goodenough commanding the light cruisers, from the Grand Fleet.

The German Guard Flotilla was commanded from V187 by Commander Wallis.

Rear Admiral Leberecht Maass commanded the supporting light cruisers from SMS Cöln.

Winner: While several British ships were damaged by gunfire, none were sunk; three German ships were sunk; a British victory.

Background to the Battle of Heligoland Bight:
In the years preceding the First World War, as it became clear that the likely British adversary would be Germany, not, as in previous wars, France or Spain, the Royal Navy changed its home focus from facing south-west and west to facing south-east. The next naval war would primarily be fought against Germany in the North Sea.


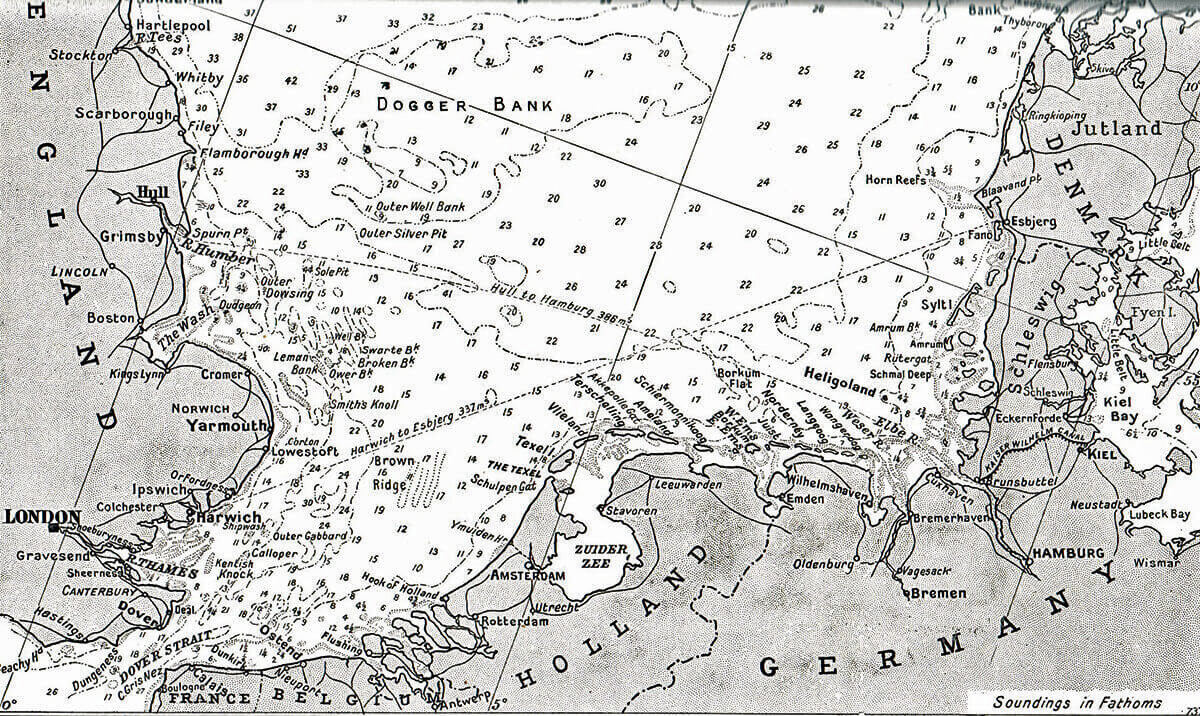
Map of the continental North Sea coast: Battle of Heligoland Bight on 28th August 1914 in the First World War​
The Royal Navy established presences in several east coast ports: Harwich, Hull, Rosyth, and built a new fleet base at Scapa Flow in the Orkney Islands. A fleet refuge for the Grand Fleet was constructed at Gairloch on the west coast of Scotland.

The German Imperial High Seas Fleet based itself in the group of ports situated on the German North Sea coast, to the south west of Denmark, in a number of estuaries; the main ports being Emden, Wilhelmshaven, Bremerhaven and Cuxhaven.

Access to the Baltic Sea from these ports was established by building the Kiel Canal.


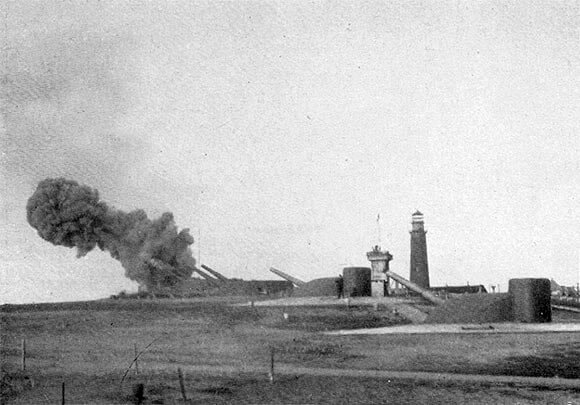
Fortifications on the German island of Heligoland in 1914: Battle of Heligoland Bight on 28th August 1914 in the First World War​
Various islands provided protection for the network of German naval bases, the most important being the heavily fortified Heligoland. The recessed area of German coastline, in which several of the bases lay, is known as the ‘Heligoland Bight’. The Island of Heligoland lies mid-way across the opening to the Bight, fifty miles out to sea.

The German North Sea coast is relatively short, around 150 miles in length, along the west-east stretch, where these harbours lie, and then another 150 miles up the south-north stretch to the Danish border. Wilhelmshaven is on the same latitude as Manchester.

British naval forces approaching from Harwich had to sail for around 250 miles north-north-east, to reach the German coast. Ships from Scapa Flow, base to the British Grand Fleet, and Scotland faced a voyage of around 500 miles, travelling south-east, to reach the German coast.


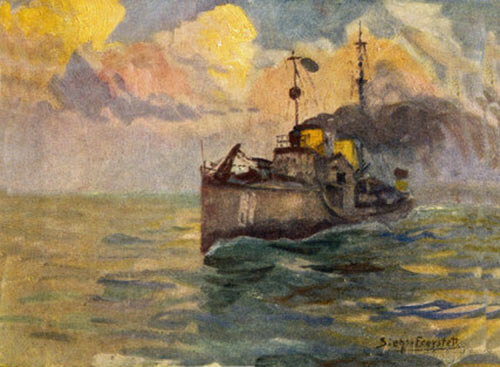
German destroyer at sea: Battle of Heligoland Bight on 28th August 1914 in the First World War: picture by JG Siehl Freystett​
With Britain’s declaration of war on Germany at midnight on 4th/5th August 1914, and the despatch of the four divisions of the British Expeditionary Force (BEF) to France between 12th and 17th August, the Royal Navy was required to mount a substantial operation, to shield the ships conveying the troops across the English Channel from German attack.

At the end of the month, it became necessary to extract the Royal Marine brigade, sent to Ostend, to evade the advancing German army. Again substantial Royal Navy cover was required for the operation.

The plan for the Heligoland Bight attack was already under consideration, with the additional reasons for the attack being that a diversion would be useful to dissuade the German Fleet from intervening in the Ostend operation, and then the operation to cover the Channel crossing of the 4th Division of the BEF (joining the 1st, 2nd, 3rd, 5th and Cavalry Divisions), followed by additional army reinforcements.

From the outset of the war, a routine of patrolling the area outside the German fleet bases was established by the British Royal Navy’s 8th ‘Oversea’ Submarine Flotilla, commanded by Commodore Keyes (HMS Lurcher), and operating from Harwich. The German Imperial Navy responded with submarine and destroyer patrols.


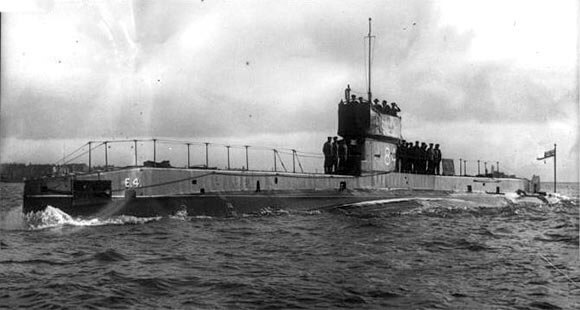
British submarine HMS E4, one of the vessels from 8th ‘Oversea’ Submarine Flotilla, based in Harwich, that routinely patrolled in the Heligoland Bight and acted as ‘bait’ in the Heligoland Bight operation on 28th August 1914. E4 was commanded by Lieutenant Commander Leir (see Anecdotes). She rescued the crew of HMS Dolphin’s whaler: Battle of Heligoland Bight on 28th August 1914 in the First World War​


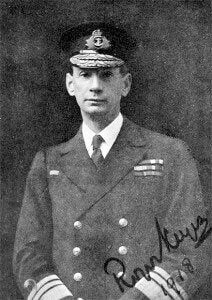
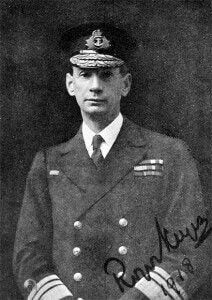
Commodore Roger Keyes RN as Rear Admiral RN in 1918. Keyes commanded the 8th ‘Oversea’ Submarine Flotilla, based at Harwich and devised the plan for the Heligoland Bight operation. Keyes was present during the Battle of Heligoland Bight on 28th August 1914 in the First World War on HMS Lurcher​
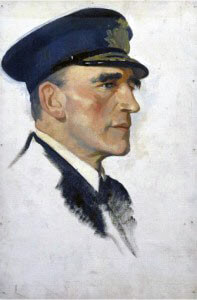
The British submarines established that the German navy mounted a patrol by destroyers, moving out from Heligoland each evening to the west and north-west, and returning at dawn.

These destroyers were led out and met by light cruisers. A daytime patrol covered the same area, with much the same pattern. There was further routine German ship movement around dawn.

Commodore Keyes devised a plan to attack the German night patrol as it returned in the morning, using significantly larger forces to overwhelm the German ships.

Keyes’ plan was accepted by the British Admiralty, except that it was decided to carry out the operation against the German day patrol of destroyers and light cruisers.

These German ships were to be lured out to sea by a small number of British submarines, and then attacked by a large formation of British destroyers and light cruisers, supported by battle cruisers, the whole force coming from the east coast English bases.

British submarines were to take position off the German coast. More submarines were to show themselves and lure the German destroyer patrols out to sea. The British 1st and 3rd Flotillas (fifteen and sixteen destroyers), each led by a light cruiser and based in Harwich, would carry out the attacks on these German vessels.

The submarines would attack any German ship that left harbour during the operation and returned to harbour at the end.

The two battle cruisers from the Humber, HMS Invincible and New Zealand, would provide immediate support to the 1st and 3rd Flotillas.


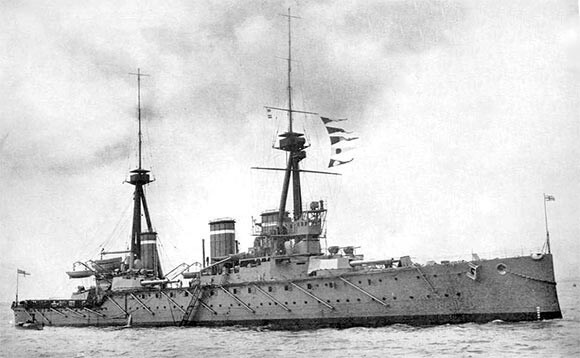
British battle cruiser HMS Invincible, one of the two battle cruisers initially allocated to support the light cruisers, destroyers and submarines conducting the sweep in the Battle of Heligoland Bight on 28th August 1914 in the First World War​
Two supporting cruiser squadrons (Rear Admirals Christian and Campbell) would lie off Terschelling on the Dutch coast, and intervene if needed.

On 25th August 1914 the Ostend evacuation was ordered and it was decided to carry out the attack on the German naval patrols in the Heligoland Bight on 28th August.


British battle cruisers HMS Lion, Princess Royal and New Zealand: Battle of Heligoland Bight on 28th August 1914 in the First World War: picture by AB Cull​
On 27th August when the British naval units were at sea and moving into position for the attack, the Commander-in-Chief of the Grand Fleet at Rosyth decided to send Admiral Beatty with his three battle cruisers, HMS Lion, Queen Mary and Princess Royal, and Commodore Goodenough with his six light cruisers, HMS Southampton, Birmingham, Falmouth, Liverpool, Nottingham and Lowestoft, to support the British attack.


Rear Admiral David Beatty RN. Beatty’s battle cruiser squadron was despatched by the Commander-in-Chief of the Grand Fleet, to provide support for the Battle of Heligoland Bight on 28th August 1914 in the First World War. Beatty’s ships were crucial in winning the battle, sinking the German light cruisers Cöln and Ariadne​
The radio messages giving this late decision reached Admiral Christian, but did not reach the commodores commanding the destroyers and submarines, with the result that the Grand Fleet ships were nearly attacked by the British force when they arrived at the rendezvous.

The submarines could not be contacted and warned of the additional British ships in the area at any stage in the operation. This led to considerable difficulty and constrained the use of the Grand Fleet ships.


A British destroyer at sea photographed from an RNAS aircraft: Battle of Heligoland Bight on 28th August 1914 in the First World War​
Account:
By 4am on 28th August 1914 the British submarines were in position: E6, E7 and E8 on a north-south line 30 miles west of Heligoland Island; D2 and D3 on a north-south line south-west of Heligoland and E4, E5 and E9 around the island. All were on the surface to act as ‘bait’, to lure the German ships from harbour.

The plan was that the two British destroyer flotillas, after the approach to the area north of Heligoland, would turn south and steam to a point twelve miles to the west of Heligoland, with the battle cruisers to their starboard, reaching this point at 8am on 28th August 1914 and then turn west and begin the sweep to catch the German destroyers lured out to sea by the British submarine line.

The Germans were warned of the presence of a significant British force off their coast by the increased radio traffic late on 27th and early on 28th August.

The German navy implemented its own plan, which was the converse of the British; to deploy destroyers to lure any approaching British ships nearer the German shore and attack them with light cruisers.

This plan clearly did not anticipate the presence of British ships of the force of battle cruisers, as the Germans were unable to put their own battle cruisers to sea until after the battle was over and the British had retired.

The weather was calm and misty, causing problems with observation and identification.

Commodore Tyrwhitt led the British approach in HMS Arethusa, a modern light cruiser, with the 3rd Flotilla (sixteen destroyers), followed, a mile astern, by the destroyers of 1st Flotilla (fifteen ships), headed by the light cruiser HMS Fearless.


British light cruiser HMS Fearless. Fearless led the 1st Destroyer Flotilla in the Battle of Heligoland Bight on 28th August 1914 in the First World War​
Eight miles astern of the destroyers were Goodenough’s six light cruisers.

The five battle cruisers, led by Beatty, steamed on the starboard flank of the destroyers.

At 7am a German destroyer appeared 3 ½ miles to the south east of the British. It turned and headed into the Heligoland Bight, pursued by the four destroyers of Tyrwhitt’s 4th Division, where more German destroyers appeared. The two groups fired on each other at extreme range.


HMS Arethusa and the Harwich Destroyers engage German Torpedo Boats in the Battle of Heligoland Bight on 28th August 1914 in the First World War​
All the ships involved, British and German, were at this point to the north-west of the Island of Heligoland.

More German destroyers appeared and Tyrwhitt at 7.40am turned two points to port and pursued both groups with his two British destroyer flotillas, firing at extreme range, although observation was hindered by the mist.

Operations throughout the day were hampered by the patches of mist, ships appearing and disappearing in the changing conditions.

This pursuit continued for around an hour, when at 8am, two German light cruisers, SMS Stettin and Frauenlob, came up on Tyrwhitt’s port side, converging with the British ships.


German light cruiser SMS Frauenlob, one of the German ships that attacked the British destroyers in the Battle of Heligoland Bight on 28th August 1914 in the First World War​
Tyrwhitt’s ship Arethusa engaged the German light cruisers supported by the destroyers, but quickly received damage from the gunfire of the two German ships.

At around 8.15am Blunt in the British light cruiser HMS Fearless, came up with the British 1st Destroyer Flotilla and engaged Stettin, which turned away towards Heligoland pursued by Blunt’s ships.


German light cruiser SMS Stettin, one of the German ships that attacked the British destroyers in the Battle of Heligoland Bight on 28th August 1914 in the First World War​
Tyrwhitt continued to engage Frauenlob, which steamed away to the south. Tyrwhitt’s ship Arethusa suffered significant damage with most of her guns out of action.

Some of the British destroyers engaged a tramp steamer attempting to lay mines in front of the Arethusa and others shot up a German torpedo boat.

At around 8.10am Tyrwhitt signalled the 1st Flotilla to begin the sweep to the West. Blunt took Fearless and his destroyers off on the sweep, while Tyrwhitt continued to engage Frauenlob.


HMS Arethusa engages SMS Stettin and Frauenlob in the Battle of Heligoland Bight on 28th August 1914 in the First World War​
Frauenlob received a hit under the fore bridge, and made off towards Heligoland, heavily damaged. Tyrwhitt turned to join the westward sweep at around 8.30am.

Both British destroyer flotillas were now steaming west, away from the Island of Heligoland. Blunt’s 1st Flotilla, led by the light cruiser Fearless, was fifteen minutes into the sweep, further north and to the west of Tyrwhitt’s 3rd Flotilla.

Soon after beginning the sweep the 1st Flotilla encountered the German destroyer V187 . Blunt’s ships fired on V187, but then fearing the ship might be Commodore Keyes in HMS Lurcher Blunt permitted V187 to steam away to the south-west.

V187 then appears to have seen the two British light cruisers, Nottingham and Lowestoft, and turned back to the north, where she encountered the eight British destroyers of 1st Flotilla’s 3rd and 5th Divisions. The British destroyers opened fire on V187 and after putting up a strenuous resistance V187 was sunk.


German Torpedo Boat V187, sunk by Blunt’s destroyers during the westward sweep in the Battle of Heligoland Bight on 28th August 1914 in the First World War​
At this point Admiral Beatty with the battle cruisers was in a position some fifty miles to the west-north-west of the Island of Heligoland. Commodore Goodenough with his light cruisers was in position west-south-west of Heligoland. Goodenough had detached HMS Nottingham and Lowestoft to assist Tyrwhitt in the fight with Stettin and Frauenlob. The rest of his squadron saw and pursued a number of German destroyers, all of which escaped in the mist.


British light cruiser HMS Lowestoft, part of Commodore Goodenough’s light cruiser squadron in the Battle of Heligoland Bight on 28th August 1914 in the First World War​
During this period, 8 to 9am, an incident occurred that might have been disastrous for the British force. Commodore Keyes in the destroyer HMS Lurcher (Keyes commanded the submarine flotilla) was checking the area over which the battle cruisers HMS Invincible and New Zealand were due to pass for German submarines. Keyes was unaware that battle cruisers and light cruisers from the Grand Fleet had joined the British force. Keyes saw 2 ships in the mist, which were probably Nottingham and Lowestoft.

Keyes followed them and signalled the presence of German ships to the two battle cruisers.
Goodenough also heard Keyes’ signal and steamed up to assist Keyes.

Keyes saw Goodenough’s ships approaching in the mist and being unaware of their presence in the force reported that there were four German cruisers and that he was pursued and attempting to lure them towards Invincible and New Zealand.


British battle cruiser HMS New Zealand during the Battle of Heligoland Bight on 28th August 1914 in the First World War​
Goodenough turned away to the West, where he encountered a British submarine in the screen, which he attempted unsuccessfully to sink.

By about 9.05am all the British ships, whether aware of each other’s presence or not, had turned west and joined the sweep, except for Nottingham and Lowestoft which failed to receive the radio message.

There was then another hitch at around 9.45am, when Tyrwhitt received a further message that HMS Lurcher was being chased. He stopped his destroyer’s progression west and headed back towards the east to look for Lurcher with 1st and 3rd Flotillas.


6 inch gun in action on HMS Arethusa in the Battle of Heligoland Bight on 28th August 1914 in the First World War​
SMS Stettin appeared from the east, was pursued by Tyrwhitt and disappeared into the mist.

Approaching Heligoland, Tyrwhitt was rejoined by 3rd and 5th Divisions of his flotilla, with reports that they had sunk V187 at around 9am. During this action a German light cruiser, probably the Stettin, had appeared and intervened. The effect of this intervention, although too late to save V187, already sinking, was to force the British destroyers hastily to leave the area, abandoning many of the German survivors still in the sea.

In addition HMS Defender, under heavy fire from Stettin, was forced to leave her whaler which was rescuing German seamen. The British crews of two small boats were later recovered by HMS E4, which had been watching the fight. E4 made an unsuccessful attempt to torpedo the Stettin.

E4 surfaced at 10.10am took off the British seaman and selected three prisoners, treated the German wounded, supplied the remaining German seamen and gave them the correct course for Heligoland, before submerging.


British destroyer HMS Lurcher, flagship of Commodore Keyes RN in the Battle of Heligoland Bight on 28th August 1914 in the First World War​
Tyrwhitt despatched his 1st flotilla, now complete with the 3rd and 5th Divisions, to resume the sweep to the west, retaining the 3rd Flotilla while he carried out emergency repairs to his own ship, HMS Arethusa.

Goodenough and Keyes had by this time sorted out the muddle over the presence of Goodenough’s light cruiser squadron and Beatty’s battle cruisers.

There was however no way of informing the British submarines of the presence of the British light cruiser squadron and it was decided that Goodenough’s ships should withdraw from the area rather than risk an attack upon them by British submarines.


Commodore Goodenough’s Light Cruiser Squadron goes into action in the Battle of Heligoland Bight on 28th August 1914 in the First World War​
At around 10.40am Commodore Tyrwhitt had completed sufficient repairs on Arethusa to bring several of her guns back into commission. Arethusa, Fearless and the destroyers of the 3rd Flotilla re-commenced the sweep to the west, away from Heligoland to which they were dangerously close.

Within ten minutes a German cruiser was spotted sailing up from the south-east towards the North. It proved to be SMS Stralsund which opened accurate and heavy fire on the damaged Arethusa, now, due to the damage received, capable of only ten knots.


German light cruiser SMS Stralsund, passing through the Kiel Canal. Stralsund was one of the German ships that attacked the British destroyers in the Battle of Heligoland Bight on 28th August 1914 in the First World War​
Tyrwhitt called Blunt to his aid and Fearless and the 1st destroyer flotilla turned to assist in the attack on the Stralsund. Stralsund was hit and sheered off towards Heligoland. Tyrwhitt, fearing a trap, did not follow the German light cruiser.

While the action involving Stralsund was in progress, the 3rd Flotilla turned back towards the sound of gunfire. Tyrwhitt came up with Fearless and the sweep to the west was resumed by both flotillas.


British destroyers rescuing the crew of V187 during the Battle of Heligoland Bight on 28th August 1914 in the First World War​
At this point SMS Stettin re-appeared from the east and opened fire on Fearless. The two British light cruisers turned back and the three cruisers began to fight it out, the British destroyers continuing the sweep to the west.

At 11.15am the destroyers of the 3rd Flotilla decided to support the two British cruisers and turned back towards Heligoland, heading for the sound of gunfire. As they approached Tyrwhitt signalled them to attack the Stettin with torpedoes. Tyrwhitt also radioed to Beatty for assistance.


British destroyers engaging SMS Mainz during the Battle of Heligoland Bight on 28th August 1914 in the First World War: picture by Lionel Wyllie​
At 11.30am the Stettin withdrew from the fight, but was replaced by Stralsund, which re-appeared from the north and opened a heavy and accurate fire on Arethusa, damaging her further. Tyrwhitt repeated his call to Beatty for assistance.

The destroyers of the 3rd Flotilla raced to attack Stralsund with torpedoes. Although they did not achieve any hits, Stralsund turned away and again broke off action.

At 11.15am the 1st Flotilla, which was continuing to the west, saw a ship approaching from the south-west. This was the German light cruiser SMS Mainz, which had been seen by the British submarine D2 to leave Borkum in the Ems Estuary and make off at high speed to the east, heading towards Heligoland.

During the course of this voyage Mainz was ordered to go to the assistance of Stralsund and turned to the north-east, meeting the British destroyers of the 1st Flotilla heading westwards.


British destroyer HMS Liberty; one of the destroyers of 4th Division of 1st Destroyer Flotilla, heavily damaged by gunfire from SMS Mainz during the Battle of Heligoland Bight on 28th August 1914 in the First World War​
The divisions of the 1st Flotilla turned to the north to put themselves in line ahead for an attack on Mainz, now sailing north. Before this attack could develop, Commodore Goodenough’s four light cruisers appeared from the west, and opened fire on Mainz. Heavily outnumbered, Mainz turned to the south to make her escape.

The 3rd Flotilla had formed up on Arethusa to resume the westward sweep when the Mainz appeared, heading across their front to the south to escape from the fire of the British light cruisers of Goodenough’s squadron, which were closing in from its starboard quarter on a converging course.


British light cruiser HMS Arethusa limps into Harwich after the Battle of Heligoland Bight on 28th August 1914 in the First World War: picture by FL Blanchard​
Arethusa and Fearless turned towards the south, and opened fire on the Mainz, signalling to the destroyers to engage the German ship. The British destroyers turned to attack. The position of the 4th Division put it nearest to the Mainz and the 4 destroyers of that division received a destructive fire from the Mainz: Laurel fired two torpedoes and was then hit by a salvo, Liberty was hit and her captain killed, Lysander was not hit and Laertes was hit by every shell from a salvo, bringing her to a complete stop.


British destroyer HMS Laertes, one of the destroyers of 4th Division of 3rd Destroyer Flotilla, heavily damaged by gunfire from SMS Mainz during the Battle of Heligoland Bight​
Mainz avoided the torpedo attack from the destroyers, but was suffering badly from the gunfire of Arethusa and Fearless.Mainz turned towards the British destroyers, but was met with a heavy fire and a further torpedo attack, with one or possibly two hits. Mainz turned back towards the south to get away, but was now heading towards the closing British light cruisers of Goodenough’s squadron.

The fire from Arethusa, Fearless and the destroyers was proving decisive and Mainz’ engines failed, bringing her to a halt. Tyrwhitt signalled his ships to resume the sweep to the west, leaving the Mainz to Goodenough’s light cruiser squadron.

Goodenough’s ships opened fire on the German light cruiser. In a few minutes Mainz was a blazing wreck and at 12.50pm she struck her colours.


HMS Lapwing of 1st Flotilla attempting to take HMS Laertes of 3rd Flotilla in tow during the Battle of Heligoland Bight on 28th August 1914 in the First World War​
After leaving Mainz, Tyrwhitt’s ships began to receive fire from the north. Arethusa caught sight of Stralsund through gaps in the mist, returning to the attack, and fired on her. Fearless moved across Arethusa’s stern to assist the destroyers of her 4th Division after the pounding they had received from Mainz.

As she did so, Fearless saw a further two German light cruisers coming down from the north-east, SMS Cöln, flying the flotilla admiral’s flag, followed by Stettin. Further to the rear was the German light cruiser, SMS Ariadne.


The sinking of the German light cruiser SMS Mainz during the Battle of Heligoland Bight on 28th August 1914 in the First World War; photograph taken from the deck of a British light cruiser​
Arethusa and Fearless with the destroyers of the 3rd Flotilla and the 4th Division of the 1st Flotilla were now in serious difficulty, under attack by the three German light cruisers.


Commodore Goodenough’s Light Cruiser Squadron at the Battle of Heligoland Bight on 28th August 1914 in the First World War​
Admiral Beatty, commanding all five of the battle cruisers, had decided to follow the light cruisers of Commodore Goodenough’s squadron into the battle area, to provide further support in case it should be needed. It was a difficult decision as it took his valuable ships nearer to the German coast and into an area where there were likely to be submarines, both German and, unfortunately, British submarines that were unaware of the presence of his ships and might well attack him.


British battle cruiser HMS Lion, Rear Admiral Beatty’s flagship at the Battle of Heligoland Bight on 28th August 1914. The three ships of Beatty’s battle cruiser squadron, from the Grand Fleet based at Scapa Flow in the Orkneys, were sent to assist in the Battle of Heligoland Bight on 28th August 1914 in the First World War. Their presence proved decisive, the ships sinking the German light cruisers, SMS Cöln and Ariadne​
When Beatty heard the firing further to the east, where Tyrwhitt’s ships heavily outgunned were combating the three German light cruisers. Beatty turned towards the firing with Goodenough’s ships, less Liverpool which was left to assist in recovering the survivors from Mainz.


Beatty’s battle cruisers arriving in the nick of time at the Battle of Heligoland Bight on 28th August 1914 in the First World War: picture by Lionel Wyllie​
As Arethusa and Fearless fought the three German light cruisers Beatty’s five battle cruisers loomed out of the mist from the west, followed by Goodenough and the rest of the 1st Flotilla.


Beattie’s battle cruisers in action at the Battle of Heligoland Bight on 28th August 1914 in the First World War​
As soon as the leading British battle cruiser HMS Lion appeared, Cöln and Stettin turned and headed east. The five British battle cruisers pursued and slowly overhauled the two German ships. Course was altered and a devastating fire opened from the British heavy guns, hitting Cöln.

Beatty was then notified by Arethusa of the presence of another German ship, SMS Ariadne. Beatty could not divide his force, in view of their precarious position so near to the main German naval bases. Beatty altered course with the whole force to intercept the Ariadne, leaving Cöln limping towards Heligoland.


German light cruiser SMS Ariadne, sunk by Beatty’s battle cruisers during the Battle of Heligoland Bight on 28th August 1914 in the First World War​
Ariadne was intercepted and quickly sunk by salvos from the heavy guns of the British battle cruisers. Beatty then returned to where Cöln had last been seen. Cöln had made little progress. At 1.25pm the mist lifted to reveal the badly damaged German light cruiser. Two salvos were sufficient to sink the Cöln.


German light cruiser SMS Ariadne under attack by Beatty’s battle cruisers and about to sink during the Battle of Heligoland Bight on 28th August 1914 in the First World War​
The British destroyers attempted to rescue the German survivors from the Mainz. In the end Keyes laid Lurcher alongside the German cruiser, in order to take off the wounded lying on the deck. Mainz capsized and went down very suddenly, narrowly missing the Lurcher. The German flotilla admiral, Admiral Maass, was lost with 380 crew.


German light cruiser SMS Mainz sinking during the Battle of Heligoland Bight on 28th August 1914 in the First World War. The ship on the left is HMS Lurcher taking off German survivors. The boats are from HMS Liverpool​
Aftermathto the Battle of Heligoland Bight:
Once the battle was finished, the British ships withdrew from the area to their home bases. Arethusa had to be taken in tow by the cruiser Hogue.

German battle cruisers arrived in the area at some stage after the British withdrawal. The survivors of the Ariadne were rescued from the sea by the battle cruiser Von der Tann.

It is thought that the loss of three light cruisers and a destroyer as against no British ship losses, caused the Kaiser to restrict the actions of the German High Seas Fleet.

The battle raised British naval morale and put in serious doubt the German claim that their navy was the coming force, attacked successfully as they had been in their own ‘back yard’.


German plan of the final stage of the Battle of Heligoland Bight on 28th August 1914 in the First World War, showing the sinking of the German light cruiser SMS Ariadne. The plan is wrong in giving the presence of HMS Inflexible. Inflexible was in the Mediterranean Fleet​
Winston Churchill wrote of the battle: “Henceforward the weight of British naval prestige lay heavy across all German sea enterprises …. the German Navy was indeed muzzled. Except for furtive movements by individual submarines and minelayers not a dog stirred from August to November.” (this was an exaggeration as there was significant German submarine activity, which led to the loss of the three British cruisers, HMS Hogue, Aboukir and Cressy, sunk by a German submarine the U9 on 22nd September 1914).

The performance of the Royal Navy’s submarines was a disappointment. Although they were involved with German destroyers no German losses were inflicted by the submarines during the action.


HMS Hogue tows HMS Arethusa into harbour after the Battle of Heligoland Bight on 28th August 1914 in the First World War​
Casualties at the Battle of Heligoland Bight:
British: Arethusa: Lieutenant Westmacott and 10 men were killed. 1 officer and 16 men were wounded. The destroyer casualties were mainly in the 4th Division, shot at by Mainz. Overall there were around 35 killed and 40 wounded. Two destroyers in the 4th Division of 3rd Flotilla were badly damaged; Liberty and Laertes.


British ships moving casualties and prisoners by boat after the Battle of Heligoland Bight on 28th August 1914 in the First World War: picture by Lionel Wyllie​
German: The German light cruisers SMS Mainz, Cöln and Ariadne were sunk:

The whole crew of Cöln, less the one stoker picked up, were lost including the admiral; 380 men. 348 crew of Mainz were rescued and made prisoner. 32 died. Ariadne: the captain and 2 officers were lost with 70 men.

The number of wounded is unknown. From V187, the German commodore, another officer and 26 men were taken prisoner.

The remainder of the crew of V187 had to be left in boats to be picked up by German ships at a later time. German total casualties are thought to have been around 1,000.


Petty Officer A. Britton on HMS Laurel winning the DSM in the Battle of Heligoland Bight on 28th August 1914 in the First World War​
Anecdotes and traditions from the Battle of Heligoland Bight:


Senior Stoker Olf Neumann, the sole survivor from the crew of the German light cruiser SMS Cöln, sunk by Admiral Beatty’s battle cruisers in the Battle of Heligoland Bight on 28th August 1914 in the First World War​
• Some of the German survivors from Mainz were found to have been shot in the back by their own officers, presumably for attempting to leave the ship.
• It was a German complaint that the British failed to rescue the crew of SMS Cöln, leaving them in the sea. German ships searched the area and three days later found the one survivor, Senior Stoker Olf Neumann.
• The British were struck by the very determined resistance put up by V187 and by the accurate shooting from all the German ships, particularly the Mainz.
• The German tactics left a great deal to be desired. The light cruisers’ actions were ill-co-ordinated and hesitant, advancing and withdrawing, then advancing again.
• The British staffing of the action was un-impressive, in particular in the failure to ensure that all ships taking part in the operation were aware that Admiral Beatty’s battle cruisers and Commodore Goodenough’s light cruisers from the Grand Fleet had joined the force, albeit at the last moment.

Commodore Keyes commented after the action “It means so much to a ship to know that, if she falls in with another, it is beyond the shadow of doubt a friend or an enemy; indeed it is the essence of good Staff work to ensure that this is possible.”

• It is clear that without these additional powerful ships (Beatty’s three battle cruisers) the force was inadequate for the task it was given. It was wholly foreseeable that German re-enforcements would intervene. It was lucky that the immediate intervention was only by four light cruisers.

• Commodore Keyes was admonished by the First Sea Lord, after the battle, for personally leading his submarines in HMS Lurcher. His role as commander of the submarine flotilla required him to remain on land. It was hard to make Keyes stick to his instructions. He was determined to lead his submarines from a ship.

Keyes anticipated the war by cancelling all leave for his submarine flotilla several days before the formal mobilisation order for the Fleet and ordering his submarines to move from their peacetime stations on the South Coast to their war stations at Harwich on the East Coast. After a false start, which saw the submarines ordered to Grimsby, Keyes led his command to Harwich and prepared for war.

• HMS Arethusa and Fearless were well handled. In turn, these two ships were closely supported by the destroyers, which fought aggressively and resourcefully.


German Light Cruiser SMS Mainz sinking at the Battle of Heligoland Bight on 28th August 1914 in the First World War: picture by Willie Stoewer​
• One of the two battle cruisers from the Humber, HMS Invincible, was to have an eventful and finally tragic war.

An account of her experiences was written under the title ‘A Naval Digression’ by Gordon Findlay under the initials GF. GF wrote of the ship’s involvement in the Heligoland Bight battle: ‘The enemy tried to break away; evidently she hoped to escape in the mist, which was fast making the range of visibility very small. We took up the chase, dealing with the German Ariadne in our stride (she was left burning furiously, and in a sinking condition), and at 1.25pm again opened fire on the Koln. In ten minutes she was no more, and for the poor wretches on board those ten minutes must have been awful , as our squadron’s big guns literally raked her fore and aft; ‘twas little wonder that she so quickly caught fire, turned over and sank.

Destroyers were sent on an errand of mercy, but not a single survivor could be seen.’ Invincible left the North Sea in November 1914 with HMS Inflexible, to confront Admiral Graf von Spee’s East Asia Squadron in the South Atlantic, sinking four of his ships at the Battle of the Falkland Islands on 8th December 1914. At the Battle of Jutland on 31st May 1916 HMS Invincible took a plunging shell in one of her magazines and exploded with the loss of all but six of her crew.


One of the surviving crew members from SMS Mainz (on the right), sunk in the Battle of Heligoland Bight on 28th August 1914 in the First World War being repatriated from Britain in 1917​
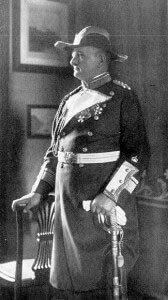
• It is interesting to note that the approach of the British ships was given away by the increased radio traffic. The technique of radio silence was in its infancy, if used at all.
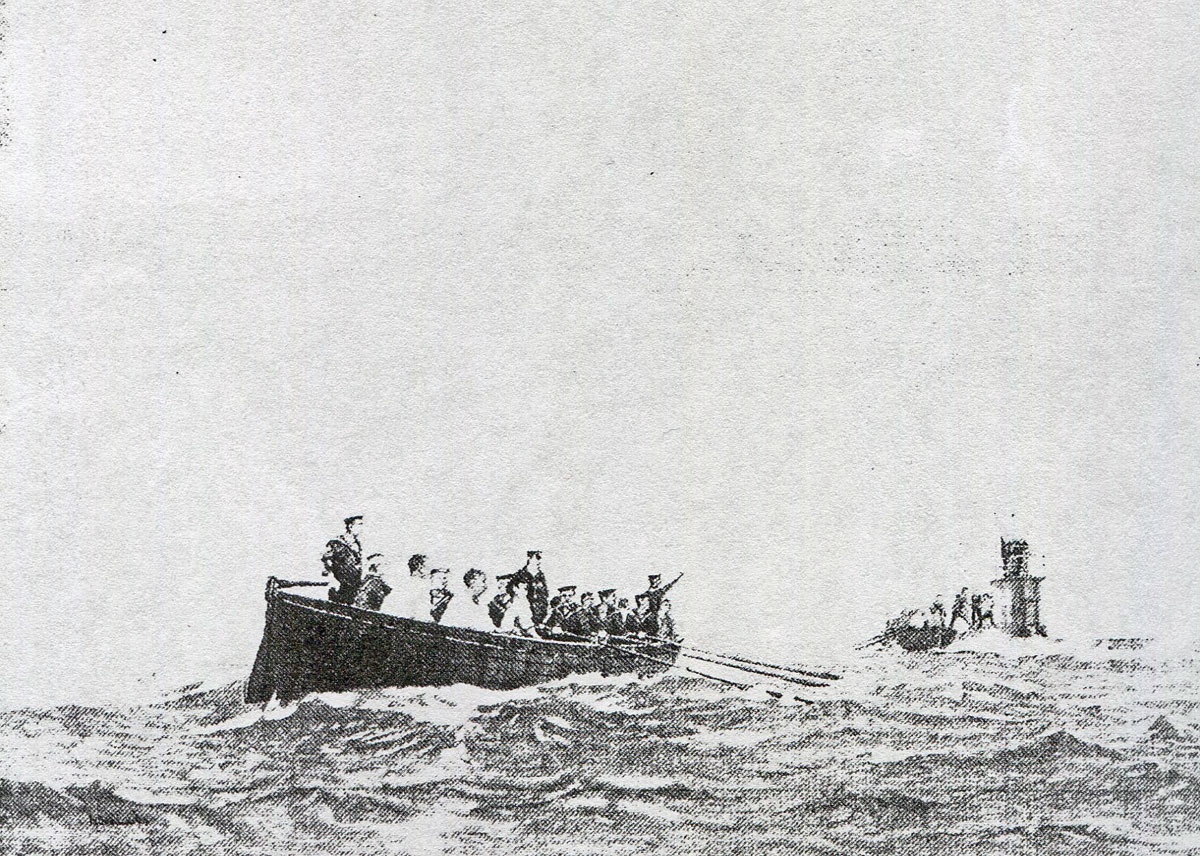


British submarine E14 sending the German wounded crew from V187 off with the bearing for Heligoland during the Battle of Heligoland Bight on 28th August 1914 in the First World War​
• The commander of HMS E4, the British submarine that rescued the seamen from Defender’s boat and assisted the wounded German seamen from V187, was Lieutenant Commander Leir. Leir was notorious in the Royal Navy submarine service for pinching stores and had the nickname of Arch Thief.

Leir was reputed to have appropriated three hundred tons of lead ballast while E4 was being built, leading the submarine to adopt the motto ‘We need no lead’.

Leir is reputed to have taken items, including a fur lined leather flying jacket, from the stores at a Royal Naval Air Station after causing a diversion by setting off the fire alarm. Apparently the theft of naval stores was considered acceptable, provided the purpose was to improve the efficiency of the appropriator’s ship.

• One of the surviving officers from SMS Mainz, rescued and taken prisoner by a British ship, was Oberleutenant Wolfgang von Tirpitz, the son of Admiral von Tirpitz. Winston Churchill, First Lord of the Admiralty, sent notice to Admiral von Tirpitz that his son was safe.

 
EAGLE SQUADRON MEMORIESDesperate for proficient pilots to combat the Nazi onslaught, Britain found willing recruits in neutral America.

By FRANK LOREY III Published May 2018

www.history net.com

Eagle-Sq-pilots-2.jpg


Members of No. 71 Squadron, the first of the Royal Air Force's "Eagle Squadrons," head out to their aircraft for the benefit of press cameras. (National Archives)

In September 1939, as war winds buffeted Europe, Americans watched warily while the German blitzkrieg swept across Poland. Despite the United States’ official policy of neutrality, many realized it was just a matter of time before America was drawn into the conflict, especially after the invasion of France and the Low Countries in May 1940 made Nazi intentions clear.

Some Americans, not wanting to wait for an official declaration of war, sought to enlist wherever they could. To young pilots and would-be airmen, the early tales of aerial battles lent a romantic allure to combat flying.

Adding to the excitement was the recent development of sleek new fighter aircraft such as the Supermarine Spitfire, capable of flying at well over 350 mph.

As Britain’s Royal Air Force faced off against Germany’s Luftwaffe, the need for competent pilots became increasingly apparent. Famed World War I Canadian ace Billy Bishop suggested that recruiters look to the United States for a promising source of new pilots and air crewmen.

Despite the unfavorable legal climate created by America’s Neutrality Acts, the Clayton Knight Committee was set up to recruit pretty much anyone who was interested in flying.

Clayton Knight was a World War I pilot veteran with connections, and along with Bishop and another WWI pilot, Homer Smith, he worked out a recruiting plan. Knight approached the chief of the U.S. Army Air Corps, Maj. Gen. Henry H. “Hap” Arnold, who was happy to supply a list of recent Air Corps washouts—the first targets of the recruiting efforts.

Many possessed good flying skills but were a little too unruly for the Army Air Corps. About 300 were signed up by May 1940. Eventually more recruiters spread out across the country, seeking volunteers with some aviation experience.

The new recruits were actually signing up with the Dominion Aeronautical Association, a supposed civil aeronautics firm that just happened to have its main office located next-door to the Royal Canadian Air Force headquarters in Ottawa.

By the fall of 1941, more than 3,000 Americans had been successfully recruited, and by the end of the year that number had swelled to 6,700.

Among the Americans attracted by the prospect of flying Spitfires against the Germans were John “Red” Campbell, Art Roscoe, John Brown, Bill Geiger, Gene Fetrow and Spiro “Steve” Pisanos. Each signed up when the RAF recruiters toured the United States, and all eventually became members of the American Eagle Squadrons in the RAF’s Fighter Command.

A total of 244 U.S. pilots eventually joined the three new Eagle Squadrons that had been formed. Roscoe and Geiger were assigned to No. 71 Squadron—the first to form up, on September 19, 1940—while Brown, Campbell and Fetrow were in No. 121 Squadron. Pisanos would later join 71 Squadron. The final Eagle Squadron was No. 133.

JOHN CAMPBELL, who had been flying since age 15, traveled from National City, near San Diego, to Hollywood to enlist in the RAF.

The British turned him down because he was only 18, but three days later—having just turned 19 and carrying a letter from his parents—he came back.

“I arrived as a wet-behind-the-ears 19-year-old,” Campbell later recalled. “The British assumed we were there to do a job, and expected we would do it.

This was quite different from the United States Army Air Forces, which assumed you couldn’t do it, unless you proved otherwise.”

Campbell already had significant flying experience when he joined up, and had also formed a picture of aerial warfare from the pulp magazines of the day.

The popular magazines were instrumental as a recruiting tool, since many stories concentrated on the seemingly glamorous life of a fighter pilot.

Campbell credited those magazines as the real reason he signed up. “I thought that every time you went up, you shot down five,” he said. He would learn that aerial combat was quite different in real life.

After flight training in the U.S. and Canada, he joined a convoy bound for England. At his assigned base, Campbell then checked out in a Miles Master.

With the Battle of Britain already raging, he got three weeks of training in Spitfires, about 25-30 total hours, with no time on instruments.

“I only flew two ops in them, and they were enjoyable to fly,” he recalled. The Spitfire training started with “sitting for a half-hour in the cockpit with a flying sergeant putting me through cockpit drills.”

The next morning he would check out a parachute, show the instructor he knew the cockpit drills and then taxi out, open up the throttle and take off.

Campbell then got to spend five weeks in Hawker Hurricanes—a total of about 54 hours—and, as he recalled, that was “more than most guys.” They flew two or three times daily, but the Eagle Squadron members were initially given old beat-up Hurricane Mark Is.

Eventually the Americans received Hurricane IIb models, which they used on fighter sweeps through Belgium and northern France. Campbell felt the greatest difficulty in flying both the Spitfire and Hurricane was having to change hands from throttle to stick, and to the gear and flap controls.

Campbell really took to the Hurricane, and lamented the fact that the press largely overlooked it during the Battle of Britain.

He noted that the “Hurricane got 80 percent of the kills, while the Spitfire got 100 percent of the credit.

You never ran into a German pilot that was shot down by a Hurricane—they always said it was a Spitfire.”

memories-Campbell-Roscoe960_640.jpg


He felt the Hurricane made a better gun platform, as it was more stable, and was best used against the German bombers. Spitfires were deployed at higher altitudes, and were more likely to engage enemy fighters. Campbell considered the Hurricane easier to land, stating,“It did not float like the Spitfire, you just flare to land, and it lands.”

In comparison to the German Messerschmitt Me-109E, Campbell said the Hurricane “lost most to the 109 at low level, where the 109 was faster, so we had to use tactics.”

But he added that “at altitude, the Hurricane was faster, could turn better and had a better gunsight.”

Campbell also flew Hurricane IIcs at Gibraltar, which he described as “the first of the four-cannon-equipped models designed for tank busting.” He was later assigned to the Far East campaign, went to Port Sudan on an aircraft carrier, and took off from there for Java and Singapore.

Stationed at Ceylon when the Japanese attacked, Campbell claimed “they got such a bloody nose that they didn’t try it again.”

Campbell believed that the “Hurricane could out-turn both the Mitsubishi A6M Zero and the Nakajima Ki.43 Oscar. In the slow, turning battles the Spitfire got eaten up, so Hurricanes remained in production until the end of the war.”

He fought against both the Zero and the Oscar, and “got shot down twice, and I shot down two each of them.”

The first time he went down, he made it back to his base after 21⁄2 days—to find all his personal effects gone. “I saw my wingman sleeping, and said, ‘Boo, this is the ghost of Red Campbell and where is my stuff?’ That woke him up in a hurry.”

After he was shot down the last time, over Java, Campbell became a prisoner of war for the duration of the conflict. Sent to a disease-plagued labor camp, he weighed only 98 pounds when the camp was finally liberated.

ART ROSCOE took his first flight at age 13, and from that point on always wanted to work in the aviation field. He got a job with Douglas Aircraft, and it was there that an RAF recruiter caught up with him in February 1941.

Roscoe recalled: “I had about 30-40 hours of flight time, and went out to Pomona to see how to get in [the RAF]. They told me to buy another 30 hours of flight time, and come back to see them then. I went back, took the flight test, and they let me know a couple of days later.”

He went to flight school at Glendale, Calif., for another 75 hours, and then took a train to Nova Scotia to catch a steamer for England. His British flight training was in Spitfires at Landau with No. 53 Operational Training Unit.

“My Spitfire was never in really good shape, but you couldn’t get hurt in it if you stayed on top of it,” he remembered. “It could outturn practically anything; you could turn on a dime and have nine cents left.”

The No. 71 Squadron pilots were often tasked with escorting Boeing B-17 Flying Fortresses on bombing missions, and frequently ran into Focke Wulf Fw-190As that had been lurking above them.

The German fighters would typically make one pass, diving down on the bombers, while the Spitfires performed a split-S and went after them through the cloud cover.

The Spits only had 15 seconds of .303-caliber ammo and six seconds of 20mm cannon rounds, so the pilots tried to make every round count. Roscoe recalled one particular B-17 escort mission to the Bay of Biscay, during which two Fw-190s attacked his flight: “The fellow in back of me got a cannon hit in his radio, so I was lucky.” He shot down his first enemy aircraft on October 2, 1941—an Me-109 over France.

In June 1942, Roscoe volunteered to help defend the island of Malta and arrived on 11 August via the carrier HMS Furious, which was carrying a load of 35 Spitfires.

The plan was to launch seven flights of five planes each, and just as Roscoe’s flight was taking off, the carrier Eagle was torpedoed and sunk while alongside Furious.

For the trip to Malta, they were given the Spitfire Vc, equipped with a tropical air filter. The planes carried only 90 gallons of fuel, mainly to assist in keeping their weight down for takeoff.

Since the flaps had only full up and down positions, a wood block was inserted to hold the flaps at 15 degrees to assist in getting off the carrier. Once airborne, the pilots lowered their flaps, allowing the wood blocks to fall out, then raised them again.

“We were told ‘no crash landings,’ and if we got into trouble we were to head to Vichy French–held North Africa and hope for the best,” Roscoe recalled. All the members of his group made it to Malta. When they got there, the newcomers joined No. 229 Squadron, and found a lot of Battle of Britain veterans already fighting the Germans.

Roscoe said Malta was “a fighter pilot’s paradise—you went for the bombers first, had one crack at them, and then the fighters would be on your tail.” It didn’t last long, as most of the aerial fighting ended in October 1942, and they were restationed by the next month.

Just before the fighting ended, Roscoe was severely wounded in a dogfight. Four cannon rounds from an Me-109 crashed through his cockpit, but only one hit him—in the shoulder.

His plane was on fire, and the German pilot pulled up alongside for a look. Roscoe managed to kick his rudder, swerve behind the 109, and fire his cannons, shooting his tormentor down.

He then crash-landed his Spitfire, as he was too weak to bail out.

Like many other Eagle Squadron members, Roscoe transferred into the USAAF when he was given the opportunity. “I had asked for [North American P-51] Mustangs, but ended up with the [Republic] P-47 [Thunderbolt]. It could out-dive practically anything—like a streamlined brick coming down,” he related. He ended the war as a squadron commander, with four confirmed victories, and another three probables.

JOHN I. BROWN III started out with Hurricanes, recalling that “of course everyone who signed up wanted to fly fighters, but we weren’t even guaranteed to fly. Some went to fighters, some to bombers and some to transports.” He quickly moved on to Spitfires.

“The Spit was very unforgiving; you had to fly with an iron hand and a silk glove,” Brown remembered. He also lamented having only 78 rounds of cannon ammunition, but said the 1,300-round-per-minute rate of fire for the .303 machine guns “could cause damage—chunks would fly off enemy planes—it could be very effective.”

Most of the missions were rather short, as his Spitfire had about two hours and 45 minutes’ flight time before it would be running on fumes. “We got about 90 miles into France, a very limited range, and coming back we had to land at the [British] coastal airfields,” he said.

“If you had your wings, it was assumed by the RAF that you could fly anything,” Brown stated.“I flew things I had never seen before. The attitude was that if you were going to get killed, do it in training. Don’t waste a plane on an operational mission.”

While at Duxford, Brown joined the USAAF and switched to the P-47. He recalled that the Thunderbolt “was one hell of an aircraft in combat, as it could take a lot of punishment.” In November 1944, he made another switch, this time to P-51s until the end of the war.

memories-Brown-Geiger960_640.jpg


While flying the Mustang, Brown got some experience fighting against the new German jet fighter, the Messerschmitt Me-262 Schwalbe. He remembered that if a pilot called out “jet in the area,” everyone went down fast, like “a funnel to a beehive.” His group eventually claimed 22 of the Me-262s.

“Only the Mustang would try anything against them,” Brown recalled, noting the P-51 could do “600 mph in a dive, and could catch up with the 262.” Using that tactic, Brown and his flight leader went after a Me-262 that was on the deck, heading home. The German jets only had about 45 minutes of fuel. “My leader got it as it passed over the airfield, needing to land,” he recalled.

BILL GEIGER didn’t get to experience much combat during World War II. He did fly some bomber escort missions, recalling that in the summer of 1941, “we never lost a bomber to any fighters.” Shortly thereafter, he was shot down over the English Channel near Dunkirk while flying a Spitfire. German fighters had picked him off at about 15,000 feet over the Channel.

He said:“My plane was on fire, and wouldn’t fly anymore. I banged on the cockpit [canopy]—it was supposed to slide but nothing happened. I beat on it with everything I had, then bent out a corner and let the slipstream grab it, and off it went. I popped out of the cockpit, and pulled the ripcord. I felt very much alone, but when I realized I was going to survive, the fear went away.”

A German boat picked up Geiger after he spent five hours in the water. Since it was still early in the war, the Eagle Squadron members were not supposed to wear their insignia, an order that Geiger had chosen not to obey.

He recalled, “Not only was I wearing my insignia, I also had extras in my pocket.” Geiger realized he was in big trouble, and fully expected to be shot.

“I was led away by a German officer with a two-man squad, and I thought about running,” he remembered. The officer recognized Geiger’s Brooklyn accent, since the German had been a truck driver in New York before the war. It turned out that he had never become a U.S. citizen, and when Adolf Hitler urged all Germans to return to the fatherland, he went back. “He asked me if I was an American, and when I admitted it he told me that I was going to be all right,” Geiger recalled. It was the start of 31⁄2 years in a POW camp for Geiger—and the end of his war.

GENE FETROW was working at Douglas Aircraft’s Santa Monica plant when the war in Europe broke out, serving as an inspector for A-20 Havocs. Hearing from a friend that an RAF recruiter was at the Roosevelt Hotel in Hollywood, Fetrow went to see him.

“I told him I had been flying since I was 15 years old, mostly Fleet biplanes,” Fetrow recalled, “but he asked how many hours I had. I only had about 35, so he told me to get more time.” He signed up with a local flying school, and put in another 35 hours as quickly as possible.

Returning to the recruiter, Fetrow took a flight test in a Waco biplane and was told they would let him know if he was accepted. A few days later a confirming telegram arrived.

They still wanted him to get more training before heading overseas, however, so Fetrow spent an additional 75 hours in Stearman, Ryan STS, Vultee BT-13 and North American AT-6 Texan trainers.

Arriving in England on a transport ship, Fetrow reported for fighter training. Flying Spitfire Mark Is and IIs, he accumulated about 70 more hours of valuable flight time.

Fetrow served in No. 121 Squadron, flying mostly the Spitfire Mark Vb equipped with two cannons and four .303 machine guns. He flew about 120 missions from England, and was part of the ill-fated August 19, 1942, Dieppe Raid, in which his aircraft was shot up pretty badly.

The Dieppe Raid turned out to be the only operation of the war that involved all three of the American Eagle Squadrons. Fetrow supported the mission by providing low cover, one of a flight of four Mark Vbs that ran into trouble shortly after crossing the harbor at Dieppe.

As Fetrow told it: “I saw several Fw-190s to my right and down below strafing our people on the beach. I thought our top cover would take care of some of them, so I started taking my flight down. A 190 then came down on me and put a 20mm deflection shot through my wing and another into my radiator. I wasn’t hurt, but the engine was hurt—my oil cooler blew apart. The engine seized up over the Channel, I rolled upside down, but the canopy wouldn’t eject—it only rolled back about six inches. I had to beat it with my elbows to get out, and my cockpit was filling with smoke. Once I was out, it got real quiet, and I saw my Spit hit the water.”

Fetrow had managed to send out a Mayday call over his radio, and the Air-Sea Rescue team came out to retrieve him while he was still in his dinghy.

But by the time he got back to base, the RAF had already listed him as missing in action. “All my stuff had already been divided—my camera, cigarettes and shoes—and it took about a week to get everything straightened out,” he recalled.“We really took a beating that day, but we got about as many of them as they did of us— about 100 shot down.”

Fetrow eventually was transferred to serve in the Italian campaign. In May 1944, he was flying with the RAF’s 1st Tactical Air Force, usually on one of two main missions.

The fighters would escort Consolidated B-24 Liberators and Martin B-26 Marauders out of Sardinia on missions to destroy German lines of communication and transport, or they would conduct ground-strafing missions against anything that moved.

“I once saw an old donkey and peasant farmer pulling a cart of hay,” Fetrow related. “I put a couple of slugs into it, and it went sky-high. It had been full of ammo for the German troops.”

He recalled another time when they saw some Tiger tanks: “We couldn’t do much against them, as they were camped in a dry riverbed in the woods. I left two Spitfires up as top cover, and the rest dove down, with one pilot managing to hit their fuel dump. I dove down too fast and steep—very poor manner, a classic case of pilot error. I realized I was in trouble, and pulled back on the stick. I blacked out, the plane did a snap roll, and I came to while flying upside down through a dry wash. My wings were bent, rivets had popped, instruments were broken, but I nursed it back up to 3,000 feet.”

Memories-Pisanos-Fetrow960_640.jpg


Fetrow managed to get the Spitfire back to Corsica, where he was amazed when the wheels came down. He made a fairly normal landing, but his aircraft was subsequently pushed into the scrap heap. Ground crews managed to salvage only the prop, engine, wheels, tires and radio. That experience was enough, however, to convince Fetrow of the aircraft’s structural integrity.

“The Spitfire was hard to land, but it had great brakes,” he remembered. “I got three Fw-190s while in Spitfires, so it was my favorite plane.”He also had some experience with the P-47 after transferring to the USAAF 335th Fighter Squadron later in the war, and served as a test pilot for many other aircraft.

Another problem with the Spitfire was in retracting the landing gear—“you had to change hands to do it,” Fetrow recalled. He also said the fuel tanks were poorly placed, especially the one in front of the instrument panel. “I lost a friend when that tank was hit, exploding into a fireball, which rapidly consumed the cockpit area.”

STEVE PISANOS was another guy who couldn’t wait to fight the Germans and signed up with an Eagle Squadron recruiter before the United States entered the war. Technically, he wasn’t officially an American.

Pisanos had come to the States from Greece in the summer of 1938, and shortly afterward had taken basic flying lessons on his own. He had renounced his Greek citizenship, but it wasn’t until May 1943 that he became a naturalized citizen—while he was in London, of all places.

Of that momentous event, he remarked: “Uncle Sam and I are best friends, and I felt nothing but gratitude. I was the first to become a citizen outside of the U.S.”

After advanced training, Pisanos shipped out to England in February 1942. He received instruction in tactics before joining an operational training unit, flying Miles Masters, Hurricanes, P-40E Kittyhawks and P-51A Mustangs during his final training phase.

He was assigned to the 268th Army Co-operation Fighter Squadron, and began flying combat missions over Holland in the P-51A. Known to his fellow pilots as the “Flying Greek,” he came to the attention of Squadron Leader Chesley Peterson in No. 71 Squadron, and was officially transferred in early September 1942.

In his one month with No. 71, he flew Spitfires and Hurricanes before transferring into the 334th Squadron, 4th Fighter Group, VIII Fighter Command, at the end of September, when the Eagle Squadrons were disbanded.

Pisanos noted that the American Eagle Squadron pilots were heavily recruited by the USAAF, as “in reality we had Ph.D. degrees in fighting—we had experience.” The recruiter said, “You come with us—you are an American, would you accept a second lieutenant [commission] in the Air Corps?” Once he was with the 334th, Pisanos flew the P-47 and briefly the P-51 again.

“The Spitfire was a great aircraft, but it was limited because it had no fuel capacity to go great distances,” Pisanos recalled. He also rated the P-47 in the same fashion, as it “could not stay with the bombers on long-distance missions, and the Luftwaffe would just wait there for the fighters to turn back.”

As for the P-51, Pisanos emphasized, “That was it!” He participated in the first escorted Berlin mission with the 4th Fighter Group on March 4, 1944, and when the Germans saw the P-51 escorting the bombers, he said they knew they had lost the war.

Pisanos wound up his combat career in spectacular fashion. On March 5, he shot down two German aircraft, giving him a total of 10 victories in the space of 110 missions spanning 300 combat hours. On the way home, his engine failed and he was forced to crash-land in France.

Evading capture, Pisanos managed to join up with members of the French Resistance, and was based in Paris until it was liberated in August of the same year.

Because he knew too much about the Resistance, Pisanos was permanently grounded for combat and sent back to the States, spending the rest of the war as a test pilot at Wright Field in Ohio.

The ranks of Eagle Squadron members have greatly dwindled over the past few years. In 2006 they held their last official reunion. Of the 17 living members at the time, only five were well enough to attend. John Brown, Gene Fetrow, Bill Geiger and Art Roscoe have already made their final flight. Steve Pisanos has finished his book of memoirs, which was released in December 2007.

Frank Lorey III is a federal- and state-registered historian with more than 340 articles and several books to his credit. He has appeared many times on the History Channel and does historical archeology work on military plane crash sites. For further reading, he recommends: The Eagle Squadrons, by Vern Haugland; and The Flying Greek: An Immigrant Fighter Ace’s WW II Odyssey With the RAF, USAAF, and French Resistance, by Colonel Steve N. Pisanos.

Originally published in the March 2008 issue of Aviation History

 
image.png

The wreckage of Heinkel He 111H (1G+EL, W.Nr. 5438 or 3438) of 3./KG 27, shot down on the night of 29/30 August 1940 by F/Lt A.R.Wright of No. 92 Squadron after being caught in searchlights over Bristol. The aircraft crashed onto a house at Downton, Hale, near Fordingbridge, Hants at 23:45 hours.

image.png

Barrage balloons come down in flames after being shot by German fighters, 30 August 1940.

image.png

A Heinkel He 111 bomber of 5./KG 1 lies in a field at Haxted, near Lingfield. The aircraft was part of a formation despatched to attack the Royal Aircraft Establishment HQ at Farnborough in Hampshire on 30 August 1940.

It was intercepted by a Hurricane of No. 253 Squadron flown by Plt Off J.P.B. Greenwood, whose bullets killed the gunner, Gefr Walter Reid, damaged both engines and started a small fire. The rest of the crew were captured.

image.png

A bandaged Flight Lieutenant Geoffrey Matheson of No. 222 Squadron surveys the burnt-out wreckage of his Spitfire after crash-landing near the Kemsley Paper Mill, close to Sittingbourne, on 30 August 1940. Moments after he brought the battle-damaged fighter down, the aircraft exploded. Matheson sustained serious injuries but was fortunate to escape.

image.png

 
Back
Top