
You are using an out of date browser. It may not display this or other websites correctly.
You should upgrade or use an alternative browser.
You should upgrade or use an alternative browser.
Lets have some History Thread
- Thread starter Gol15
- Start date


R.34Table Of Contents
Diameter: 79ft
Speed: 62mph
Engines: 5 x 270hp
Volume: 1, 950, 000cft
www.airshipsonline.com
Library DocumentsTo the members of her crew, His Majesty’s Airship R34 was known as ‘Tiny’ – inevitably. The ship was enormous: as big as a contemporary ‘Dreadnought’ battleship.
Her overall length from bow to stern was 643 feet, twice as long as a football field; her maximum diameter was 79 feet, and her overall height was just short of 92 feet.
Her cost was around £350,000, and her total gas capacity was 1,950,000 cubic ft, giving a gross lift of about 59 tons and a disposable lift, when the weight of the structure and permanent fittings was discounted, of 26 tons.
Like her sister ship, five engines were fitted, each of 250 hp.p
Design and ConstructionAt the time, German technical development had been kept under close observation and R34, in particular, had departed from the engine plan of L.33 to follow instead that of the later and more advanced L.49, which had been forced to land in France in October 1917.
The former ship had boasted six engines: one to each of the three forward propellers, one to the rear propeller and two driving small ‘wing’ propellers by shaft.
On the latter vessel, the designers had done away with this cumbersome arrangement, eliminating one engine and the two wing propellers entirely, harnessing the power of two rear engines to a single enlarged propeller.
The contract for the construction of the R34 had been signed out to William Beardmore and Company.
The Beardmore Company was one of the most diverse and enterprising heavy engineering companies on Cyldeside.
By 1916, the company was employing some 15,000 workers, who were producing a range of vehicles, ships and items specifically for the Government in the war effort.
The company had already proven itself in airship production by being awarded contracts and completing the R24 and R27.
To build these airships, the company had acquired a piece of land, some 600 acres at Inchinnan on the south side of the River Clyde.
The construction site location today is just over a mile from the current Glasgow Airport location.
The shed was created for the construction of the R24, and similarly to the construction facility at Cardington, the Beardmore company also provided houses for the airship workers.
Some of the housing, known as Beardmore Cottages, is still present in the village of Inchinnan.

Artist impression of the new R34
The R34’s construction details have been frustratingly sparse, as the Beardmore Factory and records office suffered from the German bombardment during WWII and were destroyed during a heavy night of bombing in 1941. However, there are some constructional details which are available.
As with airships constructed at the same time, the basis of construction was the same.
The whole framework was varnished to prevent atmospheric corrosion and heavily braced by wiring. Lengths of linen fabric were stretched between each pair of frames, where they were attached by laces.
Narrow strips were then glued over the lacing, and the covering of the hull was painted with dope containing aluminium powder, to reflect sunlight and so reduce superheating.
In the chambers formed by the main circumferential frames and the longitudinal girders were the gasbags, nineteen in all and made of one thickness of rubber-proofed cotton cloth, varnished and lined with goldbeaters’ skins.
Each gasbag was contoured to fill all the available space and was surrounded by cord mesh to prevent chafing against the girders.
Following the same design as the R33, beneath the main body of the airship, suspended by long, wooden struts and braced rigging wires, were four small gondolas.

R34 with outer cover being attached to the framework, Inchannan 1917

R34 under construction Inchannan 1917.
Some further details on the R34 can be read on the life of the Chief Inspector of the wiring team at the Inchinnan works, John S Richardson, can be found with a link to his son’s blog page here.
As designed in the R33, the forward gondola appeared to be a single unit, some fifty feet long, but was actually made up of two parts separated by a narrow gap, intended to prevent vibration from the engine affecting the Wireless Telegraph (W.T.) equipment. Incorporated in the forward section were a control room and a small wireless cabin, below which, during flight, trailed a long aerial.
The control cabin was fronted with ‘Triplex’ safety glass and had handling rails mounted on each side. Here were the steering and elevator wheels, the gas-valve controls, the engine telegraph, the various navigational and WT instruments and the toggles controlling the emergency forward water ballast.
Connecting the control cabin with the keel was a ladder, protected from the elements by a streamlined canvas cover. Another cover similarly enclosed the numerous control-wire connections that led up into the hull.
In the rear section of the forward gondola was the first of the engines, driving a single pusher propeller 17 feet in diameter.
In the middle of the lower hull amidships were the two smaller ‘wing’ gondolas housing an engine, together with reversing gear, a refinement that enabled the airship to be operated if those in the main control cabin failed.
The rear car was ringed with a rail to assist handlers and, as with the forward gondola, two ‘bumping bags’ of compressed air were positioned underneath to help cushion landing shocks.
Each of the five engines was a Sunbeam ‘Maori’: a new type designed for the Wolverhampton firm by a Frenchman, Louis Coatalen, and intended specifically for airship use but clearly inferior to the Rolls-Royce engines used by earlier British rigids.
Unfortunately, no Rolls-Royce engines could be made available as all those produced were now reserved for aeroplane use.

R34 forward control car


Sumbeam Maori engine
The Sunbeams had been accepted reluctantly. Each engine had twelve water-cooled cylinders, which were intended to produce full power at a theoretical 2,100 rpm, although in practice it was rare for 1,600 rpm to be exceeded. In the forward and wing cars, the radiators were mounted externally and controlled by folding shutters.
The after gondola of R34 contained two engines geared to one propeller.
The engines were each fitted with a hand starter, while the drive to the propellers was through a sliding Hele-Shaw dog-clutch and a reduction gearbox with a ratio of 1:3.86.
The clutch enabled the engine to be started and warmed up before flight without endangering the handling party and made it easier to carry out repairs in the air.
If the engine should be stopped during flight, the disconnected propeller could rotate freely in the airstream to reduce head resistance, although if it was required to remain stationary for landing or any other reason, a special brake was provided for this purpose.
Assuming that the airship was still moving forward, the engine might then be started by releasing the brake, engaging the clutch again, and allowing the airstream to turn the engine.
In addition to the gondolas, a considerable amount of space was also available inside the hull and invisible to the outside observer.
Running almost the entire length of the ship was a long keel corridor, consisting of a succession of A-shaped frames standing on the two lowest girders, and with three auxiliary longitudinal girders of their own to fence off the surrounding gasbags.
At its widest part, this corridor was about 10 ft across, narrowing somewhat towards the extremities. Leading to the wing, and after cars were narrow ladders, fully exposed to the force of the elements.
It had been discovered following tests on R33 that the turning coefficient of the two airships was 6.4, giving a minimum turning circle some 4,100 feet in diameter.
However, so strong was the effect of the slipstream of the after propeller acting on the rudder that with the forward engine still and the wing propellers both running in reverse, it was possible for R33 and R34 to pivot virtually on the spot.
Designed slimmer than the theoretical ideal, the aerodynamic shape of R34 was a distinct improvement on most earlier designs – her total air resistance being only seven per cent of a hypothetical flat disc of the same diameter.
In later airships, this was reduced even further, but in her own day, the streamlining of R34 was excellent and twice as effective as that of her British predecessors.
Even though the R34 was designed during a time of war, the R34 was never fitted with a full armament. In addition to bomb racks, the original plan had been to include a ventral ‘gun house’ behind the rear car, which would carry a one-pounder Pom-Pom and two Lewis machine guns.
Another Lewis gun was to be mounted on the rear platform behind the tail, while six more were to be shared equally among the two wing-cars, the forward gondola and the top gun platform.
A further arsenal of weapons was tp include two-pounder quick-firing guns which were to be placed on each side of the hull, and two more were to join the Lewis guns on top.
This heavy armament was presumably intended for defence against German Zeppelins, but in the event the gun house was never fitted and the number of guns was considerably reduced.
The original specification showed that her bomb-load was quite considerable: twenty at 100 lb and four at 550 lb.
The firm of William Beardmore and Company Ltd. of Inchinnan near Glasgow began work on R34 on 9 December 1917, and she was completed just over a year later.
Preparations to H.M.A.R34 were completed in December 1918 and her lift and trim trials were carried out successfully on the 20th of that month.
By the time R34 was ready for her test flights, the war was over, and she was too late to see active service.

R 34 emerges from the Inchinnan works shed March 14th 1918
On 30th December 1918, while bad weather delayed the trial flight, the Admiralty agreed to lend their airships to the Air Ministry for long-distance trials.
R34 was specifically mentioned, but because of the persistently bad weather, it was not until the following March that she left her hangar at Inchinnan, near Glasgow, where the Beardmore Company had their works.
First Trial FlightOn 14 March 1919 R.34 was brought out from her shed, and her crew began the task of accustoming themselves to the ship.
The maiden flight, lasting nearly five hours, was uneventful, and the ship was returned safely to her shed.
On 24th March, despite cold, windy conditions with intermittent fog, snow and hail, R.34 left Inchinnan in the late afternoon for a more extended trial.

R34 Trial flight 2,000ft over Renfrew, Scotland 14th March 1919.
(This is not Renfrew. It actually over the Beardsmore Workers Houses in Inchinnan. Just a couple of hundred metres west of the Massive Shed the R34 was constructed in.)
She flew down the Clyde, and then turned to fly over the North of England, towards Newcastle, then turned and returned via Liverpool, over the Irish Sea to Dublin, and returned via the Isle of Man.
During this trial, it was discovered that her elevator had jammed down, lifting the nose up. After bringing the ship to an even keel, the ship was nursed home to Scotland.
No real damage had been done, but on return to the base, the ship was badly handled by the ground crew, which caused damage to her propellers and some of the main girders.
The damage caused the ship to be laid up to be repaired; it was this incident which caused the delay in the trip to the USA, and hence, losing the title of the “first to cross the Atlantic” to Alcock and Brown.
The R34 was ready for service again at 6.00 pm on 28th May, and the ship left Inchinnan for her new home of East Fortune, the main airship base on the Firth of Forth.
The R34 was enveloped in fog and so headed out to sea to wait an improvement in the landing conditions.
The ship had to wait longer than expected and finally landed at 3.30 pm the next afternoon. The crew was hungry after 21 hours as no food had been carried on board this flight.
Baltic FlightThe plans for the transatlantic voyage were hurried forward. Two weeks after arriving at East Fortune, the R34 flew with the R29 over Edinburgh and Berwick.
This short 6-hour flight was to confirm the stability of the ship. On the evening of the 17th June 1919, the R34 was sent on an endurance voyage to give her a proper test before her major flight.
The idea was that the ship would be scouting the German Baltic Shores.
Endurance FlightThe ship carried out its duties and also flew up to Denmark, Norway and Sweden. The ship landed after this endurance trial on the morning of the 20th June after a trip of 54 hours.
Preparations for the AtlanticThe Air Ministry had now finally decided to take the R34 to the USA, and a northerly coastal route was decided in case the ship ran out of fuel; then she would never be too far from landfall.
Two warships, the Renown and Tiger, were offered as supply vessels in case the ship came into difficulty and also to offer meteorological reports.
It was agreed that if the ship did get into difficulty, then the R34 would be taken in tow.

R34 Preparations, Inchannan, Scotland
The plans which were being arranged in New York were the supply of hydrogen for the ship, and a party of 8 experienced airmen were dispatched to America to arrange and train the main part of the American ground crew.
The Americans had at that time no experience of a rigid airship.
At the Admiralty, a room was set aside for wireless messages.
A map was also provided for the ship’s progress. At East Fortune, further alterations were being made to the ship itself for the voyage.
Food lockers replaced bomb racks, which had been installed at her construction, and a compass was placed on the upper gun platform in order that the magnetic field would not be interfered with by any of the electrical equipment.
Additional tables and new wash basins were added in the crew space and furnished with lightweight curtains to stop the drafts from the interior of the hull.
Along the keel an additional 24 petrol tanks were fitted, bringing the total fuel capacity to some 6,000 gallons.
The crew were divided into two watches for the trip. In addition to the RNAS uniforms, the crew was issued with heavy-duty flying suits, which were redesigned to include parachute harnesses and integral life-saving collars.
Some 112lb of mail and parcels were loaded aboard the ship for delivery to the United States, including letters from the King and Prime Minister to the President of the United States.
The Transatlantic FlightOn 1st July 1919, it undertook a publicity flight over London, where it was seen above the capital.
The ship returned to Inchinnan in time for preparation for the flight to America.
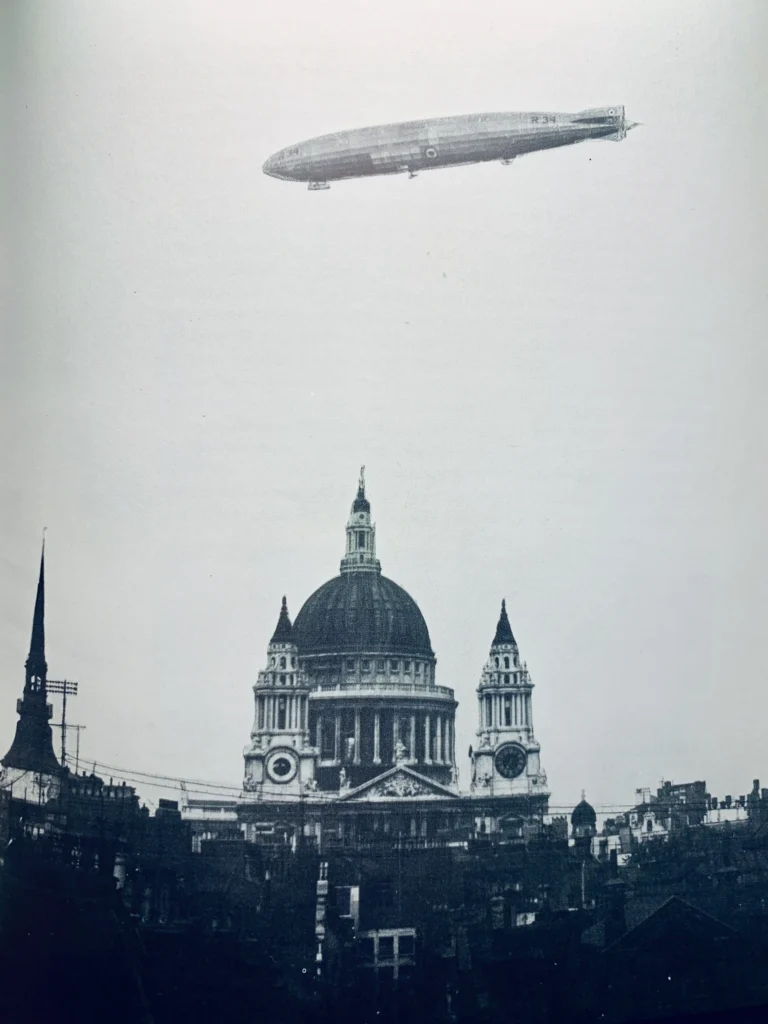
R.34 over St Paul’s Cathedral on 1st July 1919
The ship was gassed to its limit and loaded to its full capacity, and by the end of the evening, the ship was ready to go.
The ship’s official departure time was set at 2.00 am (GMT) on 2nd July in order to obtain the maximum lift from her gasbags.
The ship was eased out of her shed slowly by 700 members of the handling party.
The weather forecast was favourable and Major Scott decided not to wait any longer. and at 1.42 am (GMT) the signal to release was given and the R34 lifted slowly into the misty night sky.
The engines were signalled to commence, and the propellers roared into life.
The ship was on the way to America, but was so loaded for the journey that even with the forward momentum of the engines, she very slowly gained height.
The R34 travelled along the Firth of Forth, then at a height of 1,300ft she cleared Rosyth, Glasgow, and down the Clyde by daybreak.
Life on board began to settle into the routine of the agreed scheduled watches, meals and rest times.
Strains of jazz could be heard through the ship from the gramophone, which was carried on board for the entertainment of the crew.
Crossing the ocean, the morning fog lifted, and the crew saw that they were stuck between two cloud layers, the upper obscuring the sun.
The wireless operators were finding that these weather conditions were causing electrostatic shocks from the equipment.
The clouds soon parted, and the sun broke through. Major Scott was wary of the effect of superheating on the gasbags and wanted to avoid at all costs the valving of hydrogen at this early stage of the flight
So he brought the ship down low into the layer of fog, which protected the ship from the sunshine and soon cooled the gas.
The ship carried on with her voyage at a steady pace and standard routines.
The main upset occurred at 2.00 pm on the first day.
It was discovered that a stowaway had managed to creep on board the ship and hide up in-between the girders and the gasbags inside the hull of the ship.
Before starting on the voyage, it was decided that some of the members of the crew, including William.W. Ballantyne, must be left behind, the numbers being limited of necessity, to thirty on the voyage.

R34 Coxwain, rating at elevators and WT Operator

R34 Half way across Atlantic looking aft

This rare shot taken on 5th July 1919 as the R 34 flew over Brookfield, Nova Scotia, Canada.
Possibly the first photo of a transatlantic aerial arrival to the continental North America.(credit AHT member Tom Raub)
Two hours before the flight, William Ballantyne managed to climb back on board the ship and hid himself in the darkness of the ship.
He had also carried with him the crew’s mascot, a small tabby kitten called “Whoopsie”.
Both of these stowaways had hidden themselves.
But the cramped conditions and the fact that the smell of the gas had made Ballantyne nauseous made him give up and come out of hiding.
The dishevelled stowaway was brought in front of Major Scott and Maitland, and it was decided that there was actually nothing they could do about it.
It was agreed that had they been over land, then Ballantyne would have been put overboard by parachute, but as the next landfall was in fact America, he was to stay on board.
The only problem that could occur was the strain on the very limited and controlled resources.
Having been quite ill for some time, he was resting on one of the hammocks and attended to by Lieutenant Luck.
When he recovered, Ballantyne was, as with traditional stowaways, made to work his passage as cook and often had to hand pump the petrol into the tanks.
As to the second stowaway, Whoopsie, it was deemed that the oldest airman on board, 42-year-old George Graham, accepted responsibility for the cat, and Whoopsie worked her passage throughout the rest of the voyage, providing entertainment and comfort to the other crew members.
The weather slowly worsened, and all the ship’s engines were engaged to full power as the wind speed increased and a storm began to approach.
The next morning the R34 was halfway across the Atlantic, but the weather was continuing to deteriorate.
However, throughout the day, there were some breaks in the weather, causing the ship to be able to view the transatlantic shipping traffic below, for some 50 miles in each direction.
By the evening, the weather became increasingly stormy, and the wind turned head-on to the ship.
Coming up from the southeast, the winds were blowing at about 50mph, causing the ship to fight her way forward and sideways.
Throughout the night, Major Scott tried to move the ship up higher to avoid the wind, but it was found to be the same at each level.
By morning, the cloudbank had moved away, and clear skies brought a sight of a 150ft iceberg below the ship, further behind it smaller bergs and pack ice were visible.
The clouds soon returned as Newfoundland was not far off the ship, and fog enveloped the ship once more.

R34 Altantic Route
Concern was beginning to show by Major Scott as there were no gauges on the petrol tanks, and use of the dipstick showed that there were only some 2,200 gallons of petrol left.
With further strong headwinds expected down the coast, the thought of getting to New York without stopping was looking more unlikely every hour that drew on.
The ship flew over Labrador, and at 12.50 the land was sighted for the first time.
Now the ship had to follow the coast down and head for its landing place at New York.
With only 500 gallons of fuel left, the ship was brought down to 800ft to try and escape the worst of the headwinds.
From this height, the crew had superb views of the North American forests and could see, smell and hear every detail.
The ship had been in the air for 4 days, and the crew was beginning to tire. Emergency preparations were tentatively being made in Boston for an emergency landing there, but the ship continued on her voyage.
Each fuel tank was inspected, and whatever was left in the bottom of the tanks was collected and poured into the main tanks to keep the engines running.
The 12 British ground crew, which had been sent on ahead by ship to make arrangements for the landing, had heard from Scott about the critical fuel situation, and started up for Boston, and had already made preparations for a landing at Massachusetts.
However, it was decided that there was enough fuel left in the tanks, as John Shotter worked with many of the crew members to use jam jars or whatever they could find to carry any of the dregs of fuel from the tanks to the engines.
Major Scott made the decision that they had enough fuel to continue onto the agreed landing area at Roosevelt Field, Mineola, Long Island, New York.
In the last hour of the flight, the crew busied themselves making themselves presentable.
By 9.00 am, Mineola came into view. The landing field had been prepared with 20-tonne concrete mooring blocks.
All the carparks were full, and a huge grandstand had been erected for local and national dignitaries.
Major Jack Pritchard donned a parachute and, whilst the ship circled overhead, dropped to the ground and became the first man to arrive in America by air.

US Servicemen rush to catch hold of ship

R34 Moored up on the three wired system

Mineola Officers holding and taking instructions from the forward gondola
He hastily arranged the ground crews and helped ease the ship to the ground.
The R34 landed at 9.54 am after 108 hours and 12 minutes of flying time, equating to some four and a half days.
This became the world endurance record, breaking the set by the British North Sea Class non-rigid airship, the NS 11, of some 101 hours 5 minutes.
There were 140 gallons of fuel left on board, which was sufficient only for another 2 hours of flying at reduced power.
Making Landfall in AmericaMineola airfield, known as Roosevelt Field was some 15 miles east of Manhattan Island, and some 10 miles northeast of the current New York JFK International Airport.
The ship was only in America for 3 days.
During this time, the crew were allowed to rest and have hot showers; they attended a constant series of events where they were saluted for their historic crossing.
The people of New York lavished their generosity on the crew, and they were bombarded with offers of invitations to formal functions in NewYork during their stay.
Many dinners and parties were provided for the crew members; many had never been entertained at this level of opulence by the New York society.

Commander Maitland at the window of the Command Gondola

The rear power car being hauled down

R34 US Servicemen take over mooring
The engineering crew stayed with the ship, ready to give the engines a long-awaited overhaul and a full check over in preparation for their return voyage home.
It was found that no repairs were necessary, and the engines had performed well.
The propellers had accumulated a thick coating of engine oil, and this was proudly removed by a local firm, free of charge and just happy to offer assistance to the crew and to the ship.
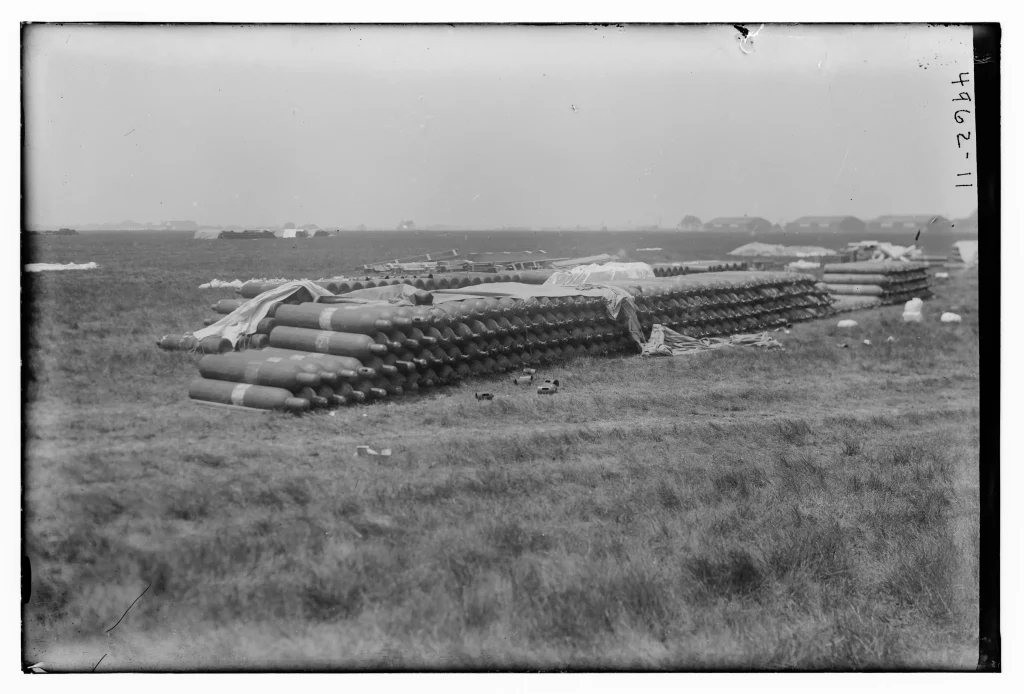
Hydrogen gas bottles for replenishing the R34 at Roosevelt Field
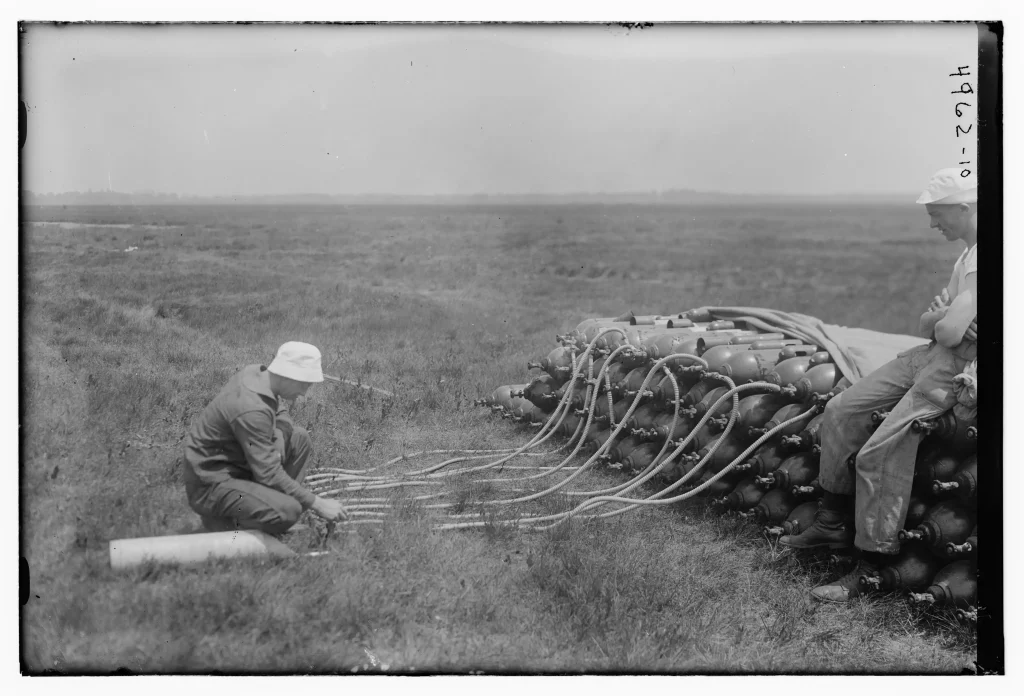
The R34 was in very good shape and moored to a three-wire system at the bows, whose own lift kept the wires taut.
However, some of the guide wires caught and tore one of the panels in the nose.
This was hastily repaired with a spare canvas covering.
The crew returned to the ship, and provisions were loaded back onto the ship for her return voyage. Some 25lb of mail was delivered to the ship for its return journey to England.
The final preparation was to gas the ship, and this was carried out using thousands of cylinders of hydrogen gas.

Col Hensley US Army Air Service, Unknown and Sq Lrd G.H. Scott

Stowaway William Ballantyne

Headlines of the New York Times

R34 Crew Members with a gramophone presented by Eddison and Wopsie, the stowaway cat
The Return Journey HomeAs with the flight to America, the R34 would be gassed to capacity again and await the coolest part of the day to depart, and so the ship was finally launched at 6 minutes to midnight on Wednesday, July 10th.
The great crowd which had always been around the R34 her entire time in America gave a huge cheer, and the ship was launched.
The wind had picked up before the launch and was gusting at 30mph, which caused concern, but the ship cleared the landing field and made her way towards New York City in the distance.
As a gesture of gratitude to the city, which had generously hosted her crews, the R34 flew towards the illuminated metropolis.
The ship made her way up to a height of 2,000ft as Major Scott was unsure of the height of the skyscrapers.
Searchlights illuminated the ship as she flew over the city, and, despite it being 1.00 am in the morning, thousands of well-wishers took to the city streets and rooftops to wave.
The ship then turned out to sea and headed on towards home.
Very good progress was made during the night as the ship had the advantage of a strong tail wind, and her speed increased to 90mph as she flew in the prevailing air current.
The forward engine was resting, and still the ship was managing to race along at 90 mph.
The crew was unprepared for the swiftness of their eastward crossing of the Atlantic.
It was considered that, as the R 34 was gaining time on her voyage and not expending much of her fuel compared to her outward journey, the ship could change her flight route and fly over London before returning to East Fortune. The return home was uneventful, and the standard ship routine continued. The only problem occurred when an engineer fell against the clutch of an engine, causing the engine to be freed and race until destruction because the connecting rods fractured.
The repairs could not be made in flight, and so the engine was stopped, but this in no way impeded the speed of the ship. Due to this event and not having any spare power in case of emergencies, it was decided to cancel the voyage over London and head straight home.
It was not until the final evening at midnight that a message was received from the Air Ministry to divert the ship from landing at East Fortune, but to go directly to Pulham.
It was initially due to bad weather at East Fortune, but a few hours later, a message from East Fortune confirmed the weather conditions had improved.
A request was put in to the Air Ministry to have the ship return to East Fortune, but this was turned down, and the ship was ordered to Pulham.

The R34 over Pulham airfield with the ground crew saluting the incoming ship on the tank used for towing in the ships.

Smiling Captain Scott on the successful return

Captain Scott reads a telegram congratulations to the officers and the crew, on the record breaking voyage, from the King on return to Pulham
No reason was ever given for this change in plan, and no explanation can be found for it.
The ship crossed the English countryside and came, rather quietly to Pulham Air Station at 6.57 GMT to be welcomed by the RAF personnel, which was rather quieter than that which greeted the ship at New York, and than expected at East Fortune.
The return journey had taken three days, three hours and three minutes. The ship had travelled some 7,420 miles on this voyage at an average speed of 43 mph.

The R34 Crew – notice the crew pets – two dogs, and a cat called Whoopsie. Whoopsie accompanied the stowaway William Ballantyne to America.
Back to Scotland and a RefitThe R34 was laid up at Pulham; however, as this was one of the busiest bases and a centre for experiments, it was decided that, due to space, the R34 would return to East Fortune and spend 6 months being refitted.
R34 Moves Again and bow hatch fitting – HowdenIn February 1920, the R 34 then made a seven-and-a-half-hour flight back to Pulham. The ship remained at Pulham for six week, where no flights were undertaken.
It was later decided that the ship would be assigned to Howden Airship Station, and she was flown up to Yorkshire at the end of March 1921.
At Howden, the R34 was to undertake further changes, like her sister ship the R33, to enable her to be moored at a mooring mast.
Her bows were to be altered to allow access to the ship, and a mooring cone was added. The new cone was ordered and placed on the R33, but the R34’s mooring gear had not arrived to be fitted to the ship.
On 27th January 1921, the R34 left Howden on her first voyage for several months. It was deemed that she was to carry out duties as with the R32, as an instructional ship for American crew.
The R34- Training Role, and Accidental DestructionThe R34 was to talk on the role of an instructional ship, to train American crews who had come over and were based at Howden in Yorkshire.
The British team were to train the US crews who were to be taking on the R38, later to be designated the ZR2, which had been sold to the Americans.
The R34 carried an instructional crew as part of a training flight, but also to check whether the recent repairs to the ship had been successful.
The ship moved out over Spurn Head, and during this time, due to confusion with radio messages, contact was lost with the ship.
Commander Maitland decided to recall the ship, and the message was ordered to be repeated until understood. The ship finally heard the signal and began to return home.
Confusion occurred on the R34 as the navigating officer had lost his way and thought that the ship was safe to journey home; however, during the voyage, the weather had deteriorated, and a heavy fog enveloped the area.
The signals were confused as to the ship’s exact location; however, the crew continued in the direction of Howden.
By midnight, the crew was settling into their bunks, and the watches were changing when a loud grinding sound was heard and a shudder went through the ship.
The control gondola lights went out, and the crew was thrown to the floor. Upon recovery, it was discovered that at 12.10 am, a sudden downdraft had pushed the ship into an unseen slope of the moors.
Luckily, the ship “bounced” and lurched upwards, and the captain rang for the engines to be stopped.
The R34 was floating helplessly in the wind whilst the damage could be assessed
. It was discovered that clumps of heather were stuck to the forward gondola, some of the windows were smashed, and the bumping bags had been carried away.
One girder in the keel had been twisted, two engine car struts were damaged, the wireless aerial shortened,d and the fore and aft propellers were reduced to stubs.
This last assessment of damage meant that the ship was now deprived of 50% of her power.
The remaining engines were started, and able to check the drift of the ship against the wind.
The R34 had floated out over the North Sea and, like her sister ship, limped home against the wind, damaged and underpowered.
By midday, the R34 neared Hull, which was only 20 miles from Howden, and it then took three hours the get the ship back to her home landing field.
At 3.00 pm, the sky had grown dark, and the landing crew assembled to haul the ship home.
The ship was almost to the doors of the shed when a gust took the ship back out onto the landing field.
The wind was gusting very strongly now, and the handling crew were at times being carried aloft as the ship bucked in the gale. More damage was done to the fore and aft cars; the rudder had jammed, and the controls were therefore inoperable.

Nose of the R34 collapsing

The R34 comes to ground, 28th January 1921, whilst emergency moored at Howden, the ship breaks up during a gale.
Commander Maitland then had to give the order to abandon ship, and the crew scrambled safely to the ground.
The R34 was then taken back to the mooring block with the idea to have the ship ride out the storm on the tree wire system, which she had used at Mineola.
Further damage occurred in trying to get the ship moored; a girder punctured some of the gasbags when it buckled.
The ship was finally moored, and it was thought that the ship would be able to survive the night; however, the gales increased in strength, and the ship’s loss of gas caused her to settle to the ground.
Her bows were smashed, and the hull of the ship was damaged beyond repair by the first light of the morning.
It was obvious that R34 would never fly again.
Within 3 days of the accident, the R34 had been stripped of her equipment and outer cover, anything salvageable from the ship had been reclaimed, and the rest of the hull structure was destroyed.
The sad remains of the R34 were later sold for scrap.
- Design and Construction
- First Trial Flight
- Baltic Flight
- Endurance Flight
- Preparations for the Atlantic
- The Transatlantic Flight
- Making Landfall in America
- The Return Journey Home
- Back to Scotland and a Refit
- R34 Moves Again and bow hatch fitting - Howden
- The R34- Training Role, and Accidental Destruction
Diameter: 79ft
Speed: 62mph
Engines: 5 x 270hp
Volume: 1, 950, 000cft
www.airshipsonline.com
Library DocumentsTo the members of her crew, His Majesty’s Airship R34 was known as ‘Tiny’ – inevitably. The ship was enormous: as big as a contemporary ‘Dreadnought’ battleship.
Her overall length from bow to stern was 643 feet, twice as long as a football field; her maximum diameter was 79 feet, and her overall height was just short of 92 feet.
Her cost was around £350,000, and her total gas capacity was 1,950,000 cubic ft, giving a gross lift of about 59 tons and a disposable lift, when the weight of the structure and permanent fittings was discounted, of 26 tons.
Like her sister ship, five engines were fitted, each of 250 hp.p
Design and ConstructionAt the time, German technical development had been kept under close observation and R34, in particular, had departed from the engine plan of L.33 to follow instead that of the later and more advanced L.49, which had been forced to land in France in October 1917.
The former ship had boasted six engines: one to each of the three forward propellers, one to the rear propeller and two driving small ‘wing’ propellers by shaft.
On the latter vessel, the designers had done away with this cumbersome arrangement, eliminating one engine and the two wing propellers entirely, harnessing the power of two rear engines to a single enlarged propeller.
The contract for the construction of the R34 had been signed out to William Beardmore and Company.
The Beardmore Company was one of the most diverse and enterprising heavy engineering companies on Cyldeside.
By 1916, the company was employing some 15,000 workers, who were producing a range of vehicles, ships and items specifically for the Government in the war effort.
The company had already proven itself in airship production by being awarded contracts and completing the R24 and R27.
To build these airships, the company had acquired a piece of land, some 600 acres at Inchinnan on the south side of the River Clyde.
The construction site location today is just over a mile from the current Glasgow Airport location.
The shed was created for the construction of the R24, and similarly to the construction facility at Cardington, the Beardmore company also provided houses for the airship workers.
Some of the housing, known as Beardmore Cottages, is still present in the village of Inchinnan.
Artist impression of the new R34
The R34’s construction details have been frustratingly sparse, as the Beardmore Factory and records office suffered from the German bombardment during WWII and were destroyed during a heavy night of bombing in 1941. However, there are some constructional details which are available.
As with airships constructed at the same time, the basis of construction was the same.
The whole framework was varnished to prevent atmospheric corrosion and heavily braced by wiring. Lengths of linen fabric were stretched between each pair of frames, where they were attached by laces.
Narrow strips were then glued over the lacing, and the covering of the hull was painted with dope containing aluminium powder, to reflect sunlight and so reduce superheating.
In the chambers formed by the main circumferential frames and the longitudinal girders were the gasbags, nineteen in all and made of one thickness of rubber-proofed cotton cloth, varnished and lined with goldbeaters’ skins.
Each gasbag was contoured to fill all the available space and was surrounded by cord mesh to prevent chafing against the girders.
Following the same design as the R33, beneath the main body of the airship, suspended by long, wooden struts and braced rigging wires, were four small gondolas.
R34 with outer cover being attached to the framework, Inchannan 1917
R34 under construction Inchannan 1917.
Some further details on the R34 can be read on the life of the Chief Inspector of the wiring team at the Inchinnan works, John S Richardson, can be found with a link to his son’s blog page here.
As designed in the R33, the forward gondola appeared to be a single unit, some fifty feet long, but was actually made up of two parts separated by a narrow gap, intended to prevent vibration from the engine affecting the Wireless Telegraph (W.T.) equipment. Incorporated in the forward section were a control room and a small wireless cabin, below which, during flight, trailed a long aerial.
The control cabin was fronted with ‘Triplex’ safety glass and had handling rails mounted on each side. Here were the steering and elevator wheels, the gas-valve controls, the engine telegraph, the various navigational and WT instruments and the toggles controlling the emergency forward water ballast.
Connecting the control cabin with the keel was a ladder, protected from the elements by a streamlined canvas cover. Another cover similarly enclosed the numerous control-wire connections that led up into the hull.
In the rear section of the forward gondola was the first of the engines, driving a single pusher propeller 17 feet in diameter.
In the middle of the lower hull amidships were the two smaller ‘wing’ gondolas housing an engine, together with reversing gear, a refinement that enabled the airship to be operated if those in the main control cabin failed.
The rear car was ringed with a rail to assist handlers and, as with the forward gondola, two ‘bumping bags’ of compressed air were positioned underneath to help cushion landing shocks.
Each of the five engines was a Sunbeam ‘Maori’: a new type designed for the Wolverhampton firm by a Frenchman, Louis Coatalen, and intended specifically for airship use but clearly inferior to the Rolls-Royce engines used by earlier British rigids.
Unfortunately, no Rolls-Royce engines could be made available as all those produced were now reserved for aeroplane use.
R34 forward control car
Sumbeam Maori engine
The Sunbeams had been accepted reluctantly. Each engine had twelve water-cooled cylinders, which were intended to produce full power at a theoretical 2,100 rpm, although in practice it was rare for 1,600 rpm to be exceeded. In the forward and wing cars, the radiators were mounted externally and controlled by folding shutters.
The after gondola of R34 contained two engines geared to one propeller.
The engines were each fitted with a hand starter, while the drive to the propellers was through a sliding Hele-Shaw dog-clutch and a reduction gearbox with a ratio of 1:3.86.
The clutch enabled the engine to be started and warmed up before flight without endangering the handling party and made it easier to carry out repairs in the air.
If the engine should be stopped during flight, the disconnected propeller could rotate freely in the airstream to reduce head resistance, although if it was required to remain stationary for landing or any other reason, a special brake was provided for this purpose.
Assuming that the airship was still moving forward, the engine might then be started by releasing the brake, engaging the clutch again, and allowing the airstream to turn the engine.
In addition to the gondolas, a considerable amount of space was also available inside the hull and invisible to the outside observer.
Running almost the entire length of the ship was a long keel corridor, consisting of a succession of A-shaped frames standing on the two lowest girders, and with three auxiliary longitudinal girders of their own to fence off the surrounding gasbags.
At its widest part, this corridor was about 10 ft across, narrowing somewhat towards the extremities. Leading to the wing, and after cars were narrow ladders, fully exposed to the force of the elements.
It had been discovered following tests on R33 that the turning coefficient of the two airships was 6.4, giving a minimum turning circle some 4,100 feet in diameter.
However, so strong was the effect of the slipstream of the after propeller acting on the rudder that with the forward engine still and the wing propellers both running in reverse, it was possible for R33 and R34 to pivot virtually on the spot.
Designed slimmer than the theoretical ideal, the aerodynamic shape of R34 was a distinct improvement on most earlier designs – her total air resistance being only seven per cent of a hypothetical flat disc of the same diameter.
In later airships, this was reduced even further, but in her own day, the streamlining of R34 was excellent and twice as effective as that of her British predecessors.
Even though the R34 was designed during a time of war, the R34 was never fitted with a full armament. In addition to bomb racks, the original plan had been to include a ventral ‘gun house’ behind the rear car, which would carry a one-pounder Pom-Pom and two Lewis machine guns.
Another Lewis gun was to be mounted on the rear platform behind the tail, while six more were to be shared equally among the two wing-cars, the forward gondola and the top gun platform.
A further arsenal of weapons was tp include two-pounder quick-firing guns which were to be placed on each side of the hull, and two more were to join the Lewis guns on top.
This heavy armament was presumably intended for defence against German Zeppelins, but in the event the gun house was never fitted and the number of guns was considerably reduced.
The original specification showed that her bomb-load was quite considerable: twenty at 100 lb and four at 550 lb.
The firm of William Beardmore and Company Ltd. of Inchinnan near Glasgow began work on R34 on 9 December 1917, and she was completed just over a year later.
Preparations to H.M.A.R34 were completed in December 1918 and her lift and trim trials were carried out successfully on the 20th of that month.
By the time R34 was ready for her test flights, the war was over, and she was too late to see active service.
R 34 emerges from the Inchinnan works shed March 14th 1918
On 30th December 1918, while bad weather delayed the trial flight, the Admiralty agreed to lend their airships to the Air Ministry for long-distance trials.
R34 was specifically mentioned, but because of the persistently bad weather, it was not until the following March that she left her hangar at Inchinnan, near Glasgow, where the Beardmore Company had their works.
First Trial FlightOn 14 March 1919 R.34 was brought out from her shed, and her crew began the task of accustoming themselves to the ship.
The maiden flight, lasting nearly five hours, was uneventful, and the ship was returned safely to her shed.
On 24th March, despite cold, windy conditions with intermittent fog, snow and hail, R.34 left Inchinnan in the late afternoon for a more extended trial.
R34 Trial flight 2,000ft over Renfrew, Scotland 14th March 1919.
(This is not Renfrew. It actually over the Beardsmore Workers Houses in Inchinnan. Just a couple of hundred metres west of the Massive Shed the R34 was constructed in.)
She flew down the Clyde, and then turned to fly over the North of England, towards Newcastle, then turned and returned via Liverpool, over the Irish Sea to Dublin, and returned via the Isle of Man.
During this trial, it was discovered that her elevator had jammed down, lifting the nose up. After bringing the ship to an even keel, the ship was nursed home to Scotland.
No real damage had been done, but on return to the base, the ship was badly handled by the ground crew, which caused damage to her propellers and some of the main girders.
The damage caused the ship to be laid up to be repaired; it was this incident which caused the delay in the trip to the USA, and hence, losing the title of the “first to cross the Atlantic” to Alcock and Brown.
The R34 was ready for service again at 6.00 pm on 28th May, and the ship left Inchinnan for her new home of East Fortune, the main airship base on the Firth of Forth.
The R34 was enveloped in fog and so headed out to sea to wait an improvement in the landing conditions.
The ship had to wait longer than expected and finally landed at 3.30 pm the next afternoon. The crew was hungry after 21 hours as no food had been carried on board this flight.
Baltic FlightThe plans for the transatlantic voyage were hurried forward. Two weeks after arriving at East Fortune, the R34 flew with the R29 over Edinburgh and Berwick.
This short 6-hour flight was to confirm the stability of the ship. On the evening of the 17th June 1919, the R34 was sent on an endurance voyage to give her a proper test before her major flight.
The idea was that the ship would be scouting the German Baltic Shores.
Endurance FlightThe ship carried out its duties and also flew up to Denmark, Norway and Sweden. The ship landed after this endurance trial on the morning of the 20th June after a trip of 54 hours.
Preparations for the AtlanticThe Air Ministry had now finally decided to take the R34 to the USA, and a northerly coastal route was decided in case the ship ran out of fuel; then she would never be too far from landfall.
Two warships, the Renown and Tiger, were offered as supply vessels in case the ship came into difficulty and also to offer meteorological reports.
It was agreed that if the ship did get into difficulty, then the R34 would be taken in tow.
R34 Preparations, Inchannan, Scotland
The plans which were being arranged in New York were the supply of hydrogen for the ship, and a party of 8 experienced airmen were dispatched to America to arrange and train the main part of the American ground crew.
The Americans had at that time no experience of a rigid airship.
At the Admiralty, a room was set aside for wireless messages.
A map was also provided for the ship’s progress. At East Fortune, further alterations were being made to the ship itself for the voyage.
Food lockers replaced bomb racks, which had been installed at her construction, and a compass was placed on the upper gun platform in order that the magnetic field would not be interfered with by any of the electrical equipment.
Additional tables and new wash basins were added in the crew space and furnished with lightweight curtains to stop the drafts from the interior of the hull.
Along the keel an additional 24 petrol tanks were fitted, bringing the total fuel capacity to some 6,000 gallons.
The crew were divided into two watches for the trip. In addition to the RNAS uniforms, the crew was issued with heavy-duty flying suits, which were redesigned to include parachute harnesses and integral life-saving collars.
Some 112lb of mail and parcels were loaded aboard the ship for delivery to the United States, including letters from the King and Prime Minister to the President of the United States.
The Transatlantic FlightOn 1st July 1919, it undertook a publicity flight over London, where it was seen above the capital.
The ship returned to Inchinnan in time for preparation for the flight to America.
R.34 over St Paul’s Cathedral on 1st July 1919
The ship was gassed to its limit and loaded to its full capacity, and by the end of the evening, the ship was ready to go.
The ship’s official departure time was set at 2.00 am (GMT) on 2nd July in order to obtain the maximum lift from her gasbags.
The ship was eased out of her shed slowly by 700 members of the handling party.
The weather forecast was favourable and Major Scott decided not to wait any longer. and at 1.42 am (GMT) the signal to release was given and the R34 lifted slowly into the misty night sky.
The engines were signalled to commence, and the propellers roared into life.
The ship was on the way to America, but was so loaded for the journey that even with the forward momentum of the engines, she very slowly gained height.
The R34 travelled along the Firth of Forth, then at a height of 1,300ft she cleared Rosyth, Glasgow, and down the Clyde by daybreak.
Life on board began to settle into the routine of the agreed scheduled watches, meals and rest times.
Strains of jazz could be heard through the ship from the gramophone, which was carried on board for the entertainment of the crew.
Crossing the ocean, the morning fog lifted, and the crew saw that they were stuck between two cloud layers, the upper obscuring the sun.
The wireless operators were finding that these weather conditions were causing electrostatic shocks from the equipment.
The clouds soon parted, and the sun broke through. Major Scott was wary of the effect of superheating on the gasbags and wanted to avoid at all costs the valving of hydrogen at this early stage of the flight
So he brought the ship down low into the layer of fog, which protected the ship from the sunshine and soon cooled the gas.
The ship carried on with her voyage at a steady pace and standard routines.
The main upset occurred at 2.00 pm on the first day.
It was discovered that a stowaway had managed to creep on board the ship and hide up in-between the girders and the gasbags inside the hull of the ship.
Before starting on the voyage, it was decided that some of the members of the crew, including William.W. Ballantyne, must be left behind, the numbers being limited of necessity, to thirty on the voyage.
R34 Coxwain, rating at elevators and WT Operator
R34 Half way across Atlantic looking aft
This rare shot taken on 5th July 1919 as the R 34 flew over Brookfield, Nova Scotia, Canada.
Possibly the first photo of a transatlantic aerial arrival to the continental North America.(credit AHT member Tom Raub)
Two hours before the flight, William Ballantyne managed to climb back on board the ship and hid himself in the darkness of the ship.
He had also carried with him the crew’s mascot, a small tabby kitten called “Whoopsie”.
Both of these stowaways had hidden themselves.
But the cramped conditions and the fact that the smell of the gas had made Ballantyne nauseous made him give up and come out of hiding.
The dishevelled stowaway was brought in front of Major Scott and Maitland, and it was decided that there was actually nothing they could do about it.
It was agreed that had they been over land, then Ballantyne would have been put overboard by parachute, but as the next landfall was in fact America, he was to stay on board.
The only problem that could occur was the strain on the very limited and controlled resources.
Having been quite ill for some time, he was resting on one of the hammocks and attended to by Lieutenant Luck.
When he recovered, Ballantyne was, as with traditional stowaways, made to work his passage as cook and often had to hand pump the petrol into the tanks.
As to the second stowaway, Whoopsie, it was deemed that the oldest airman on board, 42-year-old George Graham, accepted responsibility for the cat, and Whoopsie worked her passage throughout the rest of the voyage, providing entertainment and comfort to the other crew members.
The weather slowly worsened, and all the ship’s engines were engaged to full power as the wind speed increased and a storm began to approach.
The next morning the R34 was halfway across the Atlantic, but the weather was continuing to deteriorate.
However, throughout the day, there were some breaks in the weather, causing the ship to be able to view the transatlantic shipping traffic below, for some 50 miles in each direction.
By the evening, the weather became increasingly stormy, and the wind turned head-on to the ship.
Coming up from the southeast, the winds were blowing at about 50mph, causing the ship to fight her way forward and sideways.
Throughout the night, Major Scott tried to move the ship up higher to avoid the wind, but it was found to be the same at each level.
By morning, the cloudbank had moved away, and clear skies brought a sight of a 150ft iceberg below the ship, further behind it smaller bergs and pack ice were visible.
The clouds soon returned as Newfoundland was not far off the ship, and fog enveloped the ship once more.
R34 Altantic Route
Concern was beginning to show by Major Scott as there were no gauges on the petrol tanks, and use of the dipstick showed that there were only some 2,200 gallons of petrol left.
With further strong headwinds expected down the coast, the thought of getting to New York without stopping was looking more unlikely every hour that drew on.
The ship flew over Labrador, and at 12.50 the land was sighted for the first time.
Now the ship had to follow the coast down and head for its landing place at New York.
With only 500 gallons of fuel left, the ship was brought down to 800ft to try and escape the worst of the headwinds.
From this height, the crew had superb views of the North American forests and could see, smell and hear every detail.
The ship had been in the air for 4 days, and the crew was beginning to tire. Emergency preparations were tentatively being made in Boston for an emergency landing there, but the ship continued on her voyage.
Each fuel tank was inspected, and whatever was left in the bottom of the tanks was collected and poured into the main tanks to keep the engines running.
The 12 British ground crew, which had been sent on ahead by ship to make arrangements for the landing, had heard from Scott about the critical fuel situation, and started up for Boston, and had already made preparations for a landing at Massachusetts.
However, it was decided that there was enough fuel left in the tanks, as John Shotter worked with many of the crew members to use jam jars or whatever they could find to carry any of the dregs of fuel from the tanks to the engines.
Major Scott made the decision that they had enough fuel to continue onto the agreed landing area at Roosevelt Field, Mineola, Long Island, New York.
In the last hour of the flight, the crew busied themselves making themselves presentable.
By 9.00 am, Mineola came into view. The landing field had been prepared with 20-tonne concrete mooring blocks.
All the carparks were full, and a huge grandstand had been erected for local and national dignitaries.
Major Jack Pritchard donned a parachute and, whilst the ship circled overhead, dropped to the ground and became the first man to arrive in America by air.
US Servicemen rush to catch hold of ship
R34 Moored up on the three wired system
Mineola Officers holding and taking instructions from the forward gondola
He hastily arranged the ground crews and helped ease the ship to the ground.
The R34 landed at 9.54 am after 108 hours and 12 minutes of flying time, equating to some four and a half days.
This became the world endurance record, breaking the set by the British North Sea Class non-rigid airship, the NS 11, of some 101 hours 5 minutes.
There were 140 gallons of fuel left on board, which was sufficient only for another 2 hours of flying at reduced power.
Making Landfall in AmericaMineola airfield, known as Roosevelt Field was some 15 miles east of Manhattan Island, and some 10 miles northeast of the current New York JFK International Airport.
The ship was only in America for 3 days.
During this time, the crew were allowed to rest and have hot showers; they attended a constant series of events where they were saluted for their historic crossing.
The people of New York lavished their generosity on the crew, and they were bombarded with offers of invitations to formal functions in NewYork during their stay.
Many dinners and parties were provided for the crew members; many had never been entertained at this level of opulence by the New York society.
Commander Maitland at the window of the Command Gondola
The rear power car being hauled down
R34 US Servicemen take over mooring
The engineering crew stayed with the ship, ready to give the engines a long-awaited overhaul and a full check over in preparation for their return voyage home.
It was found that no repairs were necessary, and the engines had performed well.
The propellers had accumulated a thick coating of engine oil, and this was proudly removed by a local firm, free of charge and just happy to offer assistance to the crew and to the ship.
Hydrogen gas bottles for replenishing the R34 at Roosevelt Field
The R34 was in very good shape and moored to a three-wire system at the bows, whose own lift kept the wires taut.
However, some of the guide wires caught and tore one of the panels in the nose.
This was hastily repaired with a spare canvas covering.
The crew returned to the ship, and provisions were loaded back onto the ship for her return voyage. Some 25lb of mail was delivered to the ship for its return journey to England.
The final preparation was to gas the ship, and this was carried out using thousands of cylinders of hydrogen gas.
Col Hensley US Army Air Service, Unknown and Sq Lrd G.H. Scott
Stowaway William Ballantyne
Headlines of the New York Times
R34 Crew Members with a gramophone presented by Eddison and Wopsie, the stowaway cat
The Return Journey HomeAs with the flight to America, the R34 would be gassed to capacity again and await the coolest part of the day to depart, and so the ship was finally launched at 6 minutes to midnight on Wednesday, July 10th.
The great crowd which had always been around the R34 her entire time in America gave a huge cheer, and the ship was launched.
The wind had picked up before the launch and was gusting at 30mph, which caused concern, but the ship cleared the landing field and made her way towards New York City in the distance.
As a gesture of gratitude to the city, which had generously hosted her crews, the R34 flew towards the illuminated metropolis.
The ship made her way up to a height of 2,000ft as Major Scott was unsure of the height of the skyscrapers.
Searchlights illuminated the ship as she flew over the city, and, despite it being 1.00 am in the morning, thousands of well-wishers took to the city streets and rooftops to wave.
The ship then turned out to sea and headed on towards home.
Very good progress was made during the night as the ship had the advantage of a strong tail wind, and her speed increased to 90mph as she flew in the prevailing air current.
The forward engine was resting, and still the ship was managing to race along at 90 mph.
The crew was unprepared for the swiftness of their eastward crossing of the Atlantic.
It was considered that, as the R 34 was gaining time on her voyage and not expending much of her fuel compared to her outward journey, the ship could change her flight route and fly over London before returning to East Fortune. The return home was uneventful, and the standard ship routine continued. The only problem occurred when an engineer fell against the clutch of an engine, causing the engine to be freed and race until destruction because the connecting rods fractured.
The repairs could not be made in flight, and so the engine was stopped, but this in no way impeded the speed of the ship. Due to this event and not having any spare power in case of emergencies, it was decided to cancel the voyage over London and head straight home.
It was not until the final evening at midnight that a message was received from the Air Ministry to divert the ship from landing at East Fortune, but to go directly to Pulham.
It was initially due to bad weather at East Fortune, but a few hours later, a message from East Fortune confirmed the weather conditions had improved.
A request was put in to the Air Ministry to have the ship return to East Fortune, but this was turned down, and the ship was ordered to Pulham.
The R34 over Pulham airfield with the ground crew saluting the incoming ship on the tank used for towing in the ships.
Smiling Captain Scott on the successful return
Captain Scott reads a telegram congratulations to the officers and the crew, on the record breaking voyage, from the King on return to Pulham
No reason was ever given for this change in plan, and no explanation can be found for it.
The ship crossed the English countryside and came, rather quietly to Pulham Air Station at 6.57 GMT to be welcomed by the RAF personnel, which was rather quieter than that which greeted the ship at New York, and than expected at East Fortune.
The return journey had taken three days, three hours and three minutes. The ship had travelled some 7,420 miles on this voyage at an average speed of 43 mph.
The R34 Crew – notice the crew pets – two dogs, and a cat called Whoopsie. Whoopsie accompanied the stowaway William Ballantyne to America.
Back to Scotland and a RefitThe R34 was laid up at Pulham; however, as this was one of the busiest bases and a centre for experiments, it was decided that, due to space, the R34 would return to East Fortune and spend 6 months being refitted.
R34 Moves Again and bow hatch fitting – HowdenIn February 1920, the R 34 then made a seven-and-a-half-hour flight back to Pulham. The ship remained at Pulham for six week, where no flights were undertaken.
It was later decided that the ship would be assigned to Howden Airship Station, and she was flown up to Yorkshire at the end of March 1921.
At Howden, the R34 was to undertake further changes, like her sister ship the R33, to enable her to be moored at a mooring mast.
Her bows were to be altered to allow access to the ship, and a mooring cone was added. The new cone was ordered and placed on the R33, but the R34’s mooring gear had not arrived to be fitted to the ship.
On 27th January 1921, the R34 left Howden on her first voyage for several months. It was deemed that she was to carry out duties as with the R32, as an instructional ship for American crew.
The R34- Training Role, and Accidental DestructionThe R34 was to talk on the role of an instructional ship, to train American crews who had come over and were based at Howden in Yorkshire.
The British team were to train the US crews who were to be taking on the R38, later to be designated the ZR2, which had been sold to the Americans.
The R34 carried an instructional crew as part of a training flight, but also to check whether the recent repairs to the ship had been successful.
The ship moved out over Spurn Head, and during this time, due to confusion with radio messages, contact was lost with the ship.
Commander Maitland decided to recall the ship, and the message was ordered to be repeated until understood. The ship finally heard the signal and began to return home.
Confusion occurred on the R34 as the navigating officer had lost his way and thought that the ship was safe to journey home; however, during the voyage, the weather had deteriorated, and a heavy fog enveloped the area.
The signals were confused as to the ship’s exact location; however, the crew continued in the direction of Howden.
By midnight, the crew was settling into their bunks, and the watches were changing when a loud grinding sound was heard and a shudder went through the ship.
The control gondola lights went out, and the crew was thrown to the floor. Upon recovery, it was discovered that at 12.10 am, a sudden downdraft had pushed the ship into an unseen slope of the moors.
Luckily, the ship “bounced” and lurched upwards, and the captain rang for the engines to be stopped.
The R34 was floating helplessly in the wind whilst the damage could be assessed
. It was discovered that clumps of heather were stuck to the forward gondola, some of the windows were smashed, and the bumping bags had been carried away.
One girder in the keel had been twisted, two engine car struts were damaged, the wireless aerial shortened,d and the fore and aft propellers were reduced to stubs.
This last assessment of damage meant that the ship was now deprived of 50% of her power.
The remaining engines were started, and able to check the drift of the ship against the wind.
The R34 had floated out over the North Sea and, like her sister ship, limped home against the wind, damaged and underpowered.
By midday, the R34 neared Hull, which was only 20 miles from Howden, and it then took three hours the get the ship back to her home landing field.
At 3.00 pm, the sky had grown dark, and the landing crew assembled to haul the ship home.
The ship was almost to the doors of the shed when a gust took the ship back out onto the landing field.
The wind was gusting very strongly now, and the handling crew were at times being carried aloft as the ship bucked in the gale. More damage was done to the fore and aft cars; the rudder had jammed, and the controls were therefore inoperable.
Nose of the R34 collapsing
The R34 comes to ground, 28th January 1921, whilst emergency moored at Howden, the ship breaks up during a gale.
Commander Maitland then had to give the order to abandon ship, and the crew scrambled safely to the ground.
The R34 was then taken back to the mooring block with the idea to have the ship ride out the storm on the tree wire system, which she had used at Mineola.
Further damage occurred in trying to get the ship moored; a girder punctured some of the gasbags when it buckled.
The ship was finally moored, and it was thought that the ship would be able to survive the night; however, the gales increased in strength, and the ship’s loss of gas caused her to settle to the ground.
Her bows were smashed, and the hull of the ship was damaged beyond repair by the first light of the morning.
It was obvious that R34 would never fly again.
Within 3 days of the accident, the R34 had been stripped of her equipment and outer cover, anything salvageable from the ship had been reclaimed, and the rest of the hull structure was destroyed.
The sad remains of the R34 were later sold for scrap.
InchinnanTable Of Contents
LocationCity/County: Inchinnan, Glasgow, Scotland
Country: Scotland
1 Constructional Shed
Constructional Facilities
Proposed Facilities2 Sheds
www.airshipsonline.com
AboutThe Beardmore Company was a famous Glasgow industrial company, producing a range of products from bullets, helmets, to ships and planes.
In 1916, they were given the Government contract to help build airships.
With the revival of the rigid airship programme, the armaments firm Beardmore bid successfully to build them.
Based at Dalmuir on the western side of Clydebank, the company was the Scottish equivalent of Vickers, specialising in building warships and armaments.
Although it had experimented with aeroplanes as Shorts and Armstrong Whitworth had done, the company had no previous experience in building airships.
Glaswegian armaments company, William Beardmore and Sons, an established ship and armaments company, known as the Scottish equivalent of Vickers Company, began negotiations, along with Armstrong and Whitworth, and Vickers, to build large rigid airships.

Inchaninnan Shed Plans
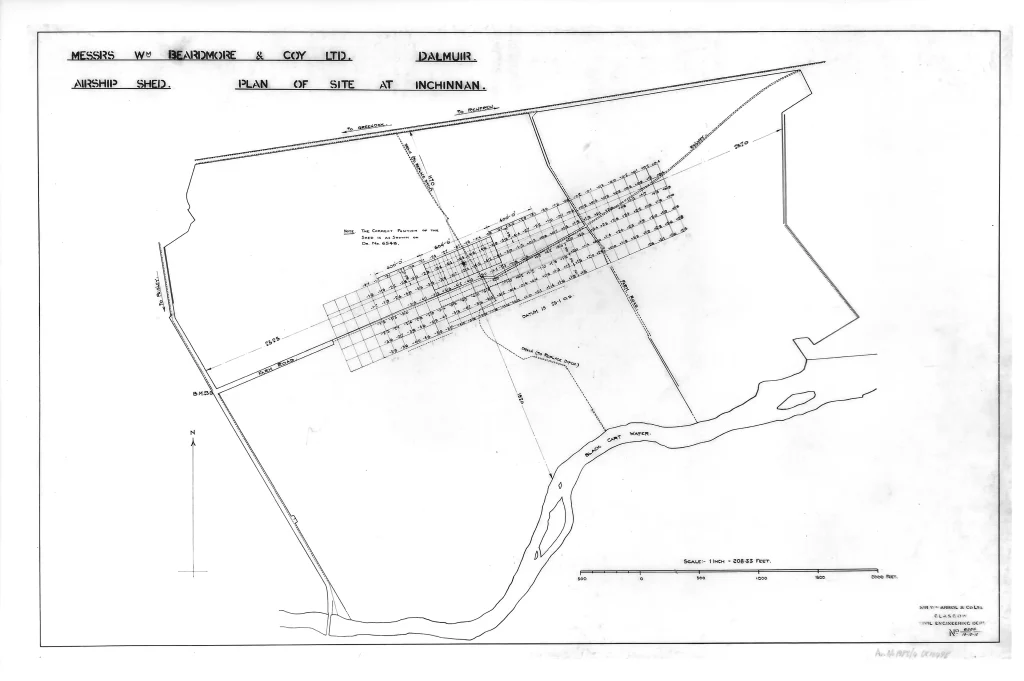
Inchinnan Airship Station plan layout
LocationOctober 1915 saw the company awarded the contract to build HMA No.24 and began working on manufacturing some of its parts in its seaplane sheds in Dalmuir, on the north side of the River Clyde.
There was no room for an airship shed in the currently built-up area; however, the land on the south bank of the river was sparsely populated, and areas of open countryside.
The original idea was to build a shed on land opposite to Beardmore’s existing works at Newshot Island; however, a site some 1.5 miles south of Dalmuir was selected.
The land was requisitioned under the Defence of the Realm Act. Some 413 acres were purchased as the site of the new airship construction site.
Beardmore was successfully awarded a grant from the Treasury towards the cost of the new airship works.
Work began on the site in January 1916, some two years into WWI.
The construction company Sir William Arrol & Co. started work on the airship shed.
Some 2,300 tonnes of steel were required.
The glazed shed windows were tinted and fitted with blinds so that it could be blacked out at night. At both ends, the sheds were fitted with large sliding doors, counterbalanced with several hundred tonnes of concrete to stabilise when open.

Inchinnan Airship Shed
As with all of the earlier sheds, the doors were manually winched open by capstans and a team of manual workers. It was estimated that it would take the men some 13 minutes to winch open the doors.
Both ends of the shed were sheltered by large steel windbreaks. Construction was almost completed by August of 1916.
A larger hangar was later built almost opposite to the south of the shed, which was used for the construction of Hawker-Page V/1500 bombers assembled.
A second airship shed was planned for construction but never put into place.
Even though the Inchinnan Airship Works were not far from Dalmuir, it was on the opposite side of the River Clyde, and not easily accessible for the workers.
Workers HousingMany of the workers had to be driven each morning from Renfrew. Similar to the Shorts Brothers works at Cardington, the Beardmore company built fifty-two houses for it’s key workers on the site of the airfield.
The idea of a model village was created, and it gave the workers the comfort and convenience of self-contained houses with very moderate rents.
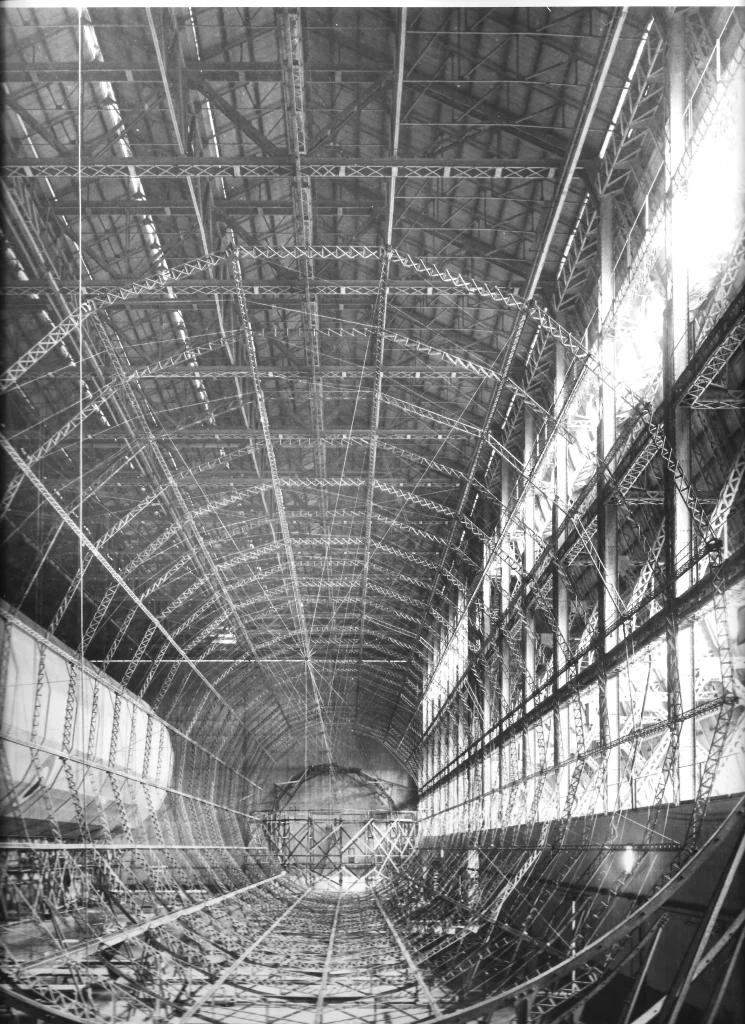
Inchaninnan Shed Interior HMA24 Hull complete and R27 under construction
Before the shed was finished, the first frames of the new airship, the R24, had been moved into the shed for assembly.
On 27th October 1917, 200 naval ratings from the Barrow-In-Furness naval base arrived to act as ground crews.
The R24 was taken out of the shed on 28th October, but the ship spent some 6 months testing mooring techniques outside.
With the ship outside, there was space inside the shed to complete another two ships side by side.
Work on the R27 commenced in March 1917 and was completed, with a first flight in June 1918.
The Inchinnan constructional shed’s most famous occupant was the transatlantic R34.
The R34 was completed in the shed and was walked in December of 1918, just after the armistice in November 1918. It was returned to the shed after ground trials and was going to undertake its first flight; however, bad weather confined the ship to the shed for the rest of the winter and didn’t re-emerge until 14th March 1919.

A painting of the R34 and R29 inside the Inchannin Shed, 1919
At the end of its second trial flight, some of the ballast bags iced up and froze.
The crew were unable to drop enough water ballast on landing, and the ship came down for a heavy landing.
A propeller and some of the girders buckled.
When the R34 was first walked out of the shed, some of the women workers pinned a black cat soft toy to the forward gondola for a good luck mascot.
On the evening of the bad landing, the mascot was removed and burned.
By the end of May 1919, the damage had been repaired and the ships were ready to be delivered to the operational airship base at East Fortune, outside of Edinburgh.
After the war, there were many ideas for commercial airship operations.
Sir William Beardmore, the owner after whom the company was named, was quoted as saying that in his opinion, “airships were the most interesting developments of all”.
The R36 was the last airship ordered and constructed in the Inchinnan constructional shed.
The work had begun on the ship as a “stretched” R34 class military ship, but it was later decided that the ship would be converted to a civil role.
This decision delayed the first flight as the ship was converted to a passenger-carrying ship, with a large external gondola fitted, with accommodation for up to fifty passengers, in both day and night configurations.
The R36 took flight on 1st April 1921, displaying its civil registration of G-FAAF.
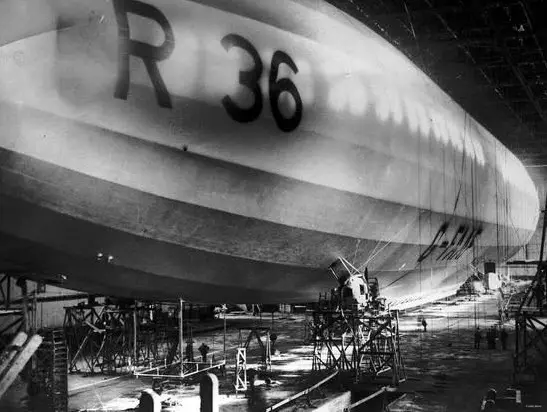
R36 under Construction at Inchinnan
Final DaysThe ship was then flown down to the Pulham experimental station and initially used for mooring trials. It was in September 1921 that the Air Ministry announced that the Inchinnan aerodrome was to close, and in the autumn of 1922, the buildings and land of the Beardmore Airship Works were handed over to the Disposal and Liquidation Commission.
During April 1923, the works were sold to Murray McVinnie & Co, ship chandlers and metal merchants. Later that year, the airship shed was demolished.
The giant Hadley Page Hangar that stood close by fared a little better, by being purchased by the India Tyre Company, and remained until 1982, sometimes confused as the “airship shed”.
Like the houses at Shortstown, Bedford, the Beardmore workers’ houses remain, and the site of the Glasgow Airport is close by, on the edge of the original land for the airship station.
TodayThe connection with aviation construction still stands to this very day, with Rolls-Royce opening a new factory in 2004 for repairing their aero engines on the same site as Beardmore’s original aviation site on the south side of the River Clyde.
LocationCity/County: Inchinnan, Glasgow, Scotland
Country: Scotland
FacilitiesActual FacilitiesGas Plant1 Constructional Shed
Constructional Facilities
Proposed Facilities2 Sheds
www.airshipsonline.com
AboutThe Beardmore Company was a famous Glasgow industrial company, producing a range of products from bullets, helmets, to ships and planes.
In 1916, they were given the Government contract to help build airships.
With the revival of the rigid airship programme, the armaments firm Beardmore bid successfully to build them.
Based at Dalmuir on the western side of Clydebank, the company was the Scottish equivalent of Vickers, specialising in building warships and armaments.
Although it had experimented with aeroplanes as Shorts and Armstrong Whitworth had done, the company had no previous experience in building airships.
Glaswegian armaments company, William Beardmore and Sons, an established ship and armaments company, known as the Scottish equivalent of Vickers Company, began negotiations, along with Armstrong and Whitworth, and Vickers, to build large rigid airships.
Inchaninnan Shed Plans
Inchinnan Airship Station plan layout
LocationOctober 1915 saw the company awarded the contract to build HMA No.24 and began working on manufacturing some of its parts in its seaplane sheds in Dalmuir, on the north side of the River Clyde.
There was no room for an airship shed in the currently built-up area; however, the land on the south bank of the river was sparsely populated, and areas of open countryside.
The original idea was to build a shed on land opposite to Beardmore’s existing works at Newshot Island; however, a site some 1.5 miles south of Dalmuir was selected.
The land was requisitioned under the Defence of the Realm Act. Some 413 acres were purchased as the site of the new airship construction site.
Beardmore was successfully awarded a grant from the Treasury towards the cost of the new airship works.
Work began on the site in January 1916, some two years into WWI.
The construction company Sir William Arrol & Co. started work on the airship shed.
Some 2,300 tonnes of steel were required.
The glazed shed windows were tinted and fitted with blinds so that it could be blacked out at night. At both ends, the sheds were fitted with large sliding doors, counterbalanced with several hundred tonnes of concrete to stabilise when open.
Inchinnan Airship Shed
As with all of the earlier sheds, the doors were manually winched open by capstans and a team of manual workers. It was estimated that it would take the men some 13 minutes to winch open the doors.
Both ends of the shed were sheltered by large steel windbreaks. Construction was almost completed by August of 1916.
A larger hangar was later built almost opposite to the south of the shed, which was used for the construction of Hawker-Page V/1500 bombers assembled.
A second airship shed was planned for construction but never put into place.
Even though the Inchinnan Airship Works were not far from Dalmuir, it was on the opposite side of the River Clyde, and not easily accessible for the workers.
Workers HousingMany of the workers had to be driven each morning from Renfrew. Similar to the Shorts Brothers works at Cardington, the Beardmore company built fifty-two houses for it’s key workers on the site of the airfield.
The idea of a model village was created, and it gave the workers the comfort and convenience of self-contained houses with very moderate rents.
Inchaninnan Shed Interior HMA24 Hull complete and R27 under construction
Before the shed was finished, the first frames of the new airship, the R24, had been moved into the shed for assembly.
On 27th October 1917, 200 naval ratings from the Barrow-In-Furness naval base arrived to act as ground crews.
The R24 was taken out of the shed on 28th October, but the ship spent some 6 months testing mooring techniques outside.
With the ship outside, there was space inside the shed to complete another two ships side by side.
Work on the R27 commenced in March 1917 and was completed, with a first flight in June 1918.
The Inchinnan constructional shed’s most famous occupant was the transatlantic R34.
The R34 was completed in the shed and was walked in December of 1918, just after the armistice in November 1918. It was returned to the shed after ground trials and was going to undertake its first flight; however, bad weather confined the ship to the shed for the rest of the winter and didn’t re-emerge until 14th March 1919.
A painting of the R34 and R29 inside the Inchannin Shed, 1919
At the end of its second trial flight, some of the ballast bags iced up and froze.
The crew were unable to drop enough water ballast on landing, and the ship came down for a heavy landing.
A propeller and some of the girders buckled.
When the R34 was first walked out of the shed, some of the women workers pinned a black cat soft toy to the forward gondola for a good luck mascot.
On the evening of the bad landing, the mascot was removed and burned.
By the end of May 1919, the damage had been repaired and the ships were ready to be delivered to the operational airship base at East Fortune, outside of Edinburgh.
After the war, there were many ideas for commercial airship operations.
Sir William Beardmore, the owner after whom the company was named, was quoted as saying that in his opinion, “airships were the most interesting developments of all”.
The R36 was the last airship ordered and constructed in the Inchinnan constructional shed.
The work had begun on the ship as a “stretched” R34 class military ship, but it was later decided that the ship would be converted to a civil role.
This decision delayed the first flight as the ship was converted to a passenger-carrying ship, with a large external gondola fitted, with accommodation for up to fifty passengers, in both day and night configurations.
The R36 took flight on 1st April 1921, displaying its civil registration of G-FAAF.
R36 under Construction at Inchinnan
Final DaysThe ship was then flown down to the Pulham experimental station and initially used for mooring trials. It was in September 1921 that the Air Ministry announced that the Inchinnan aerodrome was to close, and in the autumn of 1922, the buildings and land of the Beardmore Airship Works were handed over to the Disposal and Liquidation Commission.
During April 1923, the works were sold to Murray McVinnie & Co, ship chandlers and metal merchants. Later that year, the airship shed was demolished.
The giant Hadley Page Hangar that stood close by fared a little better, by being purchased by the India Tyre Company, and remained until 1982, sometimes confused as the “airship shed”.
Like the houses at Shortstown, Bedford, the Beardmore workers’ houses remain, and the site of the Glasgow Airport is close by, on the edge of the original land for the airship station.
TodayThe connection with aviation construction still stands to this very day, with Rolls-Royce opening a new factory in 2004 for repairing their aero engines on the same site as Beardmore’s original aviation site on the south side of the River Clyde.

Boyne
We Are The People
- Messages
- 29,862
- Reaction score
- 34,843
Was at the British Museum earlier to view the Bayeux. To say that it is superb is an understatement. An incredible embroidery and the detail and colours are incredible. My Latin is very poor - apart from Romanes Eunt Domus - but worked out some of the script from my knowledge of French. The guy standing me had a good knowledge of Latin so helped with some of the words.
A lot of queueing but worth it. If you get a chance visit the British Museum to see it. I hope to go again when tickets go on sale again to Members. Unsurprisingly I bought a couple of books. One is the guide and the other about King Harold.
A lot of queueing but worth it. If you get a chance visit the British Museum to see it. I hope to go again when tickets go on sale again to Members. Unsurprisingly I bought a couple of books. One is the guide and the other about King Harold.


Diana Barnato Walker climbing into the cockpit of a Spitfire while serving with the Air Transport Auxillary.
Jackie Moggridge, Air Transport Auxiliary pilot, climbs into the cockpit of a Spitfire fighter. Sept 1944.
Last edited by a moderator:
 Luftwaffe bombs dropping on the port of Tilbury during the Battle of Britain 1940. The first group of bombs will hit the ships lying in the Thames, the second will strike the docks.
 Undaunted by a night of German air raids in which his store front was blasted, a shopkeeper opens up the morning after for “business as usual” in London.
 ‘Hitting Back.’ Three anti-aircraft guns flash in the dark in London on 20 September 1940. They are firing a barrage at night raiding German bombers. Shells in stacked rows behind the guns leap about as the concussions from the firing loosen them.
The anti aircraft guns around London gave some reassurance to the population.
They also forced the Luftwaffe to fly higher and so the bombs were not so ‘accuratly dropped.’
Often bombs were simply dropped and the bombers turned for their home bases as soon as they could. At this point,there was no effective RAF night fighter opposition.
Last edited by a moderator:
 King George VI conferring a Bar to Flying Officer Albert G Lewis’s DFC in an awards ceremony at RAF Duxford . Lewis was a South African. He had just returned to service with No. 249 Squadron, after being shot down and badly burnt on 28 September 1940, By which time he had himself shot down 18 enemy aircraft. © IWM (CH 1948)
 Messerschmitt Bf 109 E-7 (W.Nr. 4091) of I(Jabo)./LG 2 crash-landed near Théville due to engine failure on 28 September 1940. The pilot, Hans-Joachim Marseille, had just claimed his seventh aerial victory. Bundesarchiv, Bild 101I-344-0741-30 / Röder / CC-BY-SA 3.0.
Bombed WW2 cinema to reopen after 85 years
 IMAGE SOURCE, OCTOVISION MEDIA
The bombed cinema has been restored as a war memorial and education centre
ByStuart Harratt www.bbc.co.uk
East Yorkshire and Lincolnshire
The National Picture Theatre, in Hull, was hit during a German air raid on 18 March 1941 and left derelict.
Hull City Council has described the site, in Beverley Road, as the "last surviving civilian, bomb‑damaged building in the UK".
The facade has now been restored and the open space where the auditorium once stood will become an education and community events area, as well as a "place of reflection", according to the council. It will open on 16 September.
 IMAGE SOURCE, HULL CITY COUNCIL
The new community space "honours the resilience of the people of Hull", according to Councillor Jackie Dad
Councillor Jackie Dad said it was "great to see the restoration now complete".
"The National Picture Theatre is an incredibly important part of Hull's wartime history and its preservation ensures that future generations can understand the profound impact the Second World War had on our city," she said.
"For the first time, this site will become both an educational facility and a place where people can come together to reflect and remember loved ones.
"The careful work undertaken here not only protects a unique heritage asset but also creates a new community space that honours the resilience of the people of Hull."
 IMAGE SOURCE, HULL HISTORY CENTRE
The cinema was destroyed in a German bombing raid in 1941
At the time of the air raid, 150 people were inside the cinema watching Charlie Chaplin's The Great Dictator. They took cover in the entrance foyer and no one was killed or seriously injured.
Their survival was attributed to two beams across the gallery, which prevented greater damage.
After a long campaign to preserve the building, it was granted Grade II listed status in 2007 and work to stabilise the structure took place in 2020.
A local contractor used original materials and traditional techniques to restore the cinema, which was built in 1914.
 IMAGE SOURCE, OCTOVISION MEDIA
Period materials have been used to restore the building
A new steel beam was installed to provide stability for a new roof to be constructed, while period bricks, reclaimed from other buildings in Hull, were used to rebuild supporting columns.
Funding for the restoration was provided by the council, the National Lottery Heritage Fund, UK Shared Prosperity Fund and the National Civilian World War II Memorial Trust.
In total, about 1,200 people were killed during German bombing raids on Hull, with 3,000 injured and more than 150,000 made homeless.
According to the council, the National Picture Theatre will open for organised historical events, educational visits and other public activities.
CORRECTION, 14 September: This article initially stated that the cinema was it on 17 March 1941. This has now been updated to 18 March 1941, external.
The bombed cinema has been restored as a war memorial and education centre
ByStuart Harratt www.bbc.co.uk
East Yorkshire and Lincolnshire
- Published 12 September 2026
The National Picture Theatre, in Hull, was hit during a German air raid on 18 March 1941 and left derelict.
Hull City Council has described the site, in Beverley Road, as the "last surviving civilian, bomb‑damaged building in the UK".
The facade has now been restored and the open space where the auditorium once stood will become an education and community events area, as well as a "place of reflection", according to the council. It will open on 16 September.
The new community space "honours the resilience of the people of Hull", according to Councillor Jackie Dad
Councillor Jackie Dad said it was "great to see the restoration now complete".
"The National Picture Theatre is an incredibly important part of Hull's wartime history and its preservation ensures that future generations can understand the profound impact the Second World War had on our city," she said.
"For the first time, this site will become both an educational facility and a place where people can come together to reflect and remember loved ones.
"The careful work undertaken here not only protects a unique heritage asset but also creates a new community space that honours the resilience of the people of Hull."
The cinema was destroyed in a German bombing raid in 1941
At the time of the air raid, 150 people were inside the cinema watching Charlie Chaplin's The Great Dictator. They took cover in the entrance foyer and no one was killed or seriously injured.
Their survival was attributed to two beams across the gallery, which prevented greater damage.
After a long campaign to preserve the building, it was granted Grade II listed status in 2007 and work to stabilise the structure took place in 2020.
A local contractor used original materials and traditional techniques to restore the cinema, which was built in 1914.
Period materials have been used to restore the building
A new steel beam was installed to provide stability for a new roof to be constructed, while period bricks, reclaimed from other buildings in Hull, were used to rebuild supporting columns.
Funding for the restoration was provided by the council, the National Lottery Heritage Fund, UK Shared Prosperity Fund and the National Civilian World War II Memorial Trust.
In total, about 1,200 people were killed during German bombing raids on Hull, with 3,000 injured and more than 150,000 made homeless.
According to the council, the National Picture Theatre will open for organised historical events, educational visits and other public activities.
CORRECTION, 14 September: This article initially stated that the cinema was it on 17 March 1941. This has now been updated to 18 March 1941, external.
THE FIRST BATTLE OF THE MARNEA MEMORIAL ON THE MARNE

Image: La Ferte-Sous-Jouarre Memorial
The town of La Ferte-Sous-Jouarre is a small place, lying some 40 miles to the east of Paris.The river Marne wends its way lazily though the town but along its banks, overlooking its cool calming waters, sits a memorial to when this part of the world was rent asunder by the chaos and carnage of the Great War.
La Ferte-Sous-Jouarre Memorial stands in its stone magnificence over a busy corner of the town. The names of officers and enlisted men of the British forces who lost their lives in the early stages of the First World War are inscribed upon its stone panels.
Those commemorated on this moving memorial have no known grave. Many lost their lives in one of the most climatic battles of the early war: The First Battle of the Marne.
WHAT WAS THE FIRST BATTLE OF THE MARNE?The First Battle of the Marne was a First World War battle fought by the Allied French and British Armies and the Imperial German Army.
This major battle took place between 5-12 September 1914. It is considered one of the decisive battles of the early Great War.
It was here that the French and British armies stopped the German advance which had so far swept through Belgium and France.
Following the Marne, a series of advances and counterattacks resulted in the establishment of trench warfare, but Marne essentially stopped any hopes of a fast German victory on the Western Front.
WHO FOUGHT AT THE FIRST BATTLE OF THE MARNE?

Image: Soldiers of the British Expeditionary Force, circa 1914 (© IWM (Q 57450))
The British Expeditionary Force (BEF) at the First Battle of the Marne was commanded by Field Marshal Sir John French.At the time of First Marne, the BEF was much smaller than its continental counterparts. It could put into battle around six infantry and cavalry divisions, split into three corps, and backed by some 600 or so pieces of artillery.
Ahead of the Battle of Mons in August 1914, the BEF had landed in France with around 75,000 soldiers.
While it had lost men at Mons and the subsequent retreat, replacements and reinforcements from Britain meant Field Marshal French had around 100,000 men under his command at the Battle of the Marne.
The French Army, on the other hand, numbered more than a million men and put in some 64 Divisions at Marne and the following actions and manoeuvres.
At the Battle of the Marnes the three British corps were commanded by future British Commander-in-Chief Sir Douglas Haig and Lieutenant General Sir Horace Smith-Dorian.
A great many historic and storied regiments of the British Army fought at the First Battle of the Marne.
For example, 1st Division under Major-General Samuel Holt Lomax contained elements of the Coldstream Guards, Black Watch, The Welch Regiment, and the King’s Royal Rifle Corps to name just a few.
A significant number of Irish regiments were also present at the Battle of the Marne such as the Royal Irish Regiment, Irish Guards, and Royal Irish Rifles.
Opposing the Entente allies were some 51 German divisions split into three armies under the overall command of Head of the German General Staff General Helmuth von Moltke the Younger.
The German force numbered around a million men, with the Allies matching them in terms of numbers, although leaning very heavily towards the French.
THE GREAT RETREAT

Image: British troops on the retreat from Mons (Wikimedia Commons)
Before the First Battle of the Marne, the German Army had launched its ambitious invasion of Belgium and France.This was part of its early war plan, known as the Schlieffen Plan. The plan was designed to land a knockout blow on France by charging through the country in a series of wide arcs to outflank French armies and capture Paris.
The Battle of the Frontiers, as the first battles on the Western Front are known, resulted in several German victories.
At the Battle of Mons, the British Expeditionary Force’s first significant battle of the First World War, the German Army had broken through French and British lines, putting them into full retreat.
Known as the Great Retreat, the Entente Powers were pushed back 250 miles from the French-Belgian border. Several important rearguard actions, such as the Battle of Le Cateau, were fought by both the French and BEF to hold off the seemingly unstoppable Germans.
THE STAND AT THE MARNEBy 3 September 1914, the German Army was within 30 miles of Paris.
A German capture of the French capital was a very real possibility. If Paris were to fall, then it is likely the Germans would have achieved victory in the West.
The Allies had halted their advance along the Marne River.
A wide, hard-to-cross waterway, the Marne provided a natural obstacle for the advancing Germans and the ideal place for the Allies to stop retreating and tentatively go on the attack themselves.
The BEF stopped its retreat by 5 September, after losing approximately 15,000 killed, captured or missing during the Great Retreat.
But the rapid sweep across France was also taking its toll on the Imperial German Army.
Many of its men were exhausted. The German Army was also at the extreme end of their supply lines. Morale, even after the spectacular successes of August, was low.
In the build-up to the First Battle of the Marne, the German Army made several decisions that would have a decisive impact on the battle to come.
Firstly, as many as 11 German Divisions were removed from the Western Front and transferred to the east where Germany and Austro-Hungary were beginning their titanic clashes with the Russian Army.
With their removal, German Commander von Moltke realised he didn’t have enough men to enact the Schlieffen Plan as per its original intentions.
General Alexander von Kluck was ordered by Moltke to swing his army to bypass Paris from the north.
The original Schliffen Plan strategy had called for von Kluck’s 1st Army to encircle the French capital from the southwest.
The German First Army’s flank would have to pass in front of French and British positions along the Marne defending Paris.
A gap, some 30 miles wide, was now established between von Kluck’s 1st Army and the 2nd Army under General Karl von Bülow. The gap was only screened by a cavalry force.
The great German wheel was spotted by French General and military governor of Paris Simon Gallieni on September 3. Realising what this meant, and the exposure of the German army’s flank, Gallieni appealed to the Commander-in-Chief of the French and Allied forces, Joseph Joffre, to begin a counter-offensive.
On 5 September, Joffre agreed. The Allies had turned from retreat into attack.
THE BEF ADVANCESOn the left side of Allied lines, the French 6th Army were to engage with von Kluck. The French 5th and 9th Armies would engage von Bülow on the right flank.
But what of the British? What of the gap?
While the French had been reorganising back into an offensive posture, the BEF had kept its retreat going.
As luck would have it, The British Expeditionary Force’s line of retreat had taken them directly into the 30-mile gap now established between the two German armies on the Marne.
On 5 September, Joffre visited Filed Marshal John French’s headquarters. French was technically not obliged to follow Joffre’s orders, but Joffre was sure cooperation would be the key to success on the Marne.
At a dramatic meeting, featuring Joffre banging his hands on the negotiating table and exclaiming “Monsieur le Maréchel, the honour of England is at stake!”, Joffre convinced French of his counter-offensive. The BEF would fight on the Marne.
BRITISH BATTLES ON THE MARNE

Image: Field guns of the Royal Artillery enter the battlefield © IWM (Q 51488)
For the next two days, the BEF advanced to the Northeast.The first British skirmishes at the Battle of the Marne were fought on the morning of 7 September.
Five Cavalry Brigades moving ahead of the main force reached the town of Dagny on the Aubetin River.
Leader of the 9th Lancers, Lieutenant Colonel Campbell, saw his squadron attacked by a unit of German 1st Guard Dragoons.
The British covering machine gun jammed, leaving Campbell no option but to charge the oncoming German horseman.
The Germans, taking the 9th Lancers charge at a trot, were completely overwhelmed.
For most of 7 September, the British advance was slow. The BEF covered about seven miles, far from the speed desired by Joffre.
On 8 September, British infantry brigades on the left of the BEF’s line came under heavy fire from German machine gun and artillery positions at the town of La Ferte-Sous-Jouarre.
Here, Imperial German Army units had established a bridgehead on the north bank of the Marne.
At first, the British were driven off but once the guns of the Royal Artillery arrived, the British began shelling La Ferte-Sous-Jouarre.
The way up to the Marne was covered in many smaller streams, canals, and tributaries, creating difficult obstacles for the British to cross.
The Germans had destroyed two of the main bridges into of La Ferte-Sous-Jouarre, but crucially, not the main bridges in the centre of the BEF’s advance.
At 1 pm on 8 September, the British renewed their assault on of La Ferte-Sous-Jouarre. The Royal Engineers had been called up and quickly established a floating bridge over which British infantry could cross into the town.
By 8 pm, the section of the town south of the Marne was in British Hands.
The French Armies were making progress on both flanks of the BEF’s position. Aerial reconnaissance reports from the evening of the 8th revealed the Germans were starting to withdraw en masse.
The British were ordered to keep advancing on the following day.
More road and rail bridges over the Marne and her tributaries were fought over.
In some cases, the German troops meant to be manning or building barricades were discovered to be completely drunk and taken prisoner.
Discipline in the Imperial German Army was beginning to crack.
British units were now beginning to cross the Marne, despite coming under artillery and machine gun fire.

Image: The positions of each army at the First Battle of the Marne on 9 September 1914. The BEF's positions are marked in brown, the French in red, and the German Army in blue (Wikimedia Commons)
By 3 pm on the 9th, British aerial recon planes were reporting no German forces ahead of the British I Corps so it continued.Field Marshal French later ordered them to halt as, even though the British had advanced slowly on the 8th, the BEF was now outpacing the French 5th Army.
At of La Ferte-Sous-Jouarre, the assault was continued at 4.45 pm. The British 11th and 12th Infantry Brigades attack the town with orders to repair and cross any damaged bridges.
This proved difficult. German forces occupied the buildings across the Marne river crossings in of La Ferte-Sous-Jouarre. Instead, the British infantry was withdrawn and the town bombarded.
Attempts were also made to cross the river by boat but were driven off by machine gunners.
In the meantime, some British units had managed to find further undamaged crossings, driven off the defenders, and advanced over the Marne.
Two battalions had formed up and climbed high ground around La Ferte-Sous-Jouarre.
They were too late to intercept the German retreat. The intense artillery barrage from British guns on high ground overlooking La Ferte-Sous-Jouarre had caused the Germans to finally abandon their defence.
By the evening, British III Corps was across the Marne and I and II Corps were making good progress.
THE GERMAN RETREATAs the British Expeditionary Force fell back from Mons, it had advanced a further day’s march ahead of the French forces on its flanks.
This “disappearance” of the British in the Allied lines turned into one of the key moments of The First Battle of the Marne.
With the British advancing once more, they did so into the 30-mile gap established between the two German Armies battling the French.
On September 8, the French 6th Army had launched a night attack on von Bülow’s German 2nd Army.
Von Bülow had subsequently ordered his men to execute a 12-mile withdrawal.
The gap had been widened.
By now, German high command had become convinced that when the French and British crossed the Marne a full German retreat would have to be ordered.
On the morning of September 9, von Bülow ordered a second withdrawal.
The British pouring into the gap was putting significant pressure on the German military with 2nd Army now close to breaking point.
This was news to von Kluck. His 1st Army had been holding well and was in a position to assault Paris if ordered. Lieutenant Colonel Richard Hentsch, visiting the German armies under orders from Commander von Moltke, informed von Kluck of von Bülow’s precarious position.
Reluctantly, von Kluck gave the order to withdraw.
Come 11 September all German armies in France were in full retreat.
The Allies were in pursuit but, already weakened by their own Great Retreat and now tired from a week of hard fighting, were advancing slowly.
AFTERMATH OF THE BATTLE OF THE MARNE

Image: Soldiers of the BEF advance towards the Aisne (© IWM (Q 51496))
The Imperial German Army was now in full retreat, but any hopes of a decisive, war-ending Allied victory in 1914 were dashed once it stopped.Occupying positions across the River Aisne, the German Armies on the Western Front turned to face the Allies on 13 September 1914.
The Germans, already holding terrain that favoured defence, soon dug in. They began building the great trench networks that would come to define the First World War on the Western Front.
The Allies would clash with the Germans again at the First Battle of the Aisne, where it quickly became clear that defenders now held the advantage.
The manoeuvring on the Western Front would last until October 1914 when the “Race to the Sea” was finally finished.
The Race to the Sea was the attempt by each side to turn the opposition’s flank.
What resulted was a trench network that stretched up northwestern France and into Flanders, Belgium.
By December, a stalemate had set in. Over the coming years, millions of men on both sides would be cut down on the blood-soaked battlefields of the Western Front.
Why was the First Battle of the Marne important?
The Allied effort at the Marnes effectively stopped the German advance. This had major repercussions for the course of the First World War.
Firstly, it marked the end of Germany’s aggressive two-front strategy.
The Schlieffen Plan had failed. No knockout blow had been landed and France and Britain would remain in the war until its bitter conclusion.
Secondly, it put the Germans into a defensive posture. Typically, the Germans would remain as the defensive power on the Western Front for the remainder of the war, excluding the major offensives at Verdun in 1916 and the 1918 Spring Offensive.
The Battle of the Marne also put paid to the idea that this would be a quick war. With the trenches now being built, and technology and tactics favouring defence, this was now a war of attrition.
Historian Barbara Tuchman in her classic examination of early days of the First World War The Guns of August wrote:
“The Battle of the Marne was one of the decisive battles of the world not because it determined that Germany would eventually lose or the Allies ultimately win the war but because it determined that the war would go on. There was no looking back, Joffre told the soldiers on the eve.
Afterward, there was no turning back. The nations were caught in a trap, a trap made during the first thirty days out of battles that failed to be decisive, a trap from which there was, and has been, no exit.”
CASUALTIES OF THE FIRST BATTLE OF THE MARNETotal British Expeditionary Force casualties up to 10 September are estimated at 15,000 or so killed, missing, captured or wounded. Proportionally, this was quite high, as the BEF was very small, compared with the other powers’ armies.
For the period of 6-10, British official histories put the total number of losses at some 1,700 killed during the First Battle of the Marne.
The French, being the larger allied force by some distance, are estimated to have lost taken losses of 250,000 men, of which 80,000 were killed. German losses are thought to be around the same.
All told, between 300,000 and 500,000 French, British, and German soldiers became casualties during the First Battle of the Marne.
SERJEANT GEORGE WILLIAM HUTSONAmong the British dead of the First Battle of the Marne was Olympian George Hutson.
George had initially worked for a men’s outfitter upon leaving school, but soon found his calling as a professional soldier, joining the Royal Sussex Regiment in 1908.
George was also one of the most promising British long-distance runners of his generation.
He competed for Great Britain in the 1912 Summer Olympics held in Stockholm, Sweden in the 5000 metres where he won the bronze medal.
He also joined teammates Joe Cottrill and Cyril Porter to win his second bronze of the games in the 3000 metre team race
Sadly, George’s career was tragically cut short by his First World War Service.
George was aged just 24 when was killed in action at the First Battle of the Marne. He became the first British Olympian to die in military service during the First World War.
Boyne
We Are The People
- Messages
- 29,862
- Reaction score
- 34,843
The Anglo-Saxons
 Battle of Fulford - The Anglo-SaxonsThe Battle of Fulford (1066) saw Harald Hardrada's Norwegian forces defeat the English earls Edwin and Morcar, opening the path to York before the Battle of Stamford Bridge.
OverviewThe Battle of Fulford was one of the early battles in the series of events that led to the Norman Conquest of England. In 1066, England was under significant pressure from multiple claimants to the throne, following the death of Edward the Confessor in January. Harold Godwinson, the most powerful noble in England, had been crowned king, but his claim was contested by several rivals, including Harald Hardrada, King of Norway, who believed he had a legitimate right to the English throne due to earlier treaties and alliances between the English and Scandinavian rulers.
Tostig Godwinson, Harold’s estranged brother, had been exiled from England in 1065 after losing his position as Earl of Northumbria due to his tyrannical rule and was determined to reclaim power. Tostig allied himself with Harald Hardrada, whose invasion of England was partly motivated by Tostig’s encouragement. Together, they sailed to the Humber River and began their invasion, which led to the confrontation at Fulford.

Image: Battle of Fulford by Matthew Paris, 13th Century. Public Domain.The BattleThe battle took place along the River Ouse, near the village of Gate Fulford, about 2 miles south of York. Edwin and Morcar positioned their forces near a marshy area, aiming to block the road, and Harald’s advance, toward York. There are no precise records of the size of the two forces, but Hardrada’s army is estimated to have been 6,000 to 10,000 men strong, compared to the English forces, led by Earls Edwin of Mercia and Morcar of Northumbria, which numbered around 5,000 to 6,000 men.
The initial stages saw fierce combat as the two shield walls clashed, with neither side gaining a decisive advantage. However, the turning point came when Harald Hardrada managed to outflank the English forces. The marshy ground, initially an advantage for the English, became a hindrance as the terrain restricted their movement, leading to disarray in the English lines. The Norwegian forces exploited this vulnerability, pushing hard against the English flank, which began to crumble under sustained pressure.
Edwin and Morcar’s forces were eventually overwhelmed, leading to a full-scale rout. According to the Anglo-Saxon Chronicle, many English troops were killed while fleeing, drowned in the river, caught in the marsh, or cut down by the pursuing Norwegians. Both Edwin and Morcar managed to escape, but their army suffered significant casualties, leaving York vulnerable to the invaders.
AftermathThe Battle of Fulford was a significant victory for Harald Hardrada, as it effectively opened the gateway to York. Following the battle, the city of York surrendered to the Norwegians and negotiated that 150 hostages would join the Viking army and a supply of food would be given to avoid being sacked. Hardrada was in a strong position to press his claim to the English throne; however, this victory was short-lived.
Just five days after Fulford, Harold Godwinson marched his army north from London at a remarkable pace to confront the Norwegian invaders. On September 25, 1066, Harold met Hardrada’s forces at the Battle of Stamford Bridge, where the English king decisively defeated the Norwegians, resulting in the deaths of both Harald Hardrada and Tostig Godwinson. This battle marked the end of the Viking Age invasions of England.
However, Harold’s swift and exhausting march north and his subsequent victory came at a significant cost. His forces were fatigued, and his army had been depleted by the campaign. Just under three weeks later, Harold would face William of Normandy at the Battle of Hastings, where the English forces, weakened by the northern campaign, were ultimately defeated, leading to the Norman Conquest of England.

OverviewThe Battle of Fulford was one of the early battles in the series of events that led to the Norman Conquest of England. In 1066, England was under significant pressure from multiple claimants to the throne, following the death of Edward the Confessor in January. Harold Godwinson, the most powerful noble in England, had been crowned king, but his claim was contested by several rivals, including Harald Hardrada, King of Norway, who believed he had a legitimate right to the English throne due to earlier treaties and alliances between the English and Scandinavian rulers.
Tostig Godwinson, Harold’s estranged brother, had been exiled from England in 1065 after losing his position as Earl of Northumbria due to his tyrannical rule and was determined to reclaim power. Tostig allied himself with Harald Hardrada, whose invasion of England was partly motivated by Tostig’s encouragement. Together, they sailed to the Humber River and began their invasion, which led to the confrontation at Fulford.
Image: Battle of Fulford by Matthew Paris, 13th Century. Public Domain.The BattleThe battle took place along the River Ouse, near the village of Gate Fulford, about 2 miles south of York. Edwin and Morcar positioned their forces near a marshy area, aiming to block the road, and Harald’s advance, toward York. There are no precise records of the size of the two forces, but Hardrada’s army is estimated to have been 6,000 to 10,000 men strong, compared to the English forces, led by Earls Edwin of Mercia and Morcar of Northumbria, which numbered around 5,000 to 6,000 men.
The initial stages saw fierce combat as the two shield walls clashed, with neither side gaining a decisive advantage. However, the turning point came when Harald Hardrada managed to outflank the English forces. The marshy ground, initially an advantage for the English, became a hindrance as the terrain restricted their movement, leading to disarray in the English lines. The Norwegian forces exploited this vulnerability, pushing hard against the English flank, which began to crumble under sustained pressure.
Edwin and Morcar’s forces were eventually overwhelmed, leading to a full-scale rout. According to the Anglo-Saxon Chronicle, many English troops were killed while fleeing, drowned in the river, caught in the marsh, or cut down by the pursuing Norwegians. Both Edwin and Morcar managed to escape, but their army suffered significant casualties, leaving York vulnerable to the invaders.
AftermathThe Battle of Fulford was a significant victory for Harald Hardrada, as it effectively opened the gateway to York. Following the battle, the city of York surrendered to the Norwegians and negotiated that 150 hostages would join the Viking army and a supply of food would be given to avoid being sacked. Hardrada was in a strong position to press his claim to the English throne; however, this victory was short-lived.
Just five days after Fulford, Harold Godwinson marched his army north from London at a remarkable pace to confront the Norwegian invaders. On September 25, 1066, Harold met Hardrada’s forces at the Battle of Stamford Bridge, where the English king decisively defeated the Norwegians, resulting in the deaths of both Harald Hardrada and Tostig Godwinson. This battle marked the end of the Viking Age invasions of England.
However, Harold’s swift and exhausting march north and his subsequent victory came at a significant cost. His forces were fatigued, and his army had been depleted by the campaign. Just under three weeks later, Harold would face William of Normandy at the Battle of Hastings, where the English forces, weakened by the northern campaign, were ultimately defeated, leading to the Norman Conquest of England.
Boyne
We Are The People
- Messages
- 29,862
- Reaction score
- 34,843
https://www.britishbattles.com/one-hundred-years-war/battle-of-poitiers/
Battle of PoitiersThe Black Prince’s great victory on 19th September 1356 in the Hundred Years War over the French King John II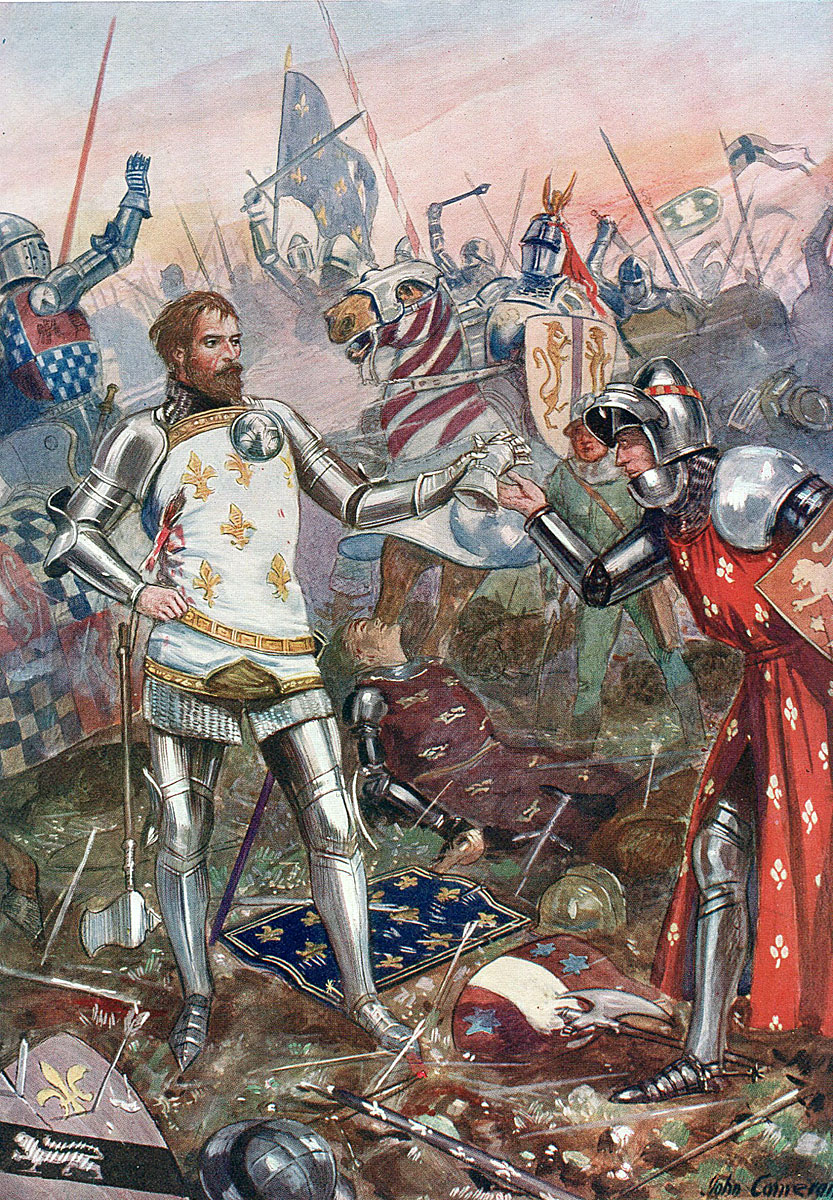
The next battle of the Hundred Years War is the Battle of Cocherel
To the 100 Years War index
War: Hundred Years War
Date of the Battle of Poitiers: 19th September 1356.
Place of the Battle of Poitiers: Western France.
Combatants at the Battle of Poitiers: An army of English and Gascons against the French and their allies.
Size of the armies at the Battle of Poitiers: The Black Prince’s army numbered some 7,000 knights, men-at-arms and archers.
Numbers in the French army are uncertain but were probably around 35,000, although Froissart gives the size of the French army as 60,000. The French army comprised a contingent of Scots commanded by Sir William Douglas.
Uniforms, arms and equipment in the Battle of Poitiers: Depending upon wealth and rank a mounted knight of the period wore jointed steel plate armour incorporating back and breast plates, a visored bascinet helmet and steel plated gauntlets with spikes on the back, the legs and feet protected by steel greaves and boots, called jambs. Weapons carried were a lance, shield, sword and dagger. Over the armour a knight wore a jupon or surcoat emblazoned with his arms and an ornate girdle.
The weapon of the English and Welsh archers was a six foot yew bow discharging a feathered arrow of a cloth yard. The rate of fire was up to an arrow every 5 seconds. For close quarter fighting the archers used hammers or daggers.
Winner of the Battle of Poitiers: The English and Gascons decisively won the battle.
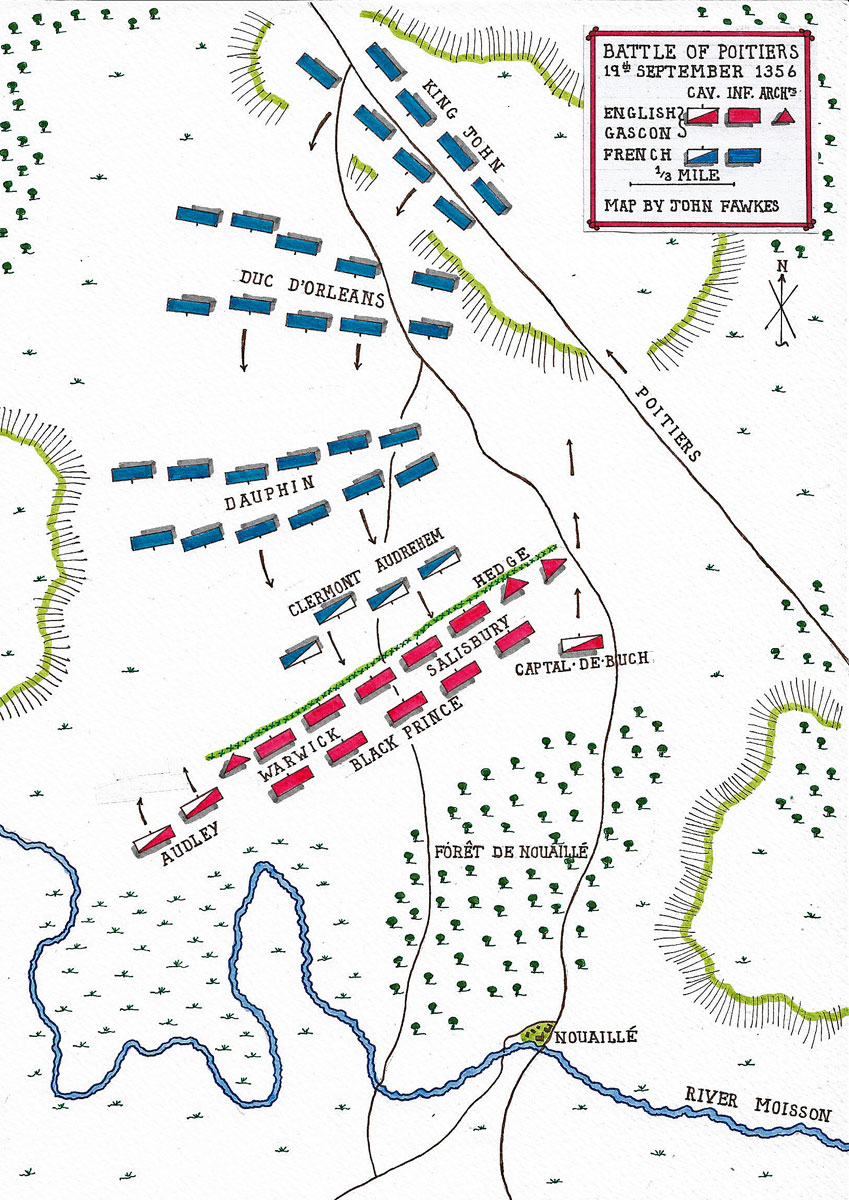
The war began well for Edward III with the decisive English victories at Sluys in 1340 and Creçy in 1346 and the capture of Calais in 1347. In the late 1340s the plague epidemic, called the Black Death, decimated the populations of France and England, bringing military operations to a halt; one of the plague’s victims being the French king Philip VI.
In 1355 King Edward III again planned for an invasion of France. His son, Edward the Black Prince, now an experienced soldier 26 years of age, landed at Bordeaux in Western France and led his army on a march through Southern France to Carcassonne. Unable to take the walled city, the Black Prince returned to Bordeaux. In early 1356 the Duke of Lancaster landed with a second force in Normandy and began to advance south. Edward III was engaged in fighting in Scotland.
In early September 1356 King John reached the Loire with his large army, just as the Black Prince turned back towards Bordeaux. The French army marched hard and overtook the unsuspecting English force at Poitiers on Sunday 18th September 1356.
The English army was an experienced force; many of the archers veterans of Creçy, ten years before, and the Gascon men-at-arms commanded by Sir John Chandos, Sir James Audley and Captal de Buche, all old soldiers.
King John was advised by his Scottish commander, Sir William Douglas, that the French attack should be delivered on foot, horses being particularly vulnerable to English archery, the arrows fired with a high trajectory falling on the unprotected necks and backs of the mounts. King John took this advice, his army in the main leaving its horses with the baggage and forming up on foot.
The French attack began in the early morning of Monday 19th September 1356 with a mounted charge by a forlorn hope of 300 German knights commanded by two Marshals of France; Barons Clermont and Audrehem. The force reached a gallop, closing in to charge down the road into the centre of the English position. The attack was a disaster, with those knights not shot down by the English archers dragged from their horses and killed or secured as prisoners for later ransom.
The first division reached the English line exhausted by its long march in heavy equipment, much harassed by the arrow fire of the English archers. The Black Prince’s soldiers, Gascon men-at-arms and English and Welsh archers, rushed forward to engage the French, pushing through the hedgerow and spilling round the flanks to attack the French in the rear.
After a short savage fight the Dauphin’s division broke and retreated, blundering into the division of the Duc D’Orleans marching up behind, both divisions falling back in confusion.
The final division of the French army, commanded by the king himself, was the strongest and best controlled. The three divisions coalesced and resumed the advance against the English, a formidable mass of walking knights and men-at-arms.
Thinking that the retreat of the first two divisions marked the end of the battle, the Black Prince had ordered a force of knights commanded by the Gascon, Captal de Buche, to mount and pursue the French. Chandos urged the Prince to launch this mounted force on the main body of the French army. The Black Prince seized on Chandos’ idea and ordered all the knights and men-at-arms to mount for the charge. The horses were ordered up from the rear; in the meantime Captal de Buch’s men, already mounted, were ordered to advance around the French flank to the right.
The French army broke up, many leaving the field, while the more stalwart knights fought hard in isolated groups. A mass of fugitives made for Poitiers pursued by the mounted Gascons to be slaughtered outside the closed city gates.
King John found himself alone with his 14 years old younger son Philip fighting an overwhelming force of Gascons and English. Eventually the king agreed to surrender.
The battle won, the English army gave itself up to pillaging the vanquished French knights and the lavish French camp.
The effect of the defeat on France and the loss of the King to captivity was devastating, leaving the country in the hands of the Dauphin Charles, escaped from the ruins of his division at Poitiers. Charles faced immediate revolts across the kingdom as he attempted to raise money to continue the war and ransom his father.
King John was released in November 1361 against other hostages. Due to the default of one of those hostages John returned to London and died there in 1364.
Anecdotes and traditions of the Battle of Poitiers:
The Hundred Years War by Alfred H. Burne
Trial by Fire, Volume lI of the four volume record of the Hundred Years War by Jonathan Sumption.
The Art of War in the Middle Ages Volume Two by Sir Charles Oman
The Hundred Years War by Robin Neillands.
British Battles by Grant.
The previous battle of the Hundred Years War is the Battle of Mauron
The next battle of the Hundred Years War is the Battle of Cocherel
To the 100 Years War index
Battle of PoitiersThe Black Prince’s great victory on 19th September 1356 in the Hundred Years War over the French King John II
King John II of France surrendering himself to the English at the Battle of Poitiers on 19th September 1356 in the Hundred Years War
The previous battle of the Hundred Years War is the Battle of MauronThe next battle of the Hundred Years War is the Battle of Cocherel
To the 100 Years War index
War: Hundred Years War
Date of the Battle of Poitiers: 19th September 1356.
Place of the Battle of Poitiers: Western France.
Combatants at the Battle of Poitiers: An army of English and Gascons against the French and their allies.
Edward, the Black Prince, commander of the English army at the Battle of Poitiers on 19th September 1356 in the Hundred Years
King John II of France: Battle of Poitiers on 19th September 1356 in the Hundred Years War
Commanders at the Battle of Poitiers: The Black Prince against King John II of France.Size of the armies at the Battle of Poitiers: The Black Prince’s army numbered some 7,000 knights, men-at-arms and archers.
Numbers in the French army are uncertain but were probably around 35,000, although Froissart gives the size of the French army as 60,000. The French army comprised a contingent of Scots commanded by Sir William Douglas.
Uniforms, arms and equipment in the Battle of Poitiers: Depending upon wealth and rank a mounted knight of the period wore jointed steel plate armour incorporating back and breast plates, a visored bascinet helmet and steel plated gauntlets with spikes on the back, the legs and feet protected by steel greaves and boots, called jambs. Weapons carried were a lance, shield, sword and dagger. Over the armour a knight wore a jupon or surcoat emblazoned with his arms and an ornate girdle.
The weapon of the English and Welsh archers was a six foot yew bow discharging a feathered arrow of a cloth yard. The rate of fire was up to an arrow every 5 seconds. For close quarter fighting the archers used hammers or daggers.
Winner of the Battle of Poitiers: The English and Gascons decisively won the battle.
Battle of Poitiers on 19th September 1356 in the Hundred Years: battle map by John Fawkes
Account of the Battle of Poitiers: Edward III, King of England, began the Hundred Years War, claiming the throne of France on the death of King Philip IV in 1337. The war finally ended in the middle of the 15th Century with the eviction of the English from France, other than Calais, and the formal abandonment by the English monarchs of their claims to French territory.The war began well for Edward III with the decisive English victories at Sluys in 1340 and Creçy in 1346 and the capture of Calais in 1347. In the late 1340s the plague epidemic, called the Black Death, decimated the populations of France and England, bringing military operations to a halt; one of the plague’s victims being the French king Philip VI.
In 1355 King Edward III again planned for an invasion of France. His son, Edward the Black Prince, now an experienced soldier 26 years of age, landed at Bordeaux in Western France and led his army on a march through Southern France to Carcassonne. Unable to take the walled city, the Black Prince returned to Bordeaux. In early 1356 the Duke of Lancaster landed with a second force in Normandy and began to advance south. Edward III was engaged in fighting in Scotland.
Battle of Poitiers on 19th September 1356 in the Hundred Years
The new king of France, John II, led an army against Lancaster forcing him to withdraw towards the coast. King John then turned to attack the Black Prince, who was advancing north east towards the Loire pillaging the countryside as he went.In early September 1356 King John reached the Loire with his large army, just as the Black Prince turned back towards Bordeaux. The French army marched hard and overtook the unsuspecting English force at Poitiers on Sunday 18th September 1356.
Cardinal Talleyrand leaves the English camp the night before the Battle of Poitiers on 19th September 1356 in the Hundred Years: picture by Richard Caton Woodville
The local prelate, Cardinal Talleyrand de Périgord, attempted to broker terms of settlement between the two armies; but the Black Prince’s offer of handing over all the booty he had taken on his “chevauchée” and maintaining a truce for 7 years was unacceptable to King John who considered the English would have little chance against his overwhelming army, and the French demand that the Black Prince surrender himself and his army was unacceptable to the English. The two armies prepared for battle.The English army was an experienced force; many of the archers veterans of Creçy, ten years before, and the Gascon men-at-arms commanded by Sir John Chandos, Sir James Audley and Captal de Buche, all old soldiers.
Sir John Chandos urges the Black Prince to attack saying ‘Sire the Day is yours’ at the Battle of Poitiers on 19th September 1356 in the Hundred Years: picture by Richard Caton Woodville
The Black Prince arranged his force in a defensive position among the hedges and orchards of the area, his front line of archers disposed behind a particularly prominent thick hedge through which the road ran at right angles.King John was advised by his Scottish commander, Sir William Douglas, that the French attack should be delivered on foot, horses being particularly vulnerable to English archery, the arrows fired with a high trajectory falling on the unprotected necks and backs of the mounts. King John took this advice, his army in the main leaving its horses with the baggage and forming up on foot.
The French attack began in the early morning of Monday 19th September 1356 with a mounted charge by a forlorn hope of 300 German knights commanded by two Marshals of France; Barons Clermont and Audrehem. The force reached a gallop, closing in to charge down the road into the centre of the English position. The attack was a disaster, with those knights not shot down by the English archers dragged from their horses and killed or secured as prisoners for later ransom.
Capture of King John of France and his 14 year old son at the Battle of Poitiers on 19th September 1356 in the Hundred Years: picture by Henri Dupray
The rest of the French army now began its ponderous advance on foot, in accordance with Douglas’ advice, arrayed in three divisions; the first led by the Dauphin Charles (the son of the King), the second by the Duc D’Orleans and the third, the largest, by the King himself.The first division reached the English line exhausted by its long march in heavy equipment, much harassed by the arrow fire of the English archers. The Black Prince’s soldiers, Gascon men-at-arms and English and Welsh archers, rushed forward to engage the French, pushing through the hedgerow and spilling round the flanks to attack the French in the rear.
After a short savage fight the Dauphin’s division broke and retreated, blundering into the division of the Duc D’Orleans marching up behind, both divisions falling back in confusion.
The final division of the French army, commanded by the king himself, was the strongest and best controlled. The three divisions coalesced and resumed the advance against the English, a formidable mass of walking knights and men-at-arms.
Thinking that the retreat of the first two divisions marked the end of the battle, the Black Prince had ordered a force of knights commanded by the Gascon, Captal de Buche, to mount and pursue the French. Chandos urged the Prince to launch this mounted force on the main body of the French army. The Black Prince seized on Chandos’ idea and ordered all the knights and men-at-arms to mount for the charge. The horses were ordered up from the rear; in the meantime Captal de Buch’s men, already mounted, were ordered to advance around the French flank to the right.
Capture of King John II of France and his 14 year old son at the Battle of Poitiers on 19th September 1356 in the Hundred Years
As the French army toiled up to the hedgerow the English force broke through the hedge and struck the French like a thunderbolt, the impetus of the charge taking the mounted knights and men-at-arms right into the French line. Simultaneously Captal de Buch’s Gascons charged in on the French flank. The English and Welsh archers left their bows and ran forward to join the fight, brandishing their daggers and fighting hammers.The French army broke up, many leaving the field, while the more stalwart knights fought hard in isolated groups. A mass of fugitives made for Poitiers pursued by the mounted Gascons to be slaughtered outside the closed city gates.
King John found himself alone with his 14 years old younger son Philip fighting an overwhelming force of Gascons and English. Eventually the king agreed to surrender.
The battle won, the English army gave itself up to pillaging the vanquished French knights and the lavish French camp.
The Battle of Poitiers on 19th September 1356 in the Hundred Years
Casualties at the Battle of Poitiers: In his dispatch to King Edward III, his father, the Black Prince stated that the French dead amounted to 3,000 while only 40 of his troops had been killed. It is likely that the English casualties were higher. Among the French prisoners were King John II, his son Philip, 17 great lords, 13 counts, 5 viscounts and a hundred other knights of significance.Battle of Poitiers on 19th September 1356 in the Hundred Years
Follow-up to the Battle of Poitiers: On the night of the battle the Black Prince entertained the King of France and his son to dinner and the next day the English army resumed its march to Bordeaux.The effect of the defeat on France and the loss of the King to captivity was devastating, leaving the country in the hands of the Dauphin Charles, escaped from the ruins of his division at Poitiers. Charles faced immediate revolts across the kingdom as he attempted to raise money to continue the war and ransom his father.
Capture of King John II of France at the Battle of Poitiers on 19th September 1356 in the Hundred Years: picture by Richard Caton Woodville
The release of King John proved difficult to negotiate as Edward III sought to extract more and more onerous terms from the French. Meanwhile the war continued to the misery of the wretched inhabitants of France.King John was released in November 1361 against other hostages. Due to the default of one of those hostages John returned to London and died there in 1364.
Anecdotes and traditions of the Battle of Poitiers:
- King John actually surrendered to a French knight, Sir Denis de Morbeque, who took him to the Prince of Wales with the Earl of Warwick.
- Poitiers was the second great battle won by the English yew bow, although in this case it was the threat of the arrow barrage that caused the French to launch the ill-judged advance on foot thereby exposing them to the English/Gascon mounted charge that won the battle.
Capture of King John II of France at the Battle of Poitiers on 19th September 1356 in the Hundred Years: picture by AW Ridley
The Hundred Years War by Alfred H. Burne
Trial by Fire, Volume lI of the four volume record of the Hundred Years War by Jonathan Sumption.
The Art of War in the Middle Ages Volume Two by Sir Charles Oman
The Hundred Years War by Robin Neillands.
British Battles by Grant.
The previous battle of the Hundred Years War is the Battle of Mauron
The next battle of the Hundred Years War is the Battle of Cocherel
To the 100 Years War index
 The fuselage of a Heinkel He 111 bomber, being transported by road to a scrap yard, October 1940. © IWM (HU 72439)
 The Palace of Westminster silhouetted against light from fires caused by bombings.
 The tail section of Oberleutnant Robert Zehbe’s Dornier Do 17 bomber landed on a London rooftop shown 21 September 1940.
The Anglo-Saxons
Battle of Fulford - The Anglo-SaxonsThe Battle of Fulford (1066) saw Harald Hardrada's Norwegian forces defeat the English earls Edwin and Morcar, opening the path to York before the Battle of Stamford Bridge.
OverviewThe Battle of Fulford was one of the early battles in the series of events that led to the Norman Conquest of England. In 1066, England was under significant pressure from multiple claimants to the throne, following the death of Edward the Confessor in January. Harold Godwinson, the most powerful noble in England, had been crowned king, but his claim was contested by several rivals, including Harald Hardrada, King of Norway, who believed he had a legitimate right to the English throne due to earlier treaties and alliances between the English and Scandinavian rulers.
Tostig Godwinson, Harold’s estranged brother, had been exiled from England in 1065 after losing his position as Earl of Northumbria due to his tyrannical rule and was determined to reclaim power. Tostig allied himself with Harald Hardrada, whose invasion of England was partly motivated by Tostig’s encouragement. Together, they sailed to the Humber River and began their invasion, which led to the confrontation at Fulford.
Image: Battle of Fulford by Matthew Paris, 13th Century. Public Domain.The BattleThe battle took place along the River Ouse, near the village of Gate Fulford, about 2 miles south of York. Edwin and Morcar positioned their forces near a marshy area, aiming to block the road, and Harald’s advance, toward York. There are no precise records of the size of the two forces, but Hardrada’s army is estimated to have been 6,000 to 10,000 men strong, compared to the English forces, led by Earls Edwin of Mercia and Morcar of Northumbria, which numbered around 5,000 to 6,000 men.
The initial stages saw fierce combat as the two shield walls clashed, with neither side gaining a decisive advantage. However, the turning point came when Harald Hardrada managed to outflank the English forces. The marshy ground, initially an advantage for the English, became a hindrance as the terrain restricted their movement, leading to disarray in the English lines. The Norwegian forces exploited this vulnerability, pushing hard against the English flank, which began to crumble under sustained pressure.
Edwin and Morcar’s forces were eventually overwhelmed, leading to a full-scale rout. According to the Anglo-Saxon Chronicle, many English troops were killed while fleeing, drowned in the river, caught in the marsh, or cut down by the pursuing Norwegians. Both Edwin and Morcar managed to escape, but their army suffered significant casualties, leaving York vulnerable to the invaders.
AftermathThe Battle of Fulford was a significant victory for Harald Hardrada, as it effectively opened the gateway to York. Following the battle, the city of York surrendered to the Norwegians and negotiated that 150 hostages would join the Viking army and a supply of food would be given to avoid being sacked. Hardrada was in a strong position to press his claim to the English throne; however, this victory was short-lived.
Just five days after Fulford, Harold Godwinson marched his army north from London at a remarkable pace to confront the Norwegian invaders. On September 25, 1066, Harold met Hardrada’s forces at the Battle of Stamford Bridge, where the English king decisively defeated the Norwegians, resulting in the deaths of both Harald Hardrada and Tostig Godwinson. This battle marked the end of the Viking Age invasions of England.
However, Harold’s swift and exhausting march north and his subsequent victory came at a significant cost. His forces were fatigued, and his army had been depleted by the campaign. Just under three weeks later, Harold would face William of Normandy at the Battle of Hastings, where the English forces, weakened by the northern campaign, were ultimately defeated, leading to the Norman Conquest of England.
Boyne: Cheers for posting this article.The Anglo-Saxons
Battle of Fulford - The Anglo-SaxonsThe Battle of Fulford (1066) saw Harald Hardrada's Norwegian forces defeat the English earls Edwin and Morcar, opening the path to York before the Battle of Stamford Bridge.
OverviewThe Battle of Fulford was one of the early battles in the series of events that led to the Norman Conquest of England. In 1066, England was under significant pressure from multiple claimants to the throne, following the death of Edward the Confessor in January. Harold Godwinson, the most powerful noble in England, had been crowned king, but his claim was contested by several rivals, including Harald Hardrada, King of Norway, who believed he had a legitimate right to the English throne due to earlier treaties and alliances between the English and Scandinavian rulers.
Tostig Godwinson, Harold’s estranged brother, had been exiled from England in 1065 after losing his position as Earl of Northumbria due to his tyrannical rule and was determined to reclaim power. Tostig allied himself with Harald Hardrada, whose invasion of England was partly motivated by Tostig’s encouragement. Together, they sailed to the Humber River and began their invasion, which led to the confrontation at Fulford.
Image: Battle of Fulford by Matthew Paris, 13th Century. Public Domain.The BattleThe battle took place along the River Ouse, near the village of Gate Fulford, about 2 miles south of York. Edwin and Morcar positioned their forces near a marshy area, aiming to block the road, and Harald’s advance, toward York. There are no precise records of the size of the two forces, but Hardrada’s army is estimated to have been 6,000 to 10,000 men strong, compared to the English forces, led by Earls Edwin of Mercia and Morcar of Northumbria, which numbered around 5,000 to 6,000 men.
The initial stages saw fierce combat as the two shield walls clashed, with neither side gaining a decisive advantage. However, the turning point came when Harald Hardrada managed to outflank the English forces. The marshy ground, initially an advantage for the English, became a hindrance as the terrain restricted their movement, leading to disarray in the English lines. The Norwegian forces exploited this vulnerability, pushing hard against the English flank, which began to crumble under sustained pressure.
Edwin and Morcar’s forces were eventually overwhelmed, leading to a full-scale rout. According to the Anglo-Saxon Chronicle, many English troops were killed while fleeing, drowned in the river, caught in the marsh, or cut down by the pursuing Norwegians. Both Edwin and Morcar managed to escape, but their army suffered significant casualties, leaving York vulnerable to the invaders.
AftermathThe Battle of Fulford was a significant victory for Harald Hardrada, as it effectively opened the gateway to York. Following the battle, the city of York surrendered to the Norwegians and negotiated that 150 hostages would join the Viking army and a supply of food would be given to avoid being sacked. Hardrada was in a strong position to press his claim to the English throne; however, this victory was short-lived.
Just five days after Fulford, Harold Godwinson marched his army north from London at a remarkable pace to confront the Norwegian invaders. On September 25, 1066, Harold met Hardrada’s forces at the Battle of Stamford Bridge, where the English king decisively defeated the Norwegians, resulting in the deaths of both Harald Hardrada and Tostig Godwinson. This battle marked the end of the Viking Age invasions of England.
However, Harold’s swift and exhausting march north and his subsequent victory came at a significant cost. His forces were fatigued, and his army had been depleted by the campaign. Just under three weeks later, Harold would face William of Normandy at the Battle of Hastings, where the English forces, weakened by the northern campaign, were ultimately defeated, leading to the Norman Conquest of England.
1066 was such an important year in the history of the British Isles.
Battle of Fulford September 1066
Tostig Godwinson, Harold's estranged younger brother, had been the Earl of Northumbria, but due to the harsh way he ruled, he was forced out by other northern earls and exiled in 1065 by Edward the Confessor.
Tostig aligned himself with the King of Norway, Harald Hardrada, and encouraged Harald to claim the English crown. Together, they amassed an army and set sail across the sea.
They sacked and burned Scarborough before landing in Yorkshire at the mouth of the River Humber.
They then sailed up the River Ouse, moving north towards York and beginning their invasion of England.
BattleOn September 20th, 1066, Harald and Tostig were confronted by Harold Godwinson's earls, Edwin, and Morcar, a few miles south of York, along the River Ouse near the village of Fulford.
 Edwin and Morcar positioned their combined Anglo-Saxon forces near a marshy area in an attempt to block the road to York.
Hardrada's army is said to have been 6,000 to 10,000 men strong compared to the earls' forces of between 5,000 to 6,000 men.
They blocked the road but gave Hardrada the high ground.
The battle began as the two shield walls of men clashed, with neither side gaining an advantage.
The Anglo-Saxons pushed first before Harald's men could fully deploy for battle, but this push didn't last as Harald's more experienced troops came to bear upon the English.
Soon, Harald was able to outflank the Anglo-Saxon forces from the right flank, and the marshy ground began to restrict the army's movement, leading to confusion and disarray.
The Norwegians pushed harder against the flank, which soon crumbled under pressure. Edwin's forces on the left flank retreated towards York, leaving Morcar's already weakening force to fight without support.
 The English forces were soon overwhelmed and routed, with many English being killed while fleeing by drowning in the River Ouse or caught in the marsh and cut down by pursuing Norwegians.
Both Earl Edwin, and Earl Morcar escaped, but the city of York was now left unprotected.
AftermathThe Battle of Fulford was a significant win for Harald Hardrada as it opened the gateway to York and passage to the north of England.
After the battle, York surrendered and negotiated that 150 hostages would join the Viking army and food would be given freely to avoid being sacked.
York was also part of Tostig Godwinson's lands before he was exiled, so that also likely saved the city from being sacked.
Hardrada was now in a good position to press his claim to the throne.
Hardrada moved his army seven miles east of York, to the town of Stamford Bridge, and built a camp to await the 150 hostages from York and to rest. But his victory would be short-lived.
Tostig's brother, Harold Godwinson, King Harold II of England, was already preparing to march his army north and would confront the Viking army just five days later at the Battle of Stamford Bridge.
BackgroundEngland, 1066. Edward the Confessor died without an heir, and the crown was contested by several rivals, including King Harald III of Norway (Harald Hardrada), William, Duke of Normandy, and Harold Godwinson, who had himself crowned King of England on January 6th, 1066, the day after Edward's death.Tostig Godwinson, Harold's estranged younger brother, had been the Earl of Northumbria, but due to the harsh way he ruled, he was forced out by other northern earls and exiled in 1065 by Edward the Confessor.
Tostig aligned himself with the King of Norway, Harald Hardrada, and encouraged Harald to claim the English crown. Together, they amassed an army and set sail across the sea.
They sacked and burned Scarborough before landing in Yorkshire at the mouth of the River Humber.
They then sailed up the River Ouse, moving north towards York and beginning their invasion of England.
BattleOn September 20th, 1066, Harald and Tostig were confronted by Harold Godwinson's earls, Edwin, and Morcar, a few miles south of York, along the River Ouse near the village of Fulford.
Edwin and Morcar positioned their combined Anglo-Saxon forces near a marshy area in an attempt to block the road to York.Hardrada's army is said to have been 6,000 to 10,000 men strong compared to the earls' forces of between 5,000 to 6,000 men.
They blocked the road but gave Hardrada the high ground.
The battle began as the two shield walls of men clashed, with neither side gaining an advantage.
The Anglo-Saxons pushed first before Harald's men could fully deploy for battle, but this push didn't last as Harald's more experienced troops came to bear upon the English.
Soon, Harald was able to outflank the Anglo-Saxon forces from the right flank, and the marshy ground began to restrict the army's movement, leading to confusion and disarray.
The Norwegians pushed harder against the flank, which soon crumbled under pressure. Edwin's forces on the left flank retreated towards York, leaving Morcar's already weakening force to fight without support.
The English forces were soon overwhelmed and routed, with many English being killed while fleeing by drowning in the River Ouse or caught in the marsh and cut down by pursuing Norwegians.Both Earl Edwin, and Earl Morcar escaped, but the city of York was now left unprotected.
AftermathThe Battle of Fulford was a significant win for Harald Hardrada as it opened the gateway to York and passage to the north of England.
After the battle, York surrendered and negotiated that 150 hostages would join the Viking army and food would be given freely to avoid being sacked.
York was also part of Tostig Godwinson's lands before he was exiled, so that also likely saved the city from being sacked.
Hardrada was now in a good position to press his claim to the throne.
Hardrada moved his army seven miles east of York, to the town of Stamford Bridge, and built a camp to await the 150 hostages from York and to rest. But his victory would be short-lived.
Tostig's brother, Harold Godwinson, King Harold II of England, was already preparing to march his army north and would confront the Viking army just five days later at the Battle of Stamford Bridge.
Boyne
We Are The People
- Messages
- 29,862
- Reaction score
- 34,843
@erskblue As you say, 1066 was an important in the history of the British Isles. If Harold had been victorious at Hastings we would probably be speaking and writing a very different type of English. Also would we have experienced the political, social and religious upheavals of later years especially those in the 16th and 17th Centuries? And possibly just as important would football be played and discussed?!Boyne: Cheers for posting this article.
1066 was such an important year in the history of the British Isles.