Lets have some History Thread

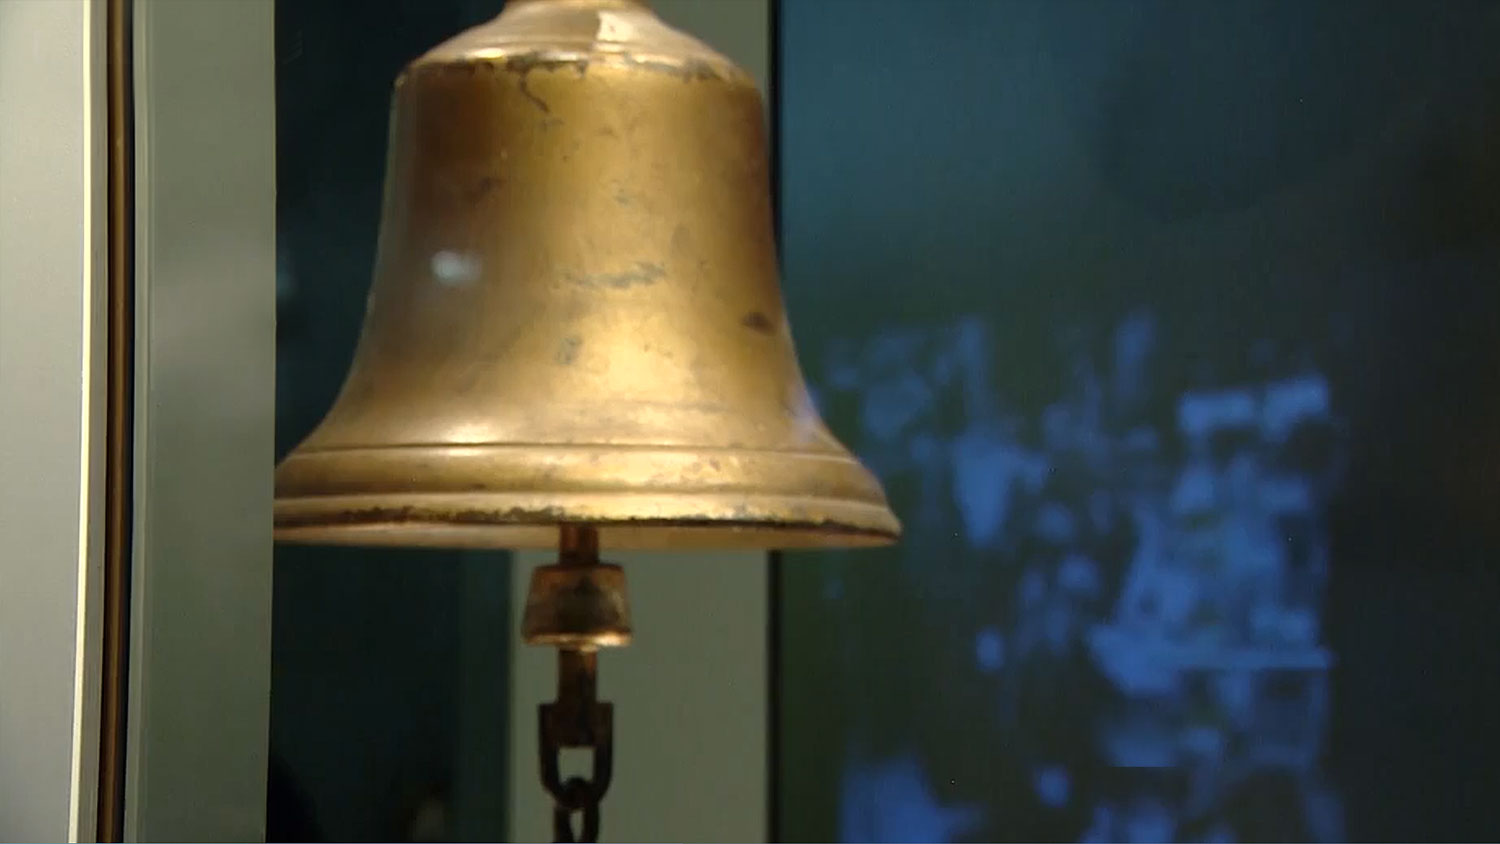
Scramble-Bell-Biggin-Hill-Memorial-Museum-Credit-Forces-News-SFW.jpg


Scramble Bell on show at the Biggin Hill Memorial Museum.

View attachment 42528

The condensation trails from German and British fighter planes engaged in an aerial battle appear in the sky over Kent on 3 September 1940.
Ah, the scramble bell. Have walked by it many times.

 
https://www.britishbattles.com/english-civil-war/battle-of-worcester/

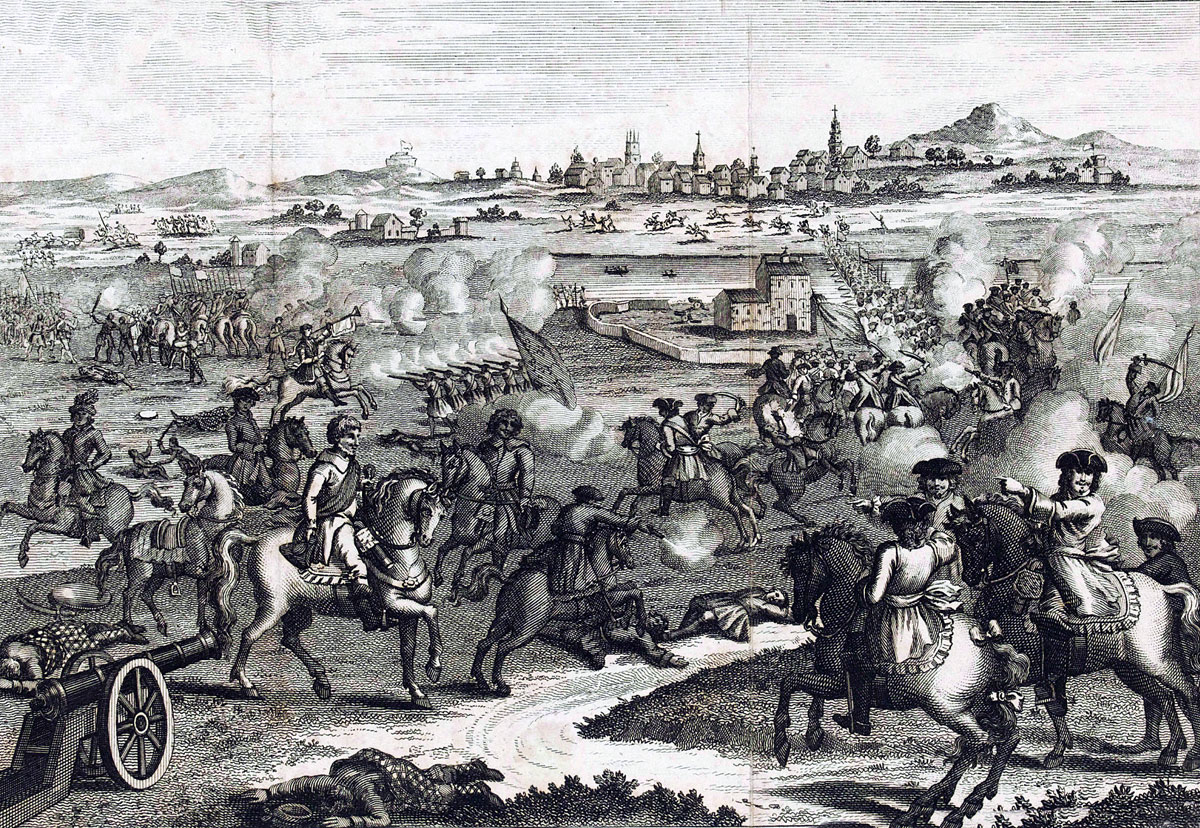
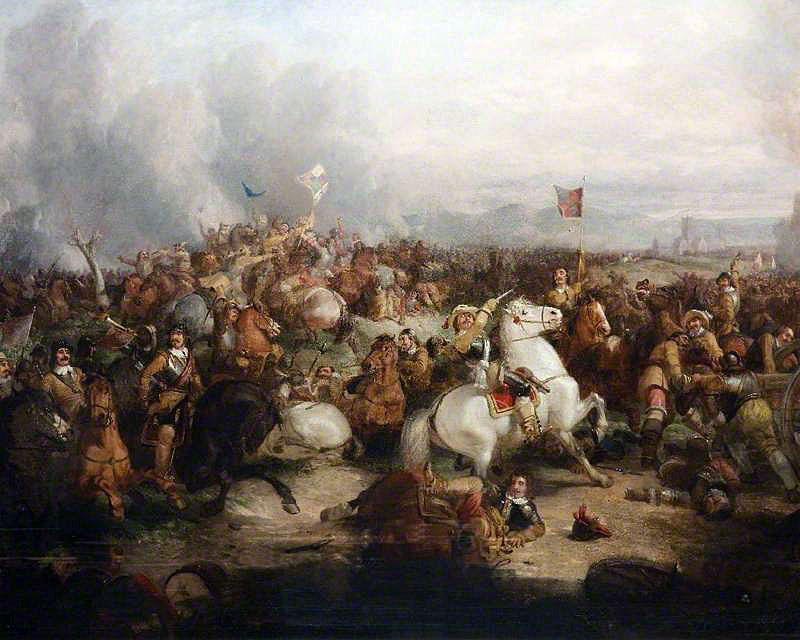
Battle of WorcesterThe Battle of Worcester fought on 3rd September 1651 between the Parliamentary army of Oliver Cromwell and the Royalist and Scottish army of King Charles II; the final battle of the English Civil War


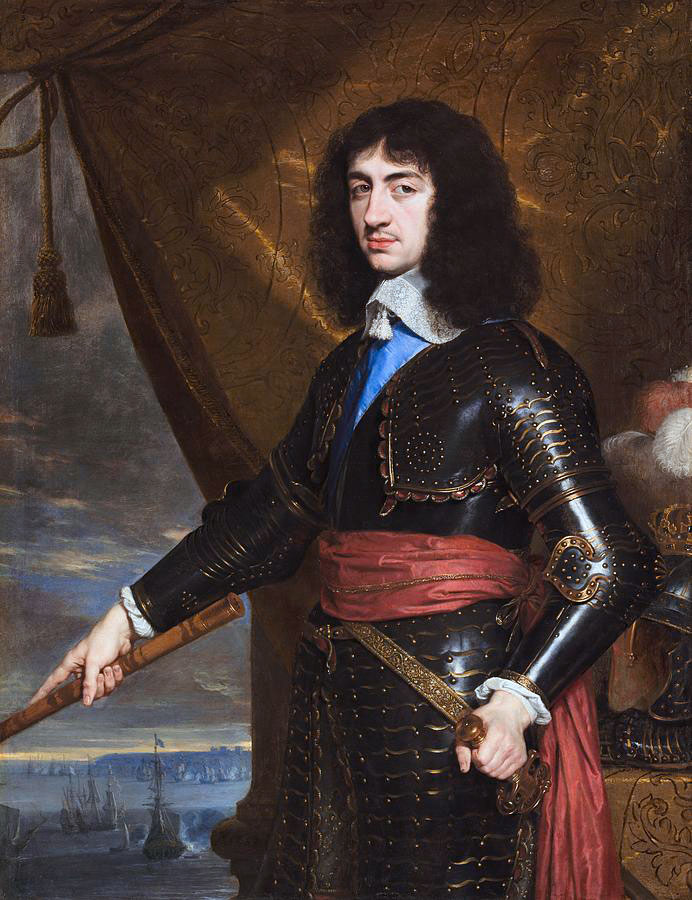
King Charles II at the Battle of Worcester on 3rd September 1651 in the English Civil War: picture by Thomas Woodward

The previous battle of the English Civil War is the Battle of Dunbar

The next battle in the British Battles series is the Battle of Blenheim

To the English Civil War index

War: English Civil War.

Date of the Battle of Worcester: 3rd September 1651


King Charles II: Battle of Worcester on 3rd September 1651 in the English Civil War: picture by Philippe de Champaigne

Place of the Battle of Worcester: At and around the City of Worcester in the West of England.

Combatants at the Battle of Worcester: An English Royalist and Scottish Covenanter army against the English Parliamentary army.

Commanders at the Battle of Worcester: King Charles II commanded the Royalist army with Sir David Leslie commanding the Scottish contingent. Oliver Cromwell commanded the Parliamentary army.

Size of the armies at the Battle of Worcester: King Charles II’s army numbered around 16,000 men while the Parliamentary army numbered around 28,000 men.

Uniforms, arms and equipment at the Battle of Worcester: See this section in the Battle of Edgehill.

Winner of the Battle of Worcester: The Royalist and Covenanter army was resoundingly defeated by Cromwell’s Parliamentary army, being nearly annihilated, bringing the English Civil War to a close, with King Charles II’s memorable flight from the battlefield to France.

Events leading to the Battle of Worcester:

Following the Parliamentary victory over the Scottish Covenanter army of Sir David Leslie at the Battle of Dunbar on 3rd June 1650, Leslie withdrew his surviving troops, around 5,000 men, to Stirling while Cromwell occupied Edinburgh and began a siege of Edinburgh Castle.

While his troops assaulted Edinburgh Castle, Cromwell followed Leslie to Stirling, intending to bring him to battle, but found the Scottish position impregnable.

Cromwell withdrew to Edinburgh and completed the subjugation of Edinburgh Castle.

In the meantime, King Charles II assembled a new royalist army, intending to combine it with the reinforced Covenanter army under Leslie.

Cromwell returned to Stirling, manoeuvred around Leslie’s position and began to reduce the country to the north.


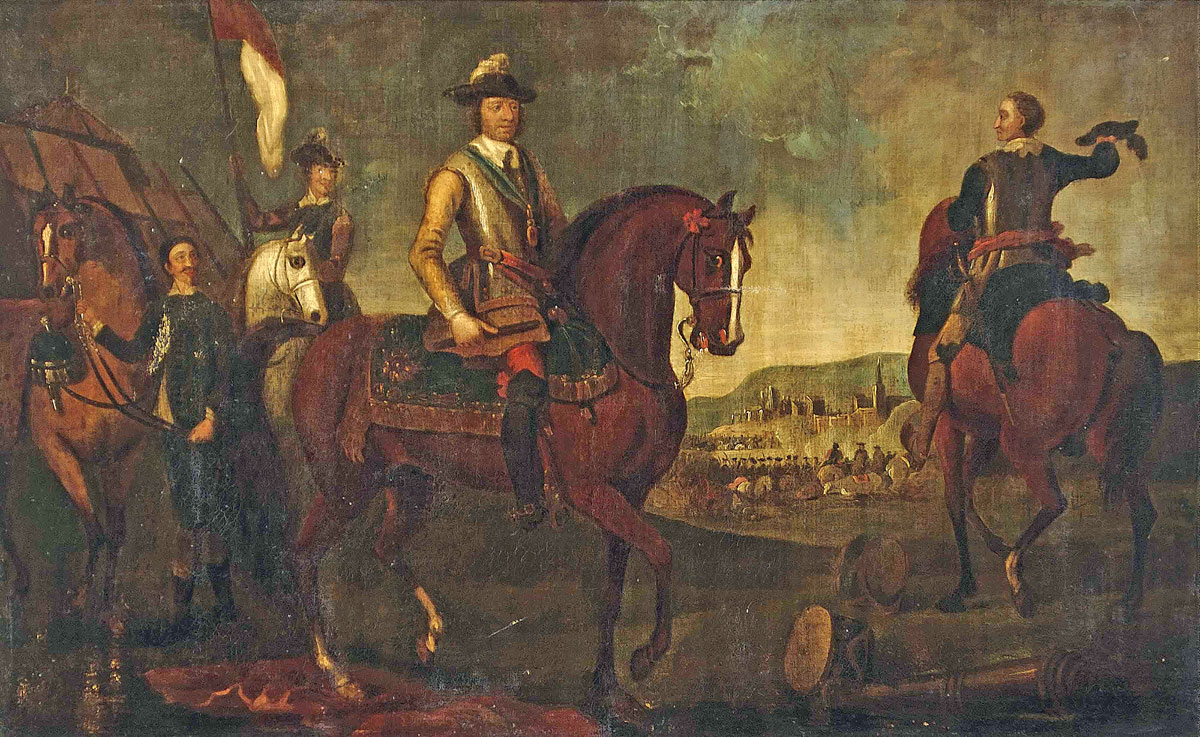
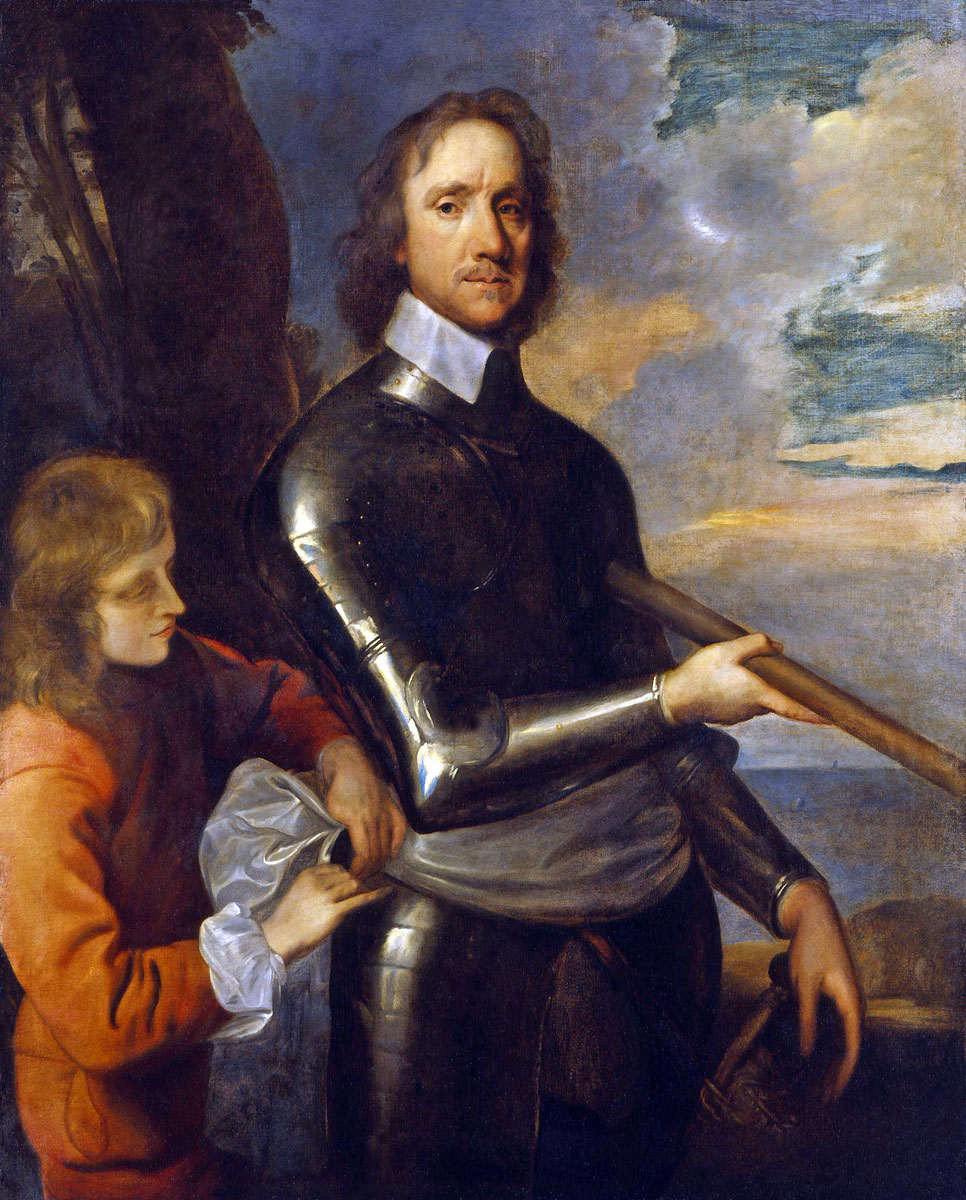
Oliver Cromwell: Battle of Worcester on 3rd September 1651 in the English Civil War: picture by Robert Walker

By 2nd August 1651 Cromwell was taking the surrender of Perth when he heard that the Royalist/Covenanter army was marching south to invade England.

Cromwell marched out of Edinburgh in pursuit of Charles II’s army on 4th August 1651.

Charles II marched down the west side of England, hoping to attract Royalist recruits. While there was some enthusiasm expressed as he journeyed south, few were prepared to commit themselves by taking up arms.

Generals Lambert and Harrison with a Parliamentary force fought a brief skirmish at Warrington in trying, unsuccessfully, to prevent the Royalist/Covenanter army from crossing the River Mersey.

The Royalist Earl of Derby with a force of some 1,500 men raised in Lancashire and Cheshire was marching to join King Charles II when he was engaged by Colonel Lilburn with 10 troops of horse. Derby was resoundingly defeated, escaping wounded to join the Royalist army with only 30 exhausted horsemen, the survivors of his force.

On 22nd August 1651 Charles II’s army reached Worcester, where it halted, after the gruelling march of some 300 miles from Scotland. Charles prepared to give battle to the pursuing Cromwell.

While the young king had been greeted with enthusiasm by Royalist sympathisers during his march south, few had enlisted in his army, leaving it heavily outnumbered by the gathering forces of Parliament,

Charles hoped during his stay in the city to attract recruits from the approaches to Wales and from the south-west of England.

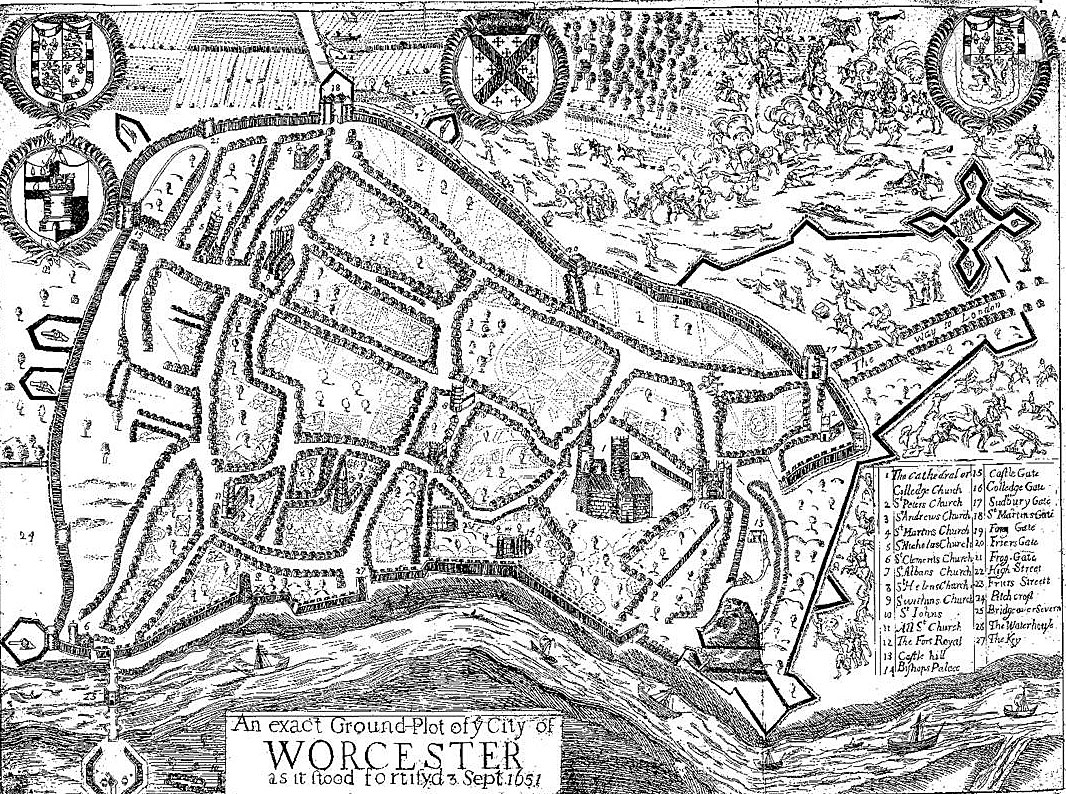
Royalist parties set to work repairing Worcester’s delipidated fortifications and building new defences against the expected attack by Cromwell’s pursuing army, in particular the substantial fieldwork in the north-east of the city known as ‘Fort Royal’.


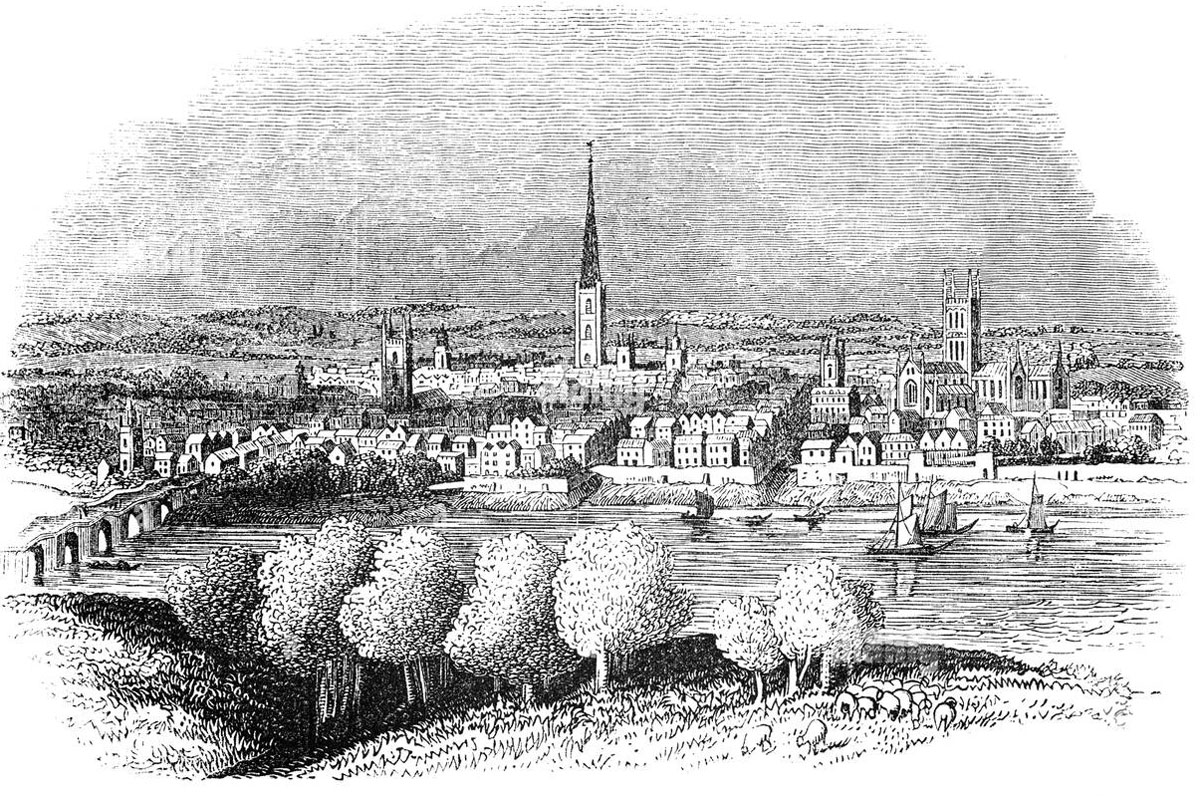
City of Worcester from across the River Severn: Battle of Worcester on 3rd September 1651 in the English Civil War

Cromwell’s marched with his main army into Evesham, some 15 miles from Worcester, on 27th August 1651, where he was joined by several junior commanders, General Fleetwood, Lord Grey of Groby and General Desborough from Reading, giving Cromwell an army of 28,000 men, nearly twice the size of Charles II’s army of 16,000 men.

Charles II conducted a council of war in the afternoon of 29th August 1651 with his subordinate commanders, Sir David Leslie commanding the large Scottish contingent, the Duke of Buckingham and General Middleton among them.


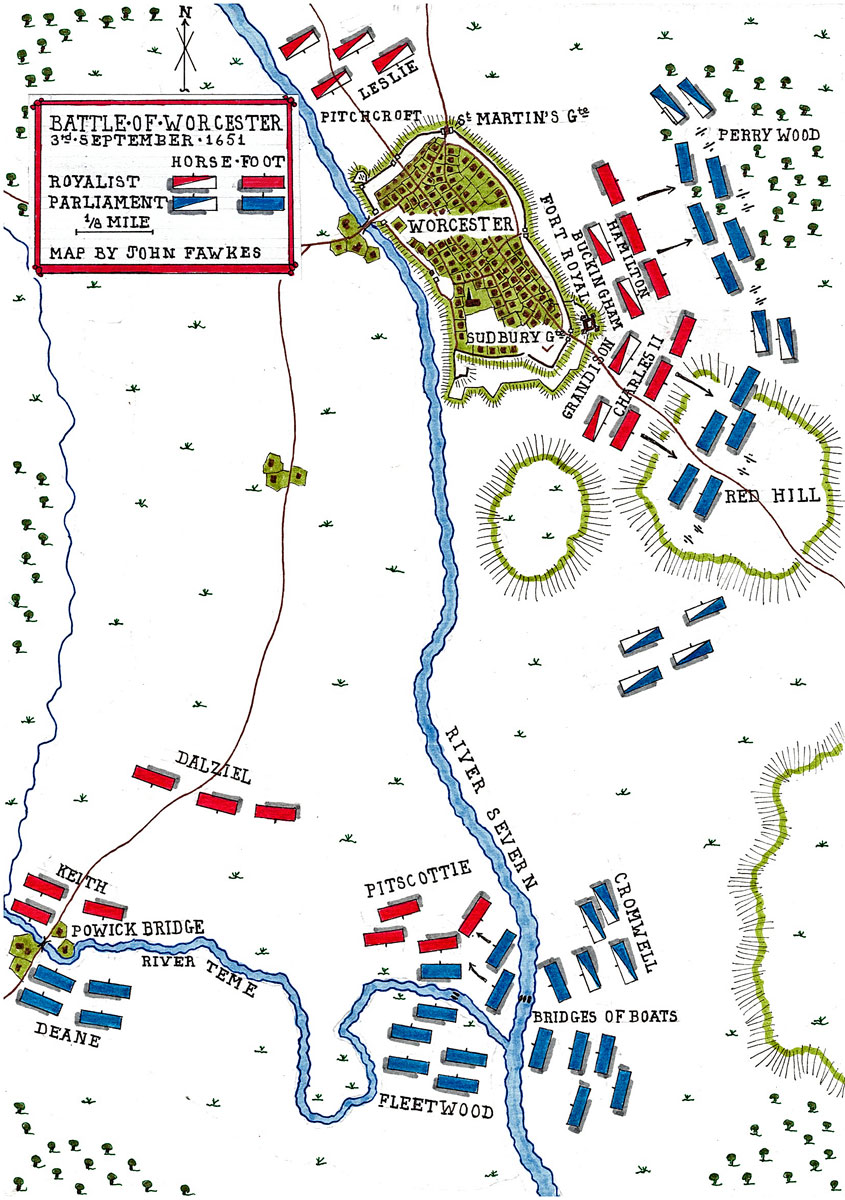
Map of the Battle of Worcester on 3rd September 1651 in the English Civil War: battle map by John Fawkes

Account of the Battle of Worcester:

The Battle of Worcester began with a Royalist attack on the battery mounted by Cromwell on Red Hill to the east of Worcester which had begun a bombardment of the city and another attack on a fortification being built on the bank of the River Severn.

These attacks were betrayed by a Puritan tailor from Worcester and the 1,500-man Royalist force led by General Middleton and Colonel Keith was repelled with heavy losses.

The tailor was identified and hanged the next day.


Contemporary plan of the City of Worcester during the Battle of Worcester on 3rd September 1651 in the English Civil War: plan by Vaughan

The Royalist General Massey was sent with a force of 300 men to defend the crossing of the River Severn at Upton-on-Severn, 9 miles south of Worcester.

The bridge across the River Severn at Upton was destroyed with a single plank left to provide a crossing for the locals.

During the night of 29th August 1651, the Parliamentary commander, General Lambert, arrived with a force that heavily outnumbered Massey’s, on the east bank of the River Severn opposite Upton with the duty of forcing a crossing. Lambert sent 18 dragoon volunteers to cross the river by the plank.

Massey’s men were unaware of the arrival of the Parliamentary troops and the dragoons were able to cross the broken bridge to the west bank unseen.

The 18 dragoons were identified and attacked, but took shelter in the neighbouring church, where they held out until a large force of Parliamentary dragoons crossed by a ford further down the river and came to their relief.

Massey fought to hold back Lambert’s incursion, but was heavily outnumbered and forced to retreat north towards Worcester, leaving Upton and the crossing point over the River Severn in Lambert’s hands.

The bridge was quickly repaired, enabling the whole of General Fleetwood’s Parliamentary army to cross to the west bank.

As a preliminary to advancing to attack the Royalist army in Worcester, Fleetwood’s army collected sufficient boats to build two floating bridges for the crossing over the Rivers Teme and Severn immediately outside Worcester.


Battle of Worcester on 3rd September 1651 in the English Civil War

The various elements of the Parliamentary army were ready for the attack on the Royalists in Worcester by 2nd September 1652, but Cromwell directed that the attack be on the following day, 3rd September 1652, the first anniversary of his victory at the Battle of Dunbar.

 In the early hours of 3rd September 1652, the Parliamentary troops of Generals Fleetwood and Lambert began their advance north towards Worcester, up the western bank of the River Severn.

The advance was slowed by the need to tow the twenty large boats making up the two bridges of boats to be used in the attack across the River Teme.

Major-General Robert Montgomery commanded the Royalist troops holding the two-mile line of the River Teme between Powick and the River Severn, comprising the brigades of Colonel Keith, Pitscottie and Major-General Dalziel.


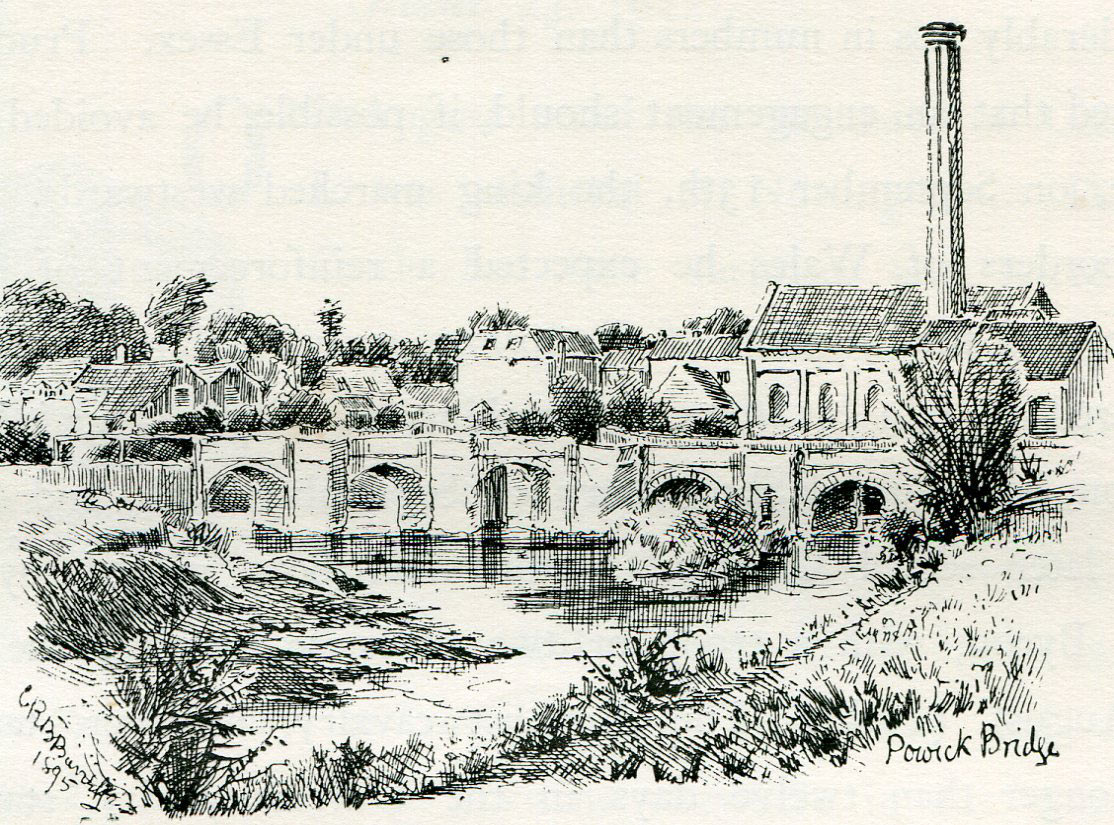
Powick Bridge: Battle of Worcester on 3rd September 1651 in the English Civil War: drawing by CRB Barrett

Keith held the bridge across the River Teme at Powick which had been partially destroyed, leaving enough fabric for the locals to cross.

Fleetwood’s and Lambert’s force reached the River Teme in the loop just west of the River Severn and the bridges of boats were put in place in a very short time, one across the River Teme near to its confluence with the River Severn and the other across the River Severn itself just north of the junction of the two rivers.

The Parliamentary guns on Red Hill and in Perry Wood to the east of Worcester on the far side of the River Severn maintained a heavy barrage on the Royalists in the city to divert them from the attack on the far side of the River Severn.

General Deane led the Parliamentary assault on Powick Bridge, but was unable to force his way across.


Battle of Worcester on 3rd September 1651 in the English Civil War: The uniforms shown are post-Restoration.

Lambert’s men crossed the bridge of boats but were driven back by Pitscottie’s highlanders.

King Charles II, at the beginning of the battle watched the fighting along the River Teme, which was described as ‘extremely bitter’, from the tower of Worcester Cathedral.

The King soon took to his horse and rode to the bank of the River Teme to give his personal encouragement to his troops.

Cromwell was also watching the struggle along the River Teme from the high ground on the east bank of the River Severn.

Seeing the difficulties the Parliamentary troops were having in crossing the River Teme and how little progress they were making, Cromwell led three brigades across the second bridge of boats that had, with considerable foresight, been laid across the River Severn with exactly this scenario in mind: the Parliamentary troops on the west bank of the River Severn suddenly requiring urgent reinforcement from Cromwell’s more powerful force on the east bank.

As the second bridge of boats had been moored to the north of the River Teme junction, Cromwell’s three brigades crossed straight onto the ground north of that river, immediately outflanking the Royalists resisting Fleetwood’s troops.

Pitscottie’s Highlanders, fighting Lambert’s men coming over the bridge of boats to their front, were now attacked by Cromwell’s brigades over the River Severn by the other bridge of boats on their left flank.

Facing overwhelming numbers, the Highlanders fell back leaving Keith’s men at Powick Bridge exposed. They retreated in considerable confusion, leaving Keith to be captured.

All the Royalist contingents along the River Teme fell back in disorder, in some cases amounting to rout, to the City of Worcester, crossing by the main city bridge.


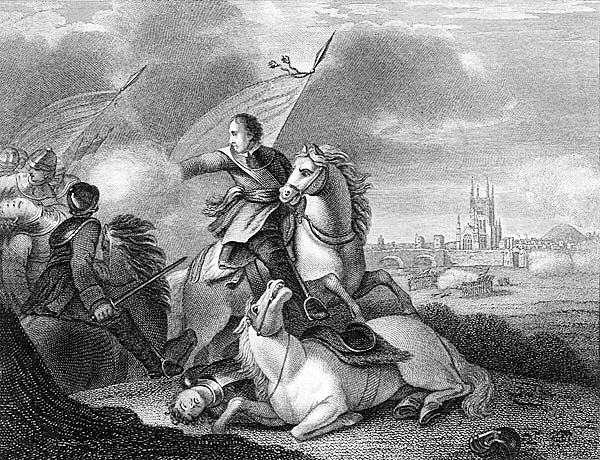
Oliver Cromwell at the Battle of Worcester on 3rd September 1651 in the English Civil War

While the battle to the west of the River Severn raged for some two hours, King Charles II rode back through Worcester and launched an attack by two columns of Royalist infantry on the Parliamentary right wing.

Charles led the right-hand column against the Parliamentary troops on Red Hill, while the Duke of Hamilton attacked into Perry Wood, the two forces marching out through the Sudbury Gate, covered by the fire from the guns in Fort Royal.

The Parliamentary troops in these positions comprised inexperienced militia and fell back all along the line, under the pressure of the Royalist assault.

The few Parliamentary cavalry still on the east bank of the River Severn hurried to support the line of militia, but they few in number and were pushed back by the Royalist attack.

In considerable haste, Cromwell recrossed the River Severn to the east bank, by way of the bridge of boats, with his three brigades and hurried to the relief of the recoiling militia, turning the tide against the now heavily outnumbered Royalists of King Charles II’s two columns.

The Royalists were driven back through the Sudbury Gate in increasing confusion, all order lost, the soldiers anxious to escape the pursuing Parliamentarians.

King Charles II had fought with considerable courage. He now found his escape blocked by an ammunition waggon, immobilised in the Sudbury Gate. Charles abandoned his armour and squeezed through, finding another horse and joining the Earl of Cleveland, Sir James Hamilton, Colonel Wogan and others in attempting to rally the Royalist troops.

However, the battle was lost. Cromwell’s men were pressing into the city from the east while Fleetwood’s troops crossed the bridge into the city from the south.

Leslie’s Scottish cavalry, supine throughout the battle on Pitchcroft to the north of the city, continued to refuse to take part in the battle.

The Royalist officer, Sir Alexander Forbes, refused to surrender Fort Royal which was stormed and captured by the Essex Militia, who then turned the fort’s guns on the melee in the city.


Battle of Worcester on 3rd September 1651 in the English Civil War

All the gates of Worcester were now taken by Parliamentary troops, other than St Martin’s Gate leading to the north, where a dreadful slaughter took place of the Royalist soldiers attempting to escape into the countryside.

Lord Rothes, Sir William Hammond and Colonel Drummond continued to resist on Castle Mound in the middle of Worcester until persuaded to surrender on terms by Cromwell himself.

Cleveland and Hammond with a party of Royalist troopers escorted King Charles II out of the city and enabled him to escape the collapse of his army.

Casualties at the Battle of Worcester:

A large proportion of the Royalist army that fought at the Battle of Worcester were Scotsmen from the Covenanting army of Sir David Leslie. 2,000 to 3,000 of them were killed in the battle. 10,000 were captured on the battlefield or as they attempted to escape to Scotland, travelling up through the north of England.

Many of the captured Scottish soldiers died in makeshift prison camps in London, while several hundred were transported to the American colonies to become indentured servants to the colonists, an early form of slavery.

Some 640 Royalist officers became prisoners.

The Duke of Hamilton died of his wounds after the attack on the Red Hill.

The Earl of Derby was captured in Cheshire. He was tried by Parliamentary court-martial and sentenced to death for treason. In spite of a request for clemency lodged by Cromwell himself the Earl was beheaded in Bolton.

General Massey, General Montgomerie and the wounded Sir Alexander Forbes were taken prisoner with the Scottish officers Pitscottie and Keith and the English Lord Grandison.

The Parliamentarians used Worcester Cathedral as a temporary prison for the captured Royalists.

The Parliamentary army is said to have suffered a few hundred casualties.

The senior Scottish generals Leslie and Lauderdale were captured and held prisoner until the Restoration in 1660.


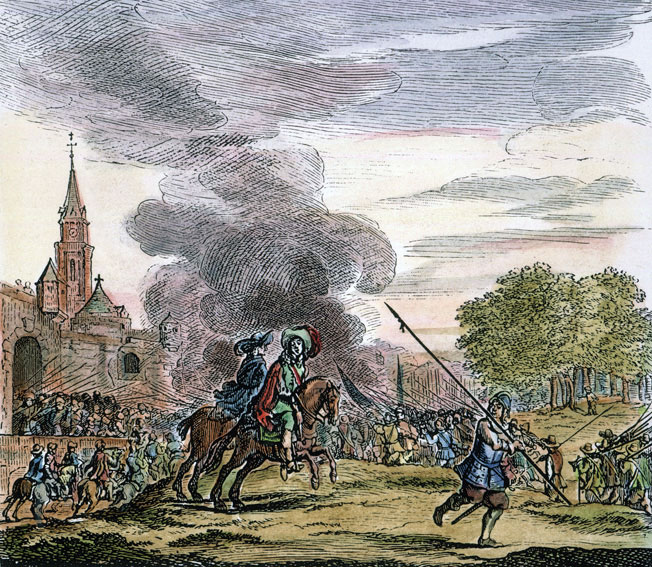
King Charles II escapes from the city after the Battle of Worcester on 3rd September 1651 in the English Civil War

Follow-up to the Battle of Worcester:

After the Battle of Worcester, King Charles II escaped with a small party of senior Royalist officers. After a detour across Worcestershire the King turned west and finally headed for the south coast.

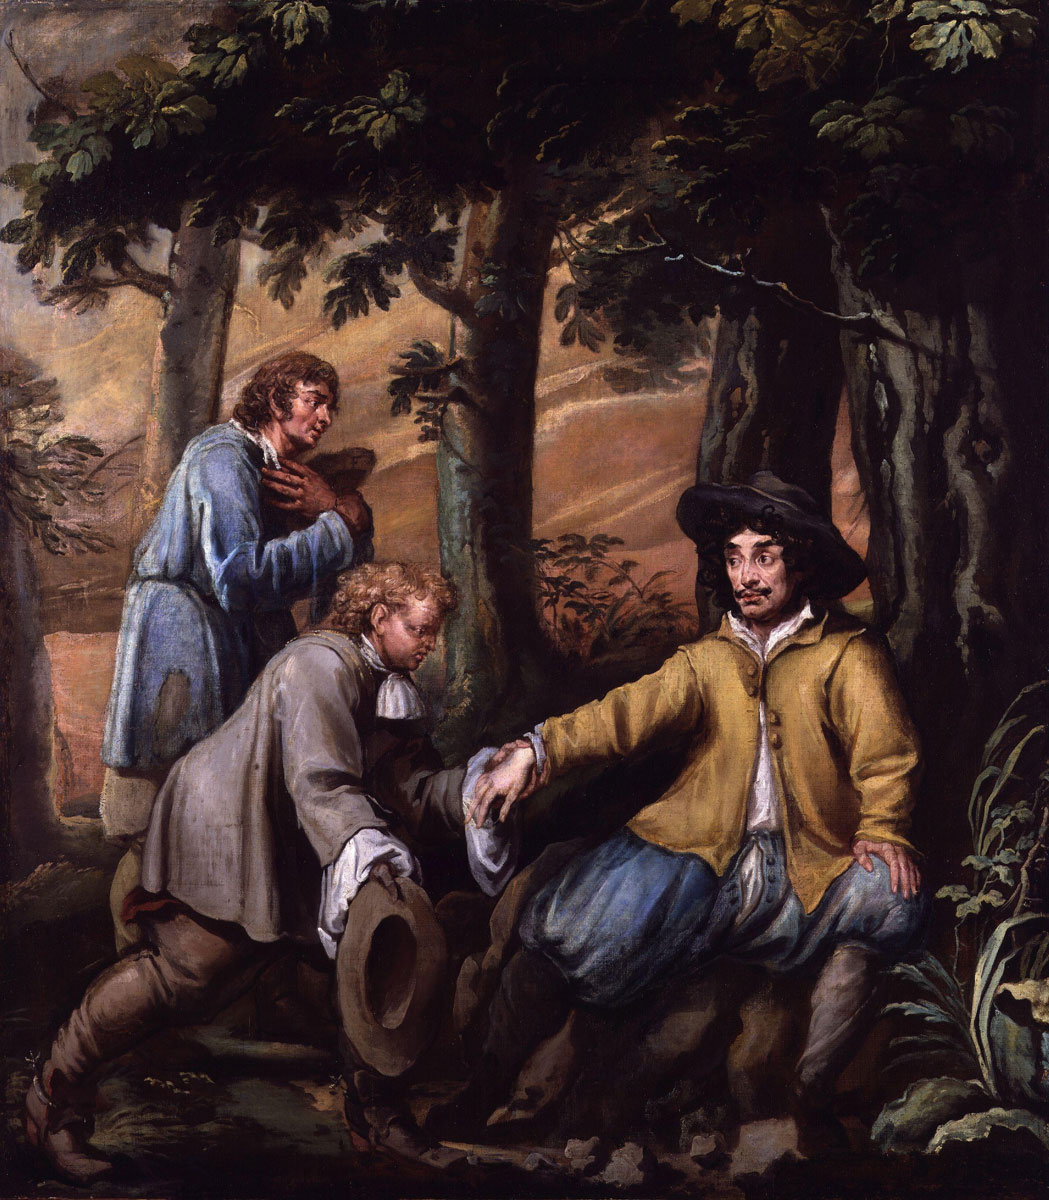
During a stay at Boscobel House King Charles II hid in an oak tree as Parliamentary troops searched the surrounding woods.


King Charles II hiding in Boscobel Wood after the Battle of Worcester on 3rd September 1651 in the English Civil War: picture by Isaac Fuller

The King eventually reached Shoreham on the south coast in Sussex and took ship to France.

The King remained on the Continent until the Restoration in 1660.

The Battle of Worcester ended the Civil War.

After the Battle of Worcester Cromwell sheathed his sword and did not fight again.

Anecdotes and traditions from the Battle of Worcester:

  • The day after the Battle of Worcester, Cromwell wrote to the Speaker of the House of Commons saying: ‘The dimensions of this mercy are above my thoughts. It is, for aught I know, a crowning mercy.’


Cromwell rides to London after the Battle of Worcester on 3rd September 1651 in the English Civil War: print by Walter Paget

References for the Battle of Worcester:

British Battles by Grant.

History of the British Army by Fortescue Volume 1

Battles in Britain by William Seymour

British Battles by Grant.

The previous battle of the English Civil War is the Battle of Dunbar

The next battle in the British Battles series is the Battle of Blenheim

To the English Civil War index

 
https://samilitaryhistory.org/vol065sb.html

The South African
Military History Society
Die Suid-Afrikaanse Krygshistoriese Vereniging


Military History Journal
Vol 6 No 5Col A W Durnfordby S. Bourquin

From his service in South Africa over a broken period of eight years, the impression which emerges of Anthony William Durnford is that of a colourful, yet controversial figure. Loved and esteemed by many, grossly maligned by others, his life-story reveals an intriguing mixture of happiness and sadness, of success and misfortune, of heroism and tragedy. He once described himself as 'the best hated man in Natal'; but whereas some might curse and revile him, his personal attributes, his integrity and character remained unassailable. The historian Froude said of him: 'I have rarely met a man who, at first sight, made a more pleasing impression upon me. He was more than I expected ... He has done the State good service. He alone did his duty when others forgot theirs'.

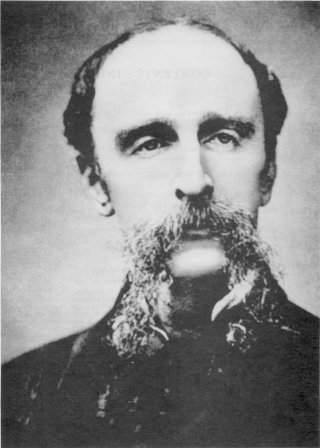
vo065sba.jpg

Col. A. W. Durnford, R.E.

Durnford came from an illustrious military family which had sent generations of its sons into the service. He was born on 24 May 1830, at Manor Hamilton, Ireland, the eldest son of Gen E.W. Durnford, Colonel Commandant, Royal Engineers. He had a younger brother, Edward, who became a lieutenant-colonel in the Royal Marine Artillery. Although he received some schooling in Ireland, he was educated mainly at Dusseldorf in Germany, where he stayed with his maternal uncle, J.T. Langley.

On his return to England Durnford entered the Royal Military Academy at Woolwich and in 1848 obtained a commission as a second lieutenant in the Royal Engineers. In October 1851, he embarked for Ceylon which was to become his home for the next five years. Stationed at Trincomalee, he gave so much assistance to Admiral Sir F Pellew in regard to the defences of the harbour that his services rendered were brought to the notice of the Master-General of the Ordnance by the Lords of the Admiralty. Two years after his arrival he was instrumental in saving the harbour defence installations from destruction by fire. In addition to his military duties he was subsequently encumbered with certain civil duties, being appointed Assistant Commissioner of Roads and Civil Engineer to the Colony.

When the Crimean War broke out in September 1854, Durnford volunteered for action but was not accepted. However, when the war dragged on he was eventually transferred to Malta as an intermediate posting in the case of his services being needed in the Crimea. Much to his disappointment, he did not see active service either in the Crimean War or Sepoy Mutiny which broke out in 1857. Instead, he remained in Malta for two years serving as adjutant before being transferred in February 1858 to England. Two years of home service at Chatham and Aldershot were relieved by a posting to Gibraltar where, for three years, he was in command of the 27th Company. In 1864, with the rank of first captain, he returned to England in order to take up a posting in China. However, en route to the East he suffered a severe breakdown in his health, as a result of which he was invalided back to England and after his recovery relegated to routine home duties for the next six years at Devonport and Dublin. Then, in 1871, came an assignment which was to have a vast and profound influence on the remaining course of his career and his life - a posting to South Africa.

On 23 January 1872, 'a tall, spare man, with sturdy, observant eyes, a balding head, and a magnificent moustache which dangled down to his collarbones' stepped ashore at Cape Town. Capt Durnford was now 41 years old and had been a soldier in the Corps of Royal Engineers for more than 22 years, but had not yet seen active service. This was not through want of trying nor a lack of soldierly qualities since there had been at least two occasions on which he had demonstrated his personal dedication and courage. Once, while stationed in Scotland as a young lieutenant, he had shown great courage in helping rescue the crew of a small craft which had run aground during a heavy storm between Berwick and Holy Island; later, when serving in Ireland, he was involved in a railway accident and nearly lost his life, but notwithstanding his own injuries he persevered in assisting a mortally injured fellow-passenger.
Of the 16 months following his arrival in the Cape Durnford spent the greater portion at King William's Town. In a letter home, he described it as a 'dull station ... the only redeeming features being the grassy plains, cheap forage and Kafir ponies for UK PND 5 each. These are not much to look at, but they go fifty miles a day for a week, and never require to be fed'. Here he received his promotion to the rank of major, served on a Royal Commission and made his first contact with the indigenous peoples of Southern Africa. He was favourably impressed by them and formed the opinion that they would be invaluable to the country if properly trained. The most obvious spheres that occurred to him were soldiering and civil works such as road construction. In another letter to his mother he wrote of the Blacks: '.. they are at least honest, chivalrous, and hospitable, true to their salt, although only barbarians. They are fine men, very naked and all that sort of thing, but thoroughly good fellows'. He appears to have adhered to his idealistic picture throughout the remaining years of his life.

When he returned to Cape Town he had his quarters (five rooms and a kitchen) in the Castle. To complete his domestic establishment he also acquired a dog, 'a magnificent animal of the "kangaroo hound breed"' which he named 'Prince' and which became his constant companion.
In May 1873 Durnford received orders to proceed to Natal, a country already visited by two of his kinsmen and with whose history his own fate would become so closely interwoven. Durnford had to stay over in Durban for a few days. He had great difficulty in finding accommodation. The hotels were either full or else the hoteliers, while they had accommodation for black servants, were not prepared to accommodate the major's English batman because their hotels did not provide for that class of servant. However, as an officer, Durnford was accepted as an honorary member by the Durban Club and there found accommodation for himself and his batman. The journey to Pietermaritzburg, the capital, was accomplished in two days. His cape cart, drawn by four horses, made an overnight stop at a somewhat primitive wayside inn.

Durnford was a keen and observant letter-writer. Besides this, throughout his career when ever stationed abroad, he would take the conditions of the country into serious consideration - its resources and capabilities in the event of British military operations and every circumstance of importance in relation to his own professional branch of the service - which could affect the welfare and success of a possible British army. His observations were always carried out in the most quiet and unobtrusive manner; he never spoke of them except to those who could assist him in the writing thereof.
Pietermaritzburg, his home for some years to come, struck him as being in a condition of 'unmitigated barbarism and not the world-civilisation of the Cape'. In picturesque style he comments on being met at every turn by the sight of white babies, in white robes, in the arms of big, male savages, 'for there are few native women servants and white ones all get married. It looks queer at first, but these men are tender nurses, and the little ones are quite content'.

One of the few exceptions to his critical assessment of the capital's society was the Anglican Bishop of Natal, the Rt Revd John Colenso and his family. The Colenso family's religious notoriety, its English social standards and its intellectual interests cut it off from much of the social life of the capital; but most new arrivals from England found their way to Bishopstowe, some six miles from the city, and the best of them including many officers from the garrison at Fort Napier, became steady visitors. Durnford's religious views, his sensitivity and sympathetic attitude towards Blacks soon made him welcome at the Colenso home. Not only did Mrs Colenso evince great motherly fondness towards him, but her second daughter; Frances Ellen (Fanny, or Nell, as she preferred to be called), a frail, beautiful girl, then 24 years old, was infatuated with the impressive Durnford, 19 years her senior. And he, lonely and inwardly sensitive, responded to her as he had never done to any other woman before - but the tragedy of the situation was that Durnford was already married.

Having so far only considered Durnford's professional and military career; it is perhaps opportune to give some thought to his private and domestic life. Apart from his many excellent qualities, Durnford's main weakness lay in the fact that he tended to be over-enthusiastic or impetuous, and that this rashness often left no room for the consideration of any possible consequences of his actions. Closely related to this tendency was his inclination, at least during his younger years, to trust to his luck. He became a heavy gambler and was usually a heavy loser but such a personal tendency had - fortunately - not interfered with his work. Until his arrival in South Africa his professional and military career had been sometimes dully routine but generally successful; his domestic life, however; was beset with misfortunes and ended on an unhappy note.

When he had received his first overseas appointment in 1851 to Ceylon he had held only the rank of lieutenant. This was an age when military professionals married very late in life if they married at all, and low pay, long tours in primitive posts in the remote corners of the Empire, and the lack of pensions all contributed to the aphorism: 'Captains may marry, majors should marry, colonels must marry'. But Durnford, following the example set by his father, had plunged into marriage. Three years after his arrival in Ceylon, on 15 September 1854, in St Stephen's Church, Trincomalee, he married Frances Catherine Tranchell, the youngest daughter of a retired lieutenant-colonel who had served in the Ceylon Rifles.
For ten years this hastily contracted marriage had been fraught with problems. No doubt there was fault on both sides. Frances had to make ends meet on a lieutenant's modest wages and her husband, seeking to improve his fortunes through gambling, had lost, but had gambled harder aggravating rather than relieving the situation. Durnford's subsequent transfers overseas must have been trying for a young wife, especially as she had given birth either immediately prior to or after three such moves, and in addition, had had the terrible distress of losing her first and third child within a few months of their being born. An infant son born in Ceylon had died in Malta; a daughter born in Malta in 1857 had survived, but another daughter born in England in 1859 had died the following year. No doubt Durnford had also felt keenly the loss of these children - he referred to the surviving child as his 'one pet lamb'.
After the Durnfords had returned to England in 1864, his wife had taken a step which finally put an end to the marriage and almost ruined Durnford's military career in the process. She had abandoned her husband and daughter and had eloped with another man. Durnford never saw her again. The scandal had been carefully hushed up and Durnford's family had taken care of the child. The mother's name was never mentioned again. Divorce had been out of the question for not even the aggrieved party could hold a Queen's commission. Durnford had followed the pattern set by others in similar situations by taking his future postings abroad. It had been on his voyage to China in 1865 that his mental stress, aggravated by heat apoplexy, caused the complete breakdown of his health which necessitated his return to England.
This, then, was the tragic background against which Durnford, now in Pietermaritzburg, found a warm friendship which, after years of loneliness, gave him much joy and comfort throughout the remaining few years of his life, but which could never blossom forth into love and ultimate happiness as long as Frances Catherine was alive. (She outlived both Durnford and Frances Ellen, who had already symptoms of the tuberculosis which was to cause her premature death in 1887). Durnford and the Colensos were so discreet about this friendship 'that no inkling of it ever leaked out, and there was never a breath of suspicion'. This was just as well in a community as small as Pietermaritzburg, or even Natal, where gossip thrived and such a 'scandal' would have been disastrous to Durnford's military career.
Durnford had barely two months to settle down in Pietermaritzburg when he was directed to accompany Mr Theophilus Shepstone and Capt Boyes, 75th Regiment, on a journey to Zululand to attend the coronation of Cetshwayo. The coronation itself, although open to criticism from a number of points of view, was generally speaking a grand affair and Durnford described the ceremony itself as being altogether 'a scene not to be missed'.
In accordance with his ways, before returning to Natal Durnford took the opportunity of improving his knowledge of the Zulus by visiting the family kraals of the king in the company of Bishop Schreuder who acted as interpreter. He spent a few more days hunting in Zululand and then on 19 September 1873 returned to Pietermaritzburg. Six weeks later he was to lead a punitive expedition against Langalibalele, chief of the Hlubi.
To call the Langalibalele Rebellion of 1873 a rebellion would be to employ what Sir Winston Churchill once called 'a terminological inexactitude; since Langalibalele, rechristened 'Long Belly' by the British who found it impossible to pronounce Zulu names (together with characteristic wit), was a shuffler and muddler in both his political and personal behaviour and quite unlikely a person to lead a rebellion. By the exaggerating influence of unrelenting colonial prejudice, on the one hand, and the zeal with which Bishop Colenso sprang to the defence, on the other; Langalibalele was transformed into a patriot, hero and martyr in the eyes of some, and a malignant traitor and rebel in the eyes of others - while his real character was insignificant.

Langalibalele and his Hlubi tribe, together with the related amaNgwe clan generally known as the Phuthini, had been ousted from their original homes by King Mpanda of the Zulus. The Natal Government under Theophilus Shepstone had then resettled the two tribes in the foothills of the Drakensberg in the Giant's Castle area. Not only did Shepstone find a home for them, but charged them with holding marauding Bushmen and Basutos at bay - a task which they had performed over a period of some twenty-five years during the course of which they had acquired, and presumably at times also used, firearms.

The Natal Government, at that time, did not forbid the possession of firearms as such. A government ordinance required every holder of a firearm to have it registered, which not only brought in some revenue but gave the rural magistrate a means of indirect control since guns brought in were either retained indefinitely or rendered useless before return. To the Natives, registration became the equivalent to confiscation and hundreds, if not thousands, of firearms remained unregistered and thus illegally held. The acquisition of guns was a relatively simple matter since on the diamond fields at Kimberley it was regular practice for miners to offer cheap guns in lieu of a season's wages.

Mr McFarlane, the resident magistrate of Estcourt, became alarmed when he learnt through informers of the large number of Hlubis who had worked on the diamond fields and of a correspondingly large increase in the number of unregistered guns in an area which, for a variety of reasons, was regarded as 'sensitive'. Consequently, the chief was ordered to comply with the ordinance. Dissolute, albeit truculent, Langalibalele, who wanted no trouble with either his own clansmen or the administration, adopted a typically native solution - he temporized. First he pleaded ignorance, then ill-health; finally government messengers were ignored or treated with disdain. To avoid the expected retribution, Langalibalele decided to assemble all able-bodied members of his tribe - men, women and children - with their belongings and most of their cattle, and to follow the example of the Voortrekkers. He would take his people across the Drakensberg into Basutoland.
Shepstone and the Lieutenant-Governor, Sir Benjamin Chilley Pine, were in a cold fury. To them, Langalibalele's conduct was tantamount to rebellion ... If the treatment of their messengers had been a personal affront and insubordination that verged on rebellion, his flight amounted to secession and was treasonable. On Wednesday, 29 October 1873, the government called up a number of volunteer units for active service and backed them with some regulars. The force was placed under the command of Lt Col Milles and ordered to intercept the Hlubis. Both Shepstone and Pine accompanied the field force to its headquarters on Meshlynn Farm but, as has happened quite often in history, the interference of politicians in the conduct of military operations was to contribute to the disaster which befell this expedition.

Lt Col Milles knew that Langalibalele was heading for Bushman's River Pass.
He therefore decided to position the bulk of his troops, supported by 5 000 native levies, in a wide area around the Hlubi and Phuthini territory so as to stop any movement into Natal proper. A left and right wing were to outflank the Hlubis by scaling the two adjacent mountain passes at the head of the Bushman's River Pass, thereby blocking Langalibalele's escape route. Capt Allison with 500 native levies was to form the right wing and ascend by the 'Champagne Castle Pass'; Capt Barter was to lead the left wing consisting of 1 officer, 6 NCOs, 47 Carbineers, 25 mounted Basutos and a native interpreter. However, almost at the last moment Col Milles placed Capt Barter and his force under the command of Maj Durnford, who was then taken aside by the lieutenant-governor and given strict personal instructions not to fire the first shot.

But the officer commanding, Col Milles, and his staff had not done their homework. The so-called 'Champagne Castle Pass' was non-existent, and Capt Allison spent his time on a heartbreaking search for a way to the top.
The timing of Maj Durnford's route was badly miscalculated and his guides, fortunately, missed the Giant's Castle Pass which, in any case, was not passable for mounted men and they led him instead to the extremely difficult and dangerous, but just passable, Hlatimba Pass. In the process a substantial number of Carbineers dropped out through fatigue and during the first night the pack-horses were lost. Contrary to orders, the Carbineers had loaded their rations and some ammunition on pack-horses instead of carrying these necessities themselves. Durnford was compelled to ask the Basutos to share their rations of meat, biscuits and rum with their negligent white comrades - which they readily did. But the loss of the pack-horses was not the only misfortune. When Durnford's horse, 'Chieftain', which he was leading, slipped, Durnford was pulled over a rock-fall and sustained lacerations, two broken ribs and a dislocated shoulder. In great pain he spent the second, bitterly cold night a couple of hundred metres below the summit which at this point reached 2 777m. But with an iron will and indomitable courage, he insisted on pressing on with only his Basutos and 32 Carbineers out of the original 55. With a sling made from a blanket, he was assisted to the summit and helped onto his horse which, fortunately, had sustained no injuries. The head of the Bushman's River Pass was reached on Tuesday morning, 4 November, 24 hours behind schedule - and too late to intercept Langalibalele and too late even to stop by peaceful means the remainder of his men and cattle who were in the process of emerging from the pass.

Mindful of his orders not to fire the first shot, Durnford relied on parleying which proved futile: more and more Hlubis were emerging from the pass, some crowding round Durnford's small band and others taking cover behind rocks. The Carbineers became increasingly nervous, and their own senior officer, Capt Barter, reported to Durnford that he could no longer rely on his men. The apprehension of the Carbineers was aggravated by the vociferous expression of fear for their safety by one of their NCOs, Sergeant Clark. When Durnford sensed that his men were on the point of breaking, he called out dramatically: 'Will no one stand by me?' - whereupon three troopers rallied to his side. Then he gave the order for a slow withdrawal to higher ground. As soon as the Carbineers began to move a single shot rang out from the ranks of the concealed Hlubis, followed by a ragged volley. The three troopers by Durnford's side, Erskine, Bond and Potterill, were struck down and the interpreter's horse was shot from under him. As Durnford stopped to help him double-mount, Elijah Khambule was shot through the head and Durnford himself received two assegai stabs, one in his side, the other in his elbow; severing a nerve thus paralysing his left under-arm and hand for the rest of his life. Durnford managed to shoot two of his assailants with his revolver and to extricate himself. The Carbineers had panicked and were galloping back the way they had come. The young chief who was leading the mounted Basutos managed to rally his men and Durnford used them to cover the headlong retreat of the Carbineers and to check the pursuit by the amaHlubi when they got too close. When he eventually caught up with his errant Carbineers he was almost weeping with rage and frustration as he berated them, holding up the Basuto troopers as examples of proper soldiers.
However, at the sight of the first pursuing Hlubis the Carbineers broke again and scrambling down the pass they did not stop until they reached camp. They were in a state of utter exhaustion having spent 41 hours out of 53 in the saddle, with hardly anything to eat or drink. The strayed pack-horses with their rations and ammunition were found too late to be of any use.

Durnford followed, escorted by his loyal Basutos, and reached his base only after midnight. Learning that a party had been sent to his aid, he waited only long enough to have his shoulder set and his wounds bandaged before setting out again to find this party and head it off from a possible Hlubi ambush.

Notwithstanding his wounds, his broken ribs and the injury to his left arm, Durnford did not report sick once. Two days after his return he accepted the task of fortifying Pietermaritzburg against a possible escalation of hostilities.

A fortnight later, on 17 November 1873, Durnford was put in command of a force of 60 men of the 75th Regiment, 30 Basutos and 400 Natal Natives in order to attend to the burial of the dead at Giant's Castle. He ascended the Bushman's River Pass which he reached on the 18th. On the next day a service was conducted by the Rev George Smith during which the three Carbineers, Elijah Khambule and another loyal native, Katana, killed in the skirmish, were buried with military honours. The two Hlubi whom Durnford had shot were buried some distance away and a cairn of stones laid over their grave. In a letter home Durnford referred to one of the slain foes:
'I took his weapons, and raised a cairn high above his grave. In future days his friends will see that one Englishman, at least, can respect a brave man, even though he has a black skin'.

Both Governor Pine and Col Milles, whose actions and omissions were no doubt the root-cause for the failure of this expedition, managed to keep a low profile but were honest enough to comment most favourably on Durnford's behaviour in their official reports immediately after the expedition. The colonists, however, agitated by fears of further hostilities and aggrieved at the loss of three of their sons, cast around for a scapegoat, and angered by Durnford's own report on the Bushman's River Pass affair in which he asserted that the majority of Carbineers had failed to support him, relieved their feelings by thrusting full responsibility on to him.

Being a newcomer to Natal, little known with as yet but few friends, he became an easy target for some severe accusations. Almost all the Natal colonists turned against him and many abusive letters about him appeared in the press. Vindictiveness reached its peak when Durnford's loyal old friend, his dog 'Prince', was poisoned. This act prompted him to leave the boarding house where he had been staying in Pietermaritzburg and to take up quarters in the garrison at Fort Napier. Durnford never tried to defend himself publicly, but in a letter home he observed: 'I am at present the best hated man in the colony. My crowning fault is that I have branded a portion of their volunteers with cowardice. Of course, I could have made a glorious despatch, but it would not have been true'.

The only persons who stood by him during this trying time were the Colensos and John Sanderson, the editor of The Natal Colonist. The fact that Durnford's military reputation had emerged unscathed from the unfortunate Bushman's River Pass affair was evinced by his promotion to lieutenant-colonel on 11 December 1873.

It was almost a year later that Governor Pine yielded to the persistent clamour by the colonists to have the name of the Carbineers vindicated. A court of inquiry was constituted in November 1874 to consider the Bushman's River Pass affair. In the court's judgement 'the Carbineers were guilty of a disorganised and precipitate retreat, with, however, mitigating circumstances'. These mitigating circumstances were, no doubt, found to soften the verdict and placate the feelings of the colonists. Some of the mitigating circumstances accepted by the court were the Carbineers' youth, the fact that they had no previous experience in battle, that they were tired and hungry, that they were strained having travelled over almost impassable country, and that they had been frightened by Sgt Clark's unbridled expression of fear that they would all be killed. (In regard to the question of age, contemporary photographs show an appreciable number of fully-bearded men and the ages of the troopers who were killed were 22, 23 and 27).

Durnford himself was dissatisfied with the proceedings of the court of inquiry which excluded from the hearing any Imperial officer or soldier on the grounds that the inquiry was 'a pure volunteer (Carbineer) question'.
This did not prevent General Sir A.T. Cunynghame, the GOC British troops in South Africa, stating in his covering report on the court's proceedings:
'It is but fair here to observe upon the steadiness and bravery of Major Durnford, regarding which the volunteers gave ample testimony, and upon whom they appeared to have the utmost reliance. Shaken, indeed almost paralysed, by a fall with his horse over a dangerous precipice, he never shrank from his duty, and, although severely wounded in two places, he used his utmost exertions to rally the retiring troops'.

Durnford was recommended for the CMG but the only recognition he received for his services was in the nature of compensation for his wounds and permanent disablement of his left arm. He was granted a pension of UK PNDS100 per annum, of which, as was discovered at the time of his death some five years later, he never drew one penny. He was a proud man and had once asserted that 'he did not sell his blood'.

The Phuthini (amaNqwe) tribesmen had been neighbours of the amaHlubi and over the years had also frequently intermarried, and prior to Langalibalele's flight from Natal he had left his old people, some women and children and some cattle in the came of the Phuthini. Immediately following the debacle at the Bushman's River Pass - and possibly also because of resentment at Langalibalele's escape - Shepstone considered this proof of rebellious intentions and collusion with Langalibalele on the part of the Phuthini and decided that the tribe should be 'eaten up' according to native fashion.

The raid which followed was one of the most cynical and cruel actions by White men against Blacks in the history of Natal. Without warning and without obvious reason the Phuthini were attacked, driven from their homes and sealed up in the caves in which they had sought shelter. Their huts were burnt down, their possessions, provisions and crops were destroyed and their cattle confiscated. Over 200 men, women and children were killed, and 500 were taken prisoner and virtually enslaved to White farmers.

Durnford writes in disgust that 'boys from 12 to 14 years were given out to volunteers and others as servants for 7 years at one shilling a month pay for the first three years; no papers. One farmer boasted that he had caused so many to be killed; another boasts that he has done more'. He was greatly distressed by the unjust and harsh treatment meted out to the Phuthini. He greatly deprecated the atrocities committed by volunteer units and their Native levies, and found but little consolation in the fact that none of the troops under his command had been involved. Durnford was not alone in his condemnation - the Colensos and a few other right-thinking persons felt the same. Even the British Government became concerned and Earl Carnarvon, then Secretary of State for Colonies, lost no time in making it clear to Governor Pine that the evidence before him did not support the allegation that the Phuthini had been in collusion with Langalibalele and he could find no justification for the ill-treatment imposed on them. He ordered all possible reparation to be made forthwith. The Natal Government was as recalcitrant and even slower in carrying out the British Government's order than Langalibalele had been in carrying out theirs. It took many months before all the members of the tribe were released from captivity. While the tribe's losses in cattle, land and other possessions amounted to an estimated UK PNDS40 000, the Natal Government granted them compensation to the value of UK PNDS12 000 (realised from the sale of confiscated cattle) - and even spread the payment of this amount over a number of years!

In the meantime Durnford had been appointed Acting Colonial Engineer, a function he had to perform in addition to his military duties. This gave him an opportunity to establish some contact with members of the Phuthini tribe and he subsequently played a meaningful part in regaining for them their freedom and rehabilitation. He drew his labour requirements from the ranks of the Phuthini prisoners who were then trained in the building and maintenance of roads and other works, and paid normal wages.
Throughout at least the first half of 1874 there was still a general scare, even traces of panic, among the white population in and around Estcourt about the possibility of further rebellion. Assaults on a couple of farmers by some scattered Hlubi tribesmen kept the embers of apprehension glowing.
The Natal Government therefore decided to give the white community a greater sense of security by blocking all the passes leading out of Natal over the Drakensberg. Not only would 'hostile natives' be prevented from entering Natal, but any rebels would be stopped from escaping across the mountains.

As Colonial Engineer and senior Engineer Officer, Durnford was entrusted with the task of organising the demolition of the passes. For this purpose he collected a company of the 75th Infantry under Capt Boyes and Lt Trower, some mounted Basutos and a labour force of 90 Phuthini prisoners who were promised their release if they rendered satisfactory service. Such was the tendency to panic in the colony that, when it was observed that Phutini prisoners, engaged on road works, who had been under the care of a corporal for some months and taught discipline in falling in, shouldering their picks and shovels, etc., Durnford was publicly attacked for imparting military training to 'rebels'. Undaunted by these charges Durnford marched his force to Estcourt at the end of May 1874, and then from there up to the Bushman's River valley.

Writing home, he described his order to march as follows:
'... an advance of fourteen Basutos, little fellows, dressed in every variety of costume, mounted on hardy little horses and armed with breech-loading carbines, which they regard as the "apple of their eye". Then twenty men of the tribe of Phutini, dressed in old soldier great-coats, and carrying each a pick and shovel, blankets, mats, etc. These are prisoners to make good the approach down the banks of streams, to fill up mud holes, and so on, for we march across country without roads. Then come pack-horses and pack-oxen, each lead by a wild-looking native with assegais in his hand. Then three waggons, each drawn by sixteen oxen.
... After these, seventy men of the working party, then the troops, and after them slaughter cattle, sheep and goats, and milch cows, the whole being closed by a rear guard of six Basutos'.

The expedition encountered bitterly cold weather and heavy snow storms. After two months of heavy work and many hardships the party returned to Pietermaritzburg on 30 July 1874, when Durnford could triumphantly report upon the good behaviour of the Phuthini with no abscondments, notwithstanding the hardships they had had to endure. The governor eventually granted a pardon to the whole of the Phuthini tribe which was then permitted to return to its former location.

At Fort Napier Durnford occupied a double marquee which he made as homely and comfortable as he could, even to the extent of planting masses of flowers around it. To ensure a supply of fresh milk and butter he kept his own cows. He allowed himself little leisure, working hard and immersing himself almost completely in his duties as colonial and military engineer. Yet, he found time and opportunity to demonstrate in a quiet but practical way his sympathy and concern for the indigenous population. He arranged for the feeding of the pardoned Phuthini tribe which had been deprived of everything they had possessed; he encouraged the Phuthini to save in order to buy their own land, and found employment for the Phuthini men and the amaHlubi who, after the capture of Langalibalele on 11 December 1873, began to drift back into Natal.

His sentiments and actions towards the indigenous people, so far advanced and ahead of his times, earned him the grateful devotion of these people - and the continued hostility of the colonial society. The Colensos, whom he often visited on a Sunday, remained his closest and staunchest friends. The unhappiness of a romance which had no future was tempered by the encouragement and comfort which he derived from Nell Colenso's warm and sincere friendship. There was no remedy, however, for the pain and disability of his wounded left arm. It was frequently the cause of great discomfort, particularly under conditions of severe cold, such as during the demolition of the passes.

In 1875 Lieutenant-Governor Pine was recalled in consequence of the manner in which he had mishandled matters during the Langalibalele rebellion and had made a mockery of Langalibalele's subsequent trial. Sir Garnet Wolseley was sent out as special commissioner until the new lieutenant-governor arrived. He took up residence in Pietermaritzburg on 2 April 1875, and remained there for five months.

Wolseley strongly disapproved of Durnford's involvement in colonial politics and promptly advised him to that effect. An entry in his diary reads: 'I told him plainly that the way he had mixed himself up with Native affairs here had weakened his usefulness as a public servant in the colony'. Angered by Wolseley's criticism, Durnford offered to resign his post as Acting Colonial Engineer. Although Wolseley refused to accept this resignation, his assessment must have had its equal in higher quarters because, in response to an earlier request by Governor Pine to Lord Carnarvon that the post of Colonial Engineer be filled on a permanent basis, Capt A.H. Hime, RE, a junior officer in the same corps as Durnford, was duly assigned to the post. This appointment, coming early in 1875, was a great disappointment to Durnford and even Wolseley's sense of justice and military decorum was outraged. 'It was most unwise of Carnarvon doing this,' he wrote on 11 July 1875, 'and it is very unjust to Lt-Col Durnford, R.E., who has been for over a year or two acting as Colonial Engineer, that [this] officer is in fact superseded by a junior of his own Corps, as if he had committed some great fault or had shown great incapacity - I have had to find fault with him more than once for mixing himself up in political affairs but I have always found him to be most hard-working'.

On 12 June 1875, Durnford set sail for England where his arm received medical treatment but with little effect. When he was advised to try the thermal springs at Wildbad in Germany, he decided to take with him his 18-year old daughter whom he had last seen when she was still a child. Although this interlude gave him a welcome opportunity to become reacquainted with his 'one pet lamb', the springs effected no real improvement in his ailment. On his return to England, Durnford was posted to Cork in Ireland

Durnford was particularly unhappy at his new station. The damp climate aggravated his pain and he felt lonely and frustrated. His general health deteriorated to such an extent that doctors recommended service in a warmer climate. He was duly posted to Mauritius, but Lt Col Brooke, RE, who had replaced him in South Africa, offered to exchange places with him.

By 23 March 1877, Durnford was back in Pietermaritzburg and, upon learning that Shepstone was in Pretoria preparing for the annexation of the Transvaal, immediately set about establishing the rudiments of a permanent cantonment at Newcastle in case Shepstone should need military assistance, and also as a precautionary measure in the light of the unrest which had already prevailed in Zululand for some months.

The cause of Zulu discontent was the failure to reach satisfactory settlement of the dispute concerning the boundary between Zululand, Natal and Transvaal. Ever since 1861 the Boers had been moving into Zululand, settling in the area between the headwaters of the Buffalo and Pongola Rivers. By 1877 they were occupying a large strip of Zululand which lay beyond the Transvaal border.

Sir Henry Bulwer, who had succeeded Sir Garnet Wolseley and had become lieutenant-governor in 1875, agreed to appoint a commission to investigate and report upon the respective claims to the disputed territory. When appointed, this commission comprised Michael H. Gallway (Attorney-General of Natal), John Wesley Shepstone (Acting Secretary of Native Affairs in Natal) and Lt Col Durnford. The commission's report, drafted by Durnford, was completed by 24 June 1878, and favoured the Zulus. Bulwer accepted the findings but the High Commissioner, Sir Bartle Frere, was seriously disappointed. Whereas a contrary finding would have provided a pretext for declaring war or the Zulus which he had been planning since December 1877, he now had to cast around for some other casus belli.

In order to gain time Frere delayed the publication of the commission's findings for almost six months. Having by then almost completed his preparations for war, the findings of the commission were presented to the Zulus together with the so-called 'ultimatum' on 11 December 1878. These preparations included raising a force of some 7 000 Native levies advocated by Lord Chelmsford as eady as August that year and finally approved by the lieutenant-governor in November. The original scheme for the organisation of such a Native contingent had been prepared and carefully worked out by the indefatigable Durnford and was based on his sound knowledge of the Natives. When laid before Lord Chelmsford it met with unqualified approval; so much so, that his first reaction was to entrust the organisation and chief command of the whole contingent to Durnford, but on the advice of his staff changed his mind and divided the contingent among the various columns.

In the end, Durnford was given command of No. 2 Column comprising the 1st Regiment, Natal Native Contingent (three battalions) and five troops of mounted Natives. Much to his disappointment he was stationed at Kranskop in a reserve position with the added task of guarding the Middle Drift over the Tugela. Two days after the expiry of the 'ultimatum' he advised Lord Chelmsford by means of a hurried note that he intended invading Zululand on the strength of information he had received that a Zulu impi was heading for Middle Drift below Kranskop. Without waiting for approval, he set his troops in motion and might have marched straight to Ulundi, had he not received an angry note from the general ordering him back to his base and warning him that he would be relieved of his command if he once again disobeyed instructions. A rather subdued Durnford returned to his camp at Fort Cherry.

A week later Durnford was ordered up to Rorke's Drift with a portion of his force and from there to Isandlwana where he arrived at 10h00 on that fateful 22 January 1879. He found Lt Col Pulleine, 24th Regiment, in charge of the camp, Lord Chelmsford and Col Glyn, the actual commander of No.3 Column, having left early that same morning on a forward movement. At 08h05 Pulleine had sent a message to Lord Chelmsford reading: 'Report just come in that Zulus are advancing in force from left front of camp'; but by the time Durnford arrived (two hours later) no further developments had taken place. By virtue of his seniority Durnford was deemed automatically to have taken over command from Pulleine. After an hour's discussion Durnford decided to move out again on a reconnaissance in force, and when he left at 11h00 it would seem natural that the command of the camp would have reverted to Pulleine.

Much argument has ensued over who was actually in command at the critical times - Durnford or Pulleine.The facts of the case are, however, that while Durnford was away the main attack by the Zulus developed and all troop dispositions to meet this attack must have been made by Pulleine. At no time did Pulleine diminish his own troops in order to assist Durnford.
On the contrary, when Durnford became aware of the attack and the left wing of the Zulu army approached his own force, he made an orderly withdrawal to a big donga not far from the camp where he made a stand to hold the encircling left wing of the enemy at bay. During the main onslaught he was thus back in position to participate in the defence of the camp, but at that stage he had no longer any means of establishing contact with Pulleine or any one else. The time was now 12h20.

As his own force was under pressure and as the British positions were beginning to be overrun by the Zulus, Durnford fought his way back to the neck from where his mounted natives now made good their escape. He, however, stood fast and rallied around himself a body of men who fought to keep the only escape route open and to cover the retreat of their comrades. Here Anthony Durnford fell, surrounded by some 30 men of the 24th, 26 Natal Police and 14 Natal Cambineers. It was almost like an act of atonement that the Carbineers rallied around and stood by him in the hour of death, because by their devotion they cleared their name which had been blotted by the desertion of their comrades six years earlier. Zulu warriors testified in later days with great admiration to the incredible valour of these men and their tall officer who carried his left arm in a sling.

The gallant Durnford was dead. The living had to consider their reputations and the prestige of the units they represented. As Durnford was dead, his prestige thus became expendable: as no other Royal Engineer was involved in the battle, the prestige of the Corps was not at stake. Since he had been in command of the camp at least once that day, it had been assumed from the outset that the responsibility for what happened had been mainly his: the arguments for and against the theory of 'poor Durnford's defeat' have been expounded over many years and are a talking point even today.

Four months later, on 21 May 1879, a party under Gen Marshall visited the scene of battle. A member of this party, Jabez, one of Durnford's loyal servants, found the body of his master. He wrapped it in a part of a wagon sail-cover, placed it in a donga and covered it with stones. A yoke stay and a shovel handle were driven into the ground to mark the spot. His body remained in that simple grave until 12 October, when it was taken to Pietermaritzburg and buried in the military cemetery at Fort Napier.

Anthony Durnford appears in the pages of history as a somewhat eccentric, if not contentious figure. He was praised at times, reviled and criticised at others. He was rebuked by Wolseley and Chelmsford at different times for acting in excess of his authority, apparently mostly due to overenthusiasm and almost boyish impetuosity, but never due to recalcitrance. Twice he was made the scapegoat for the shortcomings of others. At the Bushman's River Pass inquiry he was denied the opportunity of presenting his case; military decorum and personal dignity stopped him from seeking redress in public. At Isandlwana a hero's death had sealed his lips. Whatever his failings and shortcomings might have been, no one could ever deny his purity of purpose, his sincerity and charity in the cause of the underprivileged, the needy and the poor - nor was there ever any doubt about his high sense of duty and his personal valour.

Sir Henry Bulwer, Lieutenant-Governor of Natal, sketched a true picture of this man when he said:
'Colonel Durnford was a soldier of soldiers, with all his heart in his profession; keen, active-minded, indefatigable, unsparing of himself, and utterly fearless, honourable, loyal, of great kindness and goodness of heart. I speak of him as I knew him, and as all who knew him will speak of him'.

BIBLIOGRAPHY

Binns, C.T. The last Zulu king: the life and death of Cetshwayo. London, Longmans, 1963.
Colenso. F.E. (ed). History of the Zulu War and its origin, by F.E. Colenso assisted in those portions of the work which touch upon military matters by Lt-Col E. Durnford. London. Chapman & Hall, 1880.
Durnford. E.C.L. (ed) A soldier's life and work in South Africa, 1872 to 1879: a memoir of the late Col. A.W. Durnford, RE. London, Sampson Low, Marson, Searle & Rivington, 1882.
Frouw, P.A. The career of Colonel A. W. Durnford in South Africa, 1873-1879. University of Natal. unpubl. thesis, 1979.
Morris, D. The washing of the spears. London, Jonathan Cape, 1966.
Pearse, R.O. Barrier of spears: drama of the Drakensberg Cape Town, Howard Timmins. 1973.
Pearse, R.O.Langalibalele and the Natal Carbineers: the story of the Langalibalele Rebellion 1873. Ladysmith Historical Society, 1973.
Preston, A. (ed). Sir Garnet Wolseley's South African diaries, 1875. South African biographical and historical studies, Vol 11, Cape Town, A.A. Balkema, 1971.


 
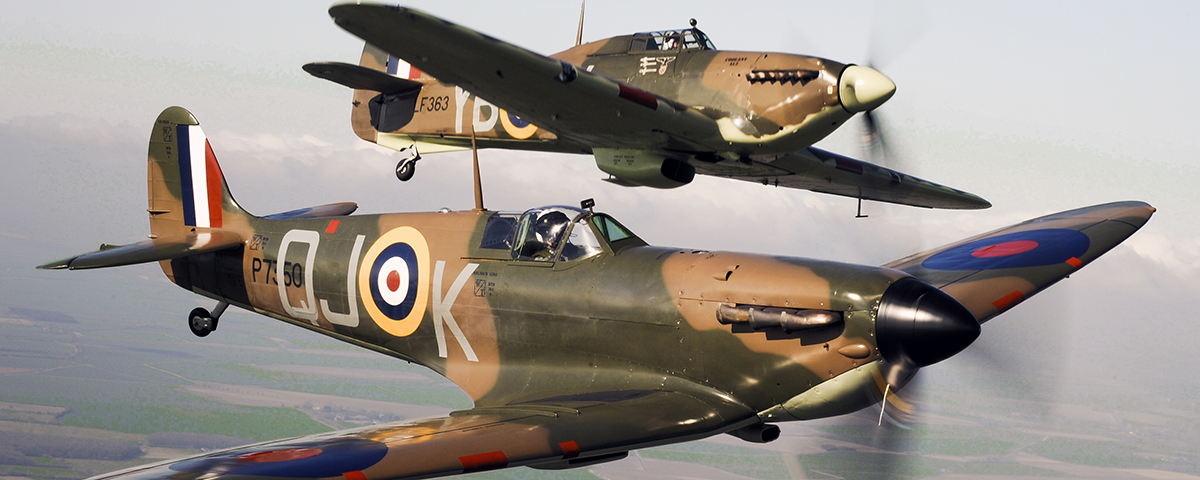
HurriSpit-1200_480.jpg


A Spitfire Mk IIa flies alongside a Hawker Hurricane Mk IIC.

Both aircraft are from the Royal Air Force Battle of Britain Memorial Flight.

 
image.png

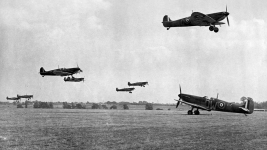
‘Spitfire Scramble!’

Spitfires of No. 222 Squadron scramble from RAF Hornchurch, September 1940.

image.png

Interior of the Sector ‘G’ Operations Room at Duxford, Cambridgeshire, September 1940. The callsigns of fighter squadrons controlled by this Sector can be seen on the wall behind the operator sitting third from left. The Controller is sitting fifth from the left, and on the extreme right, behind the Army Liaison Officer, are the R/T operators in direct touch with the aircraft. © IWM (CH 1401)

image.png

The Palace of Westminster silhouetted against light from fires caused by bombings.

image.png

The tail section of Oberleutnant Robert Zehbe’s Dornier Do 17 bomber landed on a London rooftop shown 21 September 1940.

 
image.png

The night of 2-3 September 1916 marked a turning point in the war against airships, when a new type of incendiary and explosive bullet brought one down in flames.

Lieutenant William Leefe Robinson of the Royal Flying Corps shot at SL 11, a wooden-framed Schütte-Lanz similar to a Zeppelin, over Cuffley.

250px-The_End_of_the_%27Baby-Killer%27.png


British propaganda postcard entitled "The End of the 'Baby-Killer'"

It was the first German airship to be shot down while bombing England.

The SL 11 was based at Spich and commanded by Hauptmann Wilhelmina Schramm.In the early hours of 3 September 1916, after jettisoning bombs over , Essenden Hertfordshire, destroying several houses, damaging a church, and killing two sisters aged 26 and 12,

The hydrogen ignited and turned the airship into a fireball, killing all 16 crew.

Lt Robinson received the fastest Victoria Cross ever rewarded, and the only VC for action in Britain, just 48 hours after the event.

Embarrassed by his new-found fame, Robinson requested a transfer to the front lines where, on his first patrol, he was shot down by the Red Baron.

Months in solitary confinement as a prisoner of war weakened his health and he died of Spanish flu in December 1918, aged 23

 
image.png

The B.E. 2 . This was the type of aeroplane Lee Robinson flew when he shot down and destroyed the German Airship on the night of 2nd- 3rd September 1916.

This feat led to Lee Robinson being awarded a Victoria Cross and various cash prizes, totalling up to £3,500, that had been put up by a number of individuals.

This was not an isolated victory; five more German airships were destroyed by Home Defence B.E.2c interceptors between October and December 1916.

As a consequence of these losses, the German Army's airship fleet ceased raids over England: German naval airship raiders of 1917 flew at higher altitudes to avoid interception, reducing their effectiveness.

Daylight raids by heavier-than-air bombers were also planned.

The performance of the B.E.2 was inadequate to intercept airships flying at 15,000 feet much less the large Gotha bombers that emerged during 1917, and its career as an effective home defence fighter was over.

Initially ir was used as a reconnaissance aircraft and light bomber.

By late 1915, the B.E.2 was proving to be vulnerable to the recently introduced German Fokker Eindecker fighters, leading to increased losses during the period known as the Fokker Scourge.

Although by now obsolete, it had to remain in front line service while replacement types were brought into service.

image.png

An aerial reconnaissance camera of 1916 as operated by the pilot of a B.E.2c.

Following its belated withdrawal from combat, the B.E. continued to serve in training, communications, and coastal anti-submarine patrol roles.

It continued as a single-seat night fighter and the type destroyed six German airships between September and December 1916.


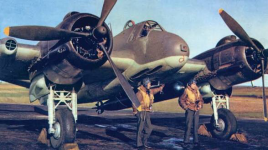
A Bristol Beaufighter releases its bombs toward the further of two German flak vessels attacked by aircraft of No. 201 Group, south of the island of Kalymnos in the Dodecanese.

The Beaufighter was a deadly ground and sea attack aircraft. It was rightly feared by those who faced it in combat.

 
Alba Undone – Royal RivalsOriginally published.August 2016

Updated. December 2024

www.warhistory.org


Ultred the Bold – Earl of Northumbria


Constantine mac Áeda had been able to concentrate on events along his southern border because few serious threats were made against him from the far North, from lands across the Mounth.

The Viking colonies in Orkney had seemingly given little trouble during his reign, perhaps because their leaders were now exposed to the political ambitions of Norway’s kings.

Scandinavian lords had evidently ousted the Pictish or Gaelic elite of Caithness, but their immediate neighbours southward were still the Cenél Loairn rulers of Moray.

There is no record of conflict between Constantine and the Moravians, the latter presumably concentrating their energies on the Viking menace in Orkney and Caithness.

By contrast, Constantine’s successor Malcolm seems to have encountered more than one instance of trouble beyond the Grampians.

We have already noted his expedition to Moray and it was while on another northward venture that his life was ended. In 954, the year when the kingdom of York came to an end, he was killed near Dunnottar.

His slayers were not foreign marauders but local inhabitants of the district.

The nature of their grievance against him is a mystery, but it is possible to imagine them as supporters of the man who replaced him on the throne of Alba: his kinsman Ildulb, a son of Constantine mac Áeda.

Ildulb’s name is a Gaelic spelling of Germanic Hildulf and was arguably bestowed on this mac Ailpín prince in memory of some earlier bearer of English, Scandinavian or Continental origin.

image.png

Little is known of Ildulb’s eight-year reign except for one significant event: the transfer of Edinburgh to the kingdom of Alba.

The details are sketchy, but the wording of the source suggests that this iconic stronghold, formerly the chief citadel of Gododdin, was evacuated by the English and handed over to the Scots.

There is no hint of a siege or any other hostile action.

On the contrary, it would seem that the ancient fortress – in Northumbrian hands since the seventh century – was granted to Ildulb by peaceful agreement.

Its occupants at the time may have been answerable to a West Saxon overking through a Northumbrian lord – perhaps the ruler of Bamburgh – but we cannot be certain that this was the case at a site on the furthest limit of English authority.

Ildulb eventually met a violent demise, perishing in 962 at Viking hands near Cullen on the coast of Moray. Following his death, a violent power-struggle broke out between rival branches of the mac Ailpín dynasty, the main protagonists being sons of the two most recent kings:

Malcolm’s son Dub and Ildulb’s son Cuilén. Dub emerged victorious after a battle at the unidentified Ridge of Crup in which the abbot of Dunkeld and the provincial ruler or mormaer (‘great steward’) of Atholl, both of whom presumably fought alongside the defeated Cuilén, were named among the casualties.

Dub reigned for five years until kin-strife flared again, at which point he was ejected from the throne in favour of Cuilén, who in turn ruled for a further five years.

After Cuilén took the kingship, Dub sought exile in Moray, seeking sanctuary with its Cenél Loairn rulers, before being slain there in 967.

His death at Forres was attributed to ‘men of Alba’ in one source but to ‘the treacherous nation of Moray’ in another, the former account suggesting that the land of the Moravians was at that time regarded as being as much a part of Alba as the Perthshire domains south of the Grampians.

It seems likely that both regions were now under mac Ailpín sovereignty.

A story attached to one record of Dub’s death speaks of his unburied corpse lying hidden under a bridge at Kinloss, two miles north-east of Forres, an incident curiously reminiscent of a sculptured cameo on the nearby monolith known as Sueno’s Stone.

Cuilén, meanwhile, continued to reign as king of Alba.

He perished in 971 at the hands of the Strathclyde Britons, having incurred their wrath by violating one of their princesses.

The girl’s father, a son of the aforementioned King Dyfnwal, sought vengeance by slaying Cuilén in battle.

This took place somewhere in Lothian and may have marked Strathclyde’s rejection of Cuilén’s overlordship as much as punishment for a shameful deed.

It provides clear proof of the Clyde kingdom’s resilience at a time when other once-powerful realms such as Mercia and Northumbria were struggling to retain their identities.

The devastating siege of Dumbarton in 870 had severely damaged the Britons, but, as the events of the tenth century confirmed, they eventually recovered their power. Their destruction of Cuilén testifies to their remarkable longevity as a potent force in northern politics.

Despite intense pressure from Vikings, Scots and West Saxons, the kings of Strathclyde even managed to expand their hegemony by encroaching on lands formerly held by English Northumbria.

By c.970, a wide swath of territory in what is now south-western Scotland had reverted to the Britons. Many parts of this region were restored to native rule for the first time in three centuries.

Cuilén’s death was followed by the accession of Dub’s brother Cináed to the throne of Alba.

He and Dyfnwal of Strathclyde were among a group of Celtic and Scandinavian kings who met with King Edgar of Wessex at a ceremony near Chester in 973.

The attendees boarded a boat which they rowed along the River Dee, Edgar taking the helm and his fellow-kings hauling the oars.

Later English chroniclers portrayed the event as an act of submission to Edgar, but it was more plausibly a display of co-operation between rival kings.

The short voyage along the river no doubt represented the symbolic or ritual aspect of a mutual peace accord. In addition to Dyfnwal, the Strathclyde delegation at Chester included his son Malcolm, a brother of the prince who had slain Cuilén of Alba two years earlier.

Malcolm may have been the acknowledged king of the Britons in 973, his father perhaps serving as advisor and mentor.

No source describes the political relationship between Strathclyde and Alba at this time, but it was not necessarily warmer than it had been during Cuilén’s reign, despite Cináed being the brother of Cuilén’s rival.

Cináed bore the auspicious name of the mac Ailpín progenitor and was a man of similarly extensive ambitions.

He had apparently disposed of Cuilén’s brother Olaf (Gaelic Amlaib) on his way to the throne and adopted a similarly aggressive stance throughout his reign.

At some point, perhaps before the royal peacemaking ceremony at Chester, he launched plundering campaigns southward. His targets were the Clyde Britons and the Northumbrians, the former faring rather better than the latter.

When he attacked Strathclyde, his army was repulsed with heavy loss in a battle at Moin Uacoruar (or Vacornar), a moin or ‘moss’ whose location is unknown.

It was presumably to discourage counter-raids by the Britons that he erected defences at the ancient Fords of Frew on the River Forth, eight miles west of Stirling.

His assault on Northumbria proved more successful, bringing his forces as far south as Stainmore and seizing as a high-status hostage an English prince of either the Northumbrian or West Saxon royal houses.

Among Cináed’s motives in marching down to the River Tees may have been a claim to lordship over English-held estates in Lothian, in which case the prince in his custody was perhaps the son of a ‘king’ or earl of Bamburgh.

If these events occurred prior to the meeting at Chester, they might even have given Cináed considerable leverage in discussions over the status of Lothian.

It is unlikely to be a coincidence that later Northumbrian tradition regarded the eventual cession of Lothian to Alba as an outcome of face to face negotiations between Edgar and Cináed.

It may have been in Cináed’s time that Orkney formally became a Scandinavian earldom. The Icelandic sagas place this event somewhat earlier, in the reign of King Harald Fairhair (or Finehair) who ruled western Norway from c.872 to c.935.

It is possible, however, that the thirteenth-century authors of the sagas did not know the true date, or that their sources gave inaccurate information.

The first verifiable Orcadian earl was Sigurd who died in 1014.

He might even have been the first formally recognised holder of the title, receiving it not from Harald Fairhair but from a later king of Norway or Denmark.

If so, then the earldom may have originated in the last quarter of the tenth century, perhaps at a time when the Danish king Harald Bluetooth was pursuing expansionist policies at home and abroad.

If Bluetooth engaged in warfare or diplomacy with Cináed of Alba, there is no record of any such contact. Perhaps their respective territorial ambitions never clashed?

After a reign of eighteen years, Cináed met a violent death in 995, perishing in mysterious circumstances at the instigation of a noblewoman called Finella. His assassination occurred at Fettercairn, ten miles north of Brechin, in the district of Angus where Finella’s father Cunchar held authority as a mormaer. The sources speak of Finella’s treachery and deceit in arranging the king’s murder, but she evidently had a genuine grievance, her only son having been killed by Cináed.

Although later tradition wove a fictional tale around these events, we have no reason to entirely disbelieve them, nor should we deny Finella’s  historical existence.

A folk-memory of her name lingers today in the valley of Strath Finella, four miles north-east of Fettercairn, in what were once presumably her family’s ancestral lands. Little more can be said about her.

The original form of her name in the earlier chronicles is Finuele, a form reminiscent of Gaelic Finguala (now Fionnuala), but her father’s name might represent Brittonic or Pictish-British Cincar.

It is possible, then, that the stewardship of Angus was held in this period by Gaelic-speakers of Pictish origin, or by a family of immigrants from Dál Riata.

The latter might seem more likely if we admit the possibility that the territorial name ‘Angus’ preserves a memory of Cenél nÓengusa, the rulers of Islay. Did some part of this kindred abandon their Hebridean home in search of new opportunities in the East?

Finella’s involvement in Cináed’s death may have arisen from more than a desire for revenge. Her political sympathies perhaps lay with his rivals in the house of mac Ailpín, namely the grandsons of Ildulb.

One of these, a son of Cuilén called Constantine, made a successful bid for the throne and clung to power for a couple of years.

He died in 997, another victim of the feud between royal factions, falling in battle at the confluence of the rivers Almond and Tay.

The place of his death was Rathinveramon, the old Roman fort of Bertha, where a royal residence doubtless existed at the end of the tenth century.

His conqueror and successor was Cináed mac Duib, a son of the Dub toppled by Cuilén in 967, whom we may here call ‘Cináed III’ for the sake of convenience.

During Cináed’s reign a major assault against the Strathclyde Britons was launched by the West Saxon king Aethelred ‘the Unready’.

This occurred at the turn of the millennium, in the year 1000, and resulted in a severe ravaging of Clydesdale by English soldiers.

The attack could have been much worse had a fierce storm not intervened to keep Aethelred’s naval forces away from the Firth of Clyde.

It would appear that the Britons got off lightly, for the English ships changed course by heading instead for the Isle of Man where their crews disembarked to plunder Scandinavian coastal settlements.

Aethelred’s nickname, given above in its usual modern form, was actually Unraed, meaning ‘Poor Counsel’ in the sense of ‘badly advised’.

It was a pejorative epithet alluding to his policy of paying Viking warlords large sums of money to stop ravaging his kingdom. In spite of these ‘Danegeld’ payments, his most fearsome adversary in the closing years of the tenth century was Sveinn Forkbeard, king of Denmark, who repeatedly raided the coasts of England.

Sveinn’s depredations in the South seem to have drawn Aethelred’s attention away from northern events after the attack on Strathclyde, the distraction no doubt bringing relief to Britons and Scots alike.

Dynastic in-fighting within the mac Ailpín dynasty simmered for a few years before a further eruption of conflict led to yet another royal slaying. On this occasion, the warring parties sprang from the same branch of the family.

The protagonists were Cináed III and his cousin Malcolm mac Cináeda, a son of the earlier king Cináed mac Mail Coluim – the proliferation of Cináeds and Malcolms in these years can seem somewhat confusing.

The rivals clashed in 1005 at Monzievaird (‘Moor of the Bards’), near Crieff in Perthshire. Malcolm emerged victorious and took the kingship.

His long reign of almost thirty years was punctuated by military campaigns beyond his south-eastern border, his main foes being the English earls of Northumbria, but he is also credited with wars against Vikings and Britons, both of whom he encountered on his frontiers in the West.

One of his first ventures occurred in 1006 when he raided deep into Northumbrian territory. He laid siege to Durham, the seat of an important bishopric, but his army was defeated by an English counter-attack. The event and its outcome were summarised by the Irish annalists:

A battle between the men of Alba and the Saxons. And the rout was upon the Scots, and they left behind them a slaughter of their good men.

The bane of the Scottish army on this occasion was Uhtred, a young English nobleman whose father-in-law was the bishop of Durham. Uhtred’s own father was Waltheof, earl of Bamburgh, in whose domains the Durham bishopric lay. Gathering an army, Uhtred fell upon the besiegers, lifting their blockade and forcing them to flee.

The army of Alba suffered heavy casualties, Malcolm himself barely escaping with his life. After the slaughter a grim fate awaited those of his warriors who lay dead upon the battlefield.

A near-contemporary source, entitled De Obsessione Dunelmi (‘On The Siege Of Durham’), gives the gruesome details. It tells how Uhtred:

. . . caused to be carried to Durham the best-looking heads of the slain, ornamented with braided locks as was the fashion of the time, and after they had been washed by four women – to each of whom he gave a cow for their trouble – he caused these heads to be fixed upon stakes and placed around the walls.

Uhtred eventually succeeded his father as earl of Bamburgh. During his tenure of the earldom a major change occurred in the dynastic politics of England. The long line of West Saxon monarchs was broken when Cnut, the half-Polish son of Sveinn Forkbeard, was chosen as king by a faction among the English nobility.

A rival faction supported Aethelred Unraed and, later, his son Edmund who claimed the kingship after Aethelred’s death in 1016. A brief civil war between Edmund and Cnut raged for several months before the rivals concluded a peace which partitioned the kingdom between them.

Edmund died barely six months after his father, his death allowing Cnut to claim sovereignty over all of England. To Malcolm of Alba the change of regime presented an opportunity which he exploited to good effect two years later, in 1018, with an assault on Northumbria.

At his side marched Owain Calvus (‘the Bald’), king of the Strathclyde Britons, as a trusted ally or loyal vassal. Against them stood the Northumbrians led by an English earl – unidentified in the sources – whom we may cautiously identify as Uhtred of Bamburgh.

The opposing forces fought a battle at Carham-on-Tweed from which the northern Celtic powers emerged victorious. In the following year, Uhtred was assassinated while journeying south to pay homage to Cnut, his murder apparently being undertaken on the king’s orders.

He was succeeded in the earldom of Bamburgh by his brother, Eadwulf Cudel (‘Cuttlefish’), who could only watch from the sidelines as Cnut ceded whatever remained of English-held territory in Lothian to Malcolm.

The border between England and Alba was formally established along the Tweed as far as the old Bernician heartlands around the river’s lower course, thereby reducing Eadwulf’s earldom to little more than a northerly outpost of Cnut’s realm.

It would have been small consolation to the disgruntled Cuttlefish that the kingdom of Owain the Bald, one of the victors at Carham, was soon to disappear completely from the political map.

Owain’s successors were still ruling on the Clyde in the middle of the eleventh century, but their kingdom, the last outpost of the North Britons, fell under Scottish control before 1070.

By then, the kingship of Alba had already passed out of mac Ailpín hands to Donnchad, a grandson of Malcolm mac Cináeda by his daughter Bethoc.

This Donnchad is more familiar in his literary guise as the ‘King Duncan’ killed by Shakespeare’s villainous Macbeth who, in turn, was based on a  historical ruler of Moray called Macbethad.

By 1040, when Macbethad seized the kingship of Alba, the realm was already being referred to as Scotia, a Latin name meaning simply ‘Scotland’.

 
Bristol Beaufighter
image.png

www.classicwarbirds.co.uk

Quick facts  -  First flight: 17th July 1939  |  Entered service: 27th July 1940  |  Total built: 5,928

Entering service with the Royal Air Force in July 1940, the Beaufighter would serve in a number of roles and form the North Coates Strike Wing.

Its wartime service also saw the Royal Australian Air Force use the type and the Bristol Beaufighter would be involved in the Battle of the Bismarck Sea during March 1943.

It was eventually retired by the RAF in May 1960.

Bristol's design team, led by Leslie Frise and Roy Faddon, set about working on a new design heavily based on its recent Beaufort torpedo bomber.

This new aircraft was to be powered by a pair of Bristol's Hercules engines and would use the Beaufort's landing gear, wings and tail, based around a newly designed fuselage and would have a crew of two, pilot and navigator.

Bristol submitted this aircraft in October 1938 to the Air Ministry, who ordered four prototypes. On the 17th July 1939 the first prototype flew, with Captain Cyril Uwins at the controls.

The Royal Air Force received their first Beaufighter Mk I on the 27th July 1940. Powered by the 1,560-hp Bristol Hercules XI engine, its top speed was 320 mph, range 1,500 miles with a service ceiling of 29,000 ft. Armament was four 20mm cannons, six 0.303-in machine-guns and 2,000lb bombs.

It would be the Fighter Interception Unit based at RAF Tangmere who would be the first squadrons to receive the Beaufighter Mk IF, which had Airborne Interception radar Mk IV installed.

They started to get theirs on the 12th August 1940 and, after moving to RAF Shoreham, undertook the Beaufighter Mk IFs first operational sortieon the 4th September 1940.

A further five squadrons, Nos. 25, 29, 219, 600 and 604, would take delivery of small numbers of the aircraft by October 1940.

No. 219 Squadron scored the type's first aerial victory when a Dornier Do 17Z was shot down on the 25th October 1940.

No. 604 Squadron scored the Beaufighter's first radar assisted victory, shooting down a Junkers Ju 88 on the 19th November 1940.

A Beaufighter Mk IC for use by Coastal Command was developed and No. 143 Squadron based at RAF Aldergrove, which had been reformed on the 15th June 1941, would be the first to receive the type.

With Bristol's Hercules engines in demand elsewhere, it was decided to look for an alternative engine in case of a shortage.

So two airframes were installed with Rolls-Royce Merlin engines, testing showed the centre of gravity in the Beaufighter moved which resulted in directional instability, which would require the tail of the aircraft to be redesigned.

This led to the 1,250-hp Rolls-Royce Merlin XX powered Beaufighter Mk II, with the first example flying on the 22nd March 1941.

These had a top speed of 327 mph, a range of 1,500 miles and a service ceiling of 29,000 ft. Armament consisted of four 20mm cannons, six 0.303-in machine-guns and 2,000lb bombs.

The Bristol Hercules II, X or XI engine was to power a proposed Beaufighter Mk III and the Rolls-Royce Merlin XX engine the Beaufighter Mk IV, but none were built.

Two Beaufighter Mk Vs powered by the 1,250-hp Rolls-Royce Merlin XX engine were, but no further Beaufighter Mk Vs were produced.

bristol-beaufighter-1.jpg


Beaufighter TF.Mk X at the Royal Air Force Museum, London

The next variant to enter production was the Beaufighter Mk VI. Powered by the 1,650-hp Bristol Hercules VI engine, its top speed was 330 mph, range 1,500 miles with a service ceiling of 29,000 ft.

Armament was four 20mm cannons, six 0.303-in machine-guns and either torpedoes or rocket projectiles. Fighter Command and Coastal Command started to receive their first Beaufighter Mk VIs in early 1942.

This was followed in May 1942 with tests which saw the aircraft able to be armed with torpedoes, to begin with sixteen Beaufighter Mk VICs would be modified to carry torpedoes and these would enter service during June 1942 with No. 254 Squadron based at RAF Dyce.

The next three intended variants were the Beaufighter Mk VII, to be powered by the Bristol Hercules 26 engine and the Beaufghter Mk VIII and Beaufighter Mk IX, which were both to be powered by the Bristol Hercules XVII engine.

These were to be built in Australia, but none were produced.

This meant the Beaufighter TF.Mk X was the next production variant, Powered by the 1,735-hp Bristol Hercules XVII engine, it had a top speed of 323 mph, a range of 1,500 miles and a service ceiling of 29,000 ft.

Armament consisted of four 20mm cannons, six 0.303-in machine-guns and either 500lb bombs or torpedoes or rocket projectiles.

The Beaufighter TF.Mk X would be used for anti-shipping operations and was fitted with Airbone Interception radar Mk VIII.

The Beaufighter Mk XI was the next production version, essentially a Beaufighter Mk X but without the ability to carry torpedoes.

The Beaufighter Mk XI provided the basis for the Beaufighter Mk XII, with the main change being an increased range, but this would never enter production.

The Royal Australian Air Force would also take delivery of a small number of Beaufighters in 1941 and 1942. One of the squadrons to be equipped with the aircraft was No. 30 Squadron, Royal Australian Air Force and they would use the type in the Battle of the Bismarck Sea (2nd March 1943 - 4th March 1943).

No. 30 Squadron, RAAF Beaufighters would be among a number of aircraft, including those of the United States Fifth Air Force, which during these three days would attack a Japanese convoy on its way to Lae, New Guinea which was ferrying troops and supplies.

bristol-beaufighter-2.jpg


Beaufighter TF.Mk X at the Royal Air Force Museum, London

Australia would build a number of the type under licence in 1944 and 1945, these were based on the Beaufighter TF Mk X.

Known as the Beaufighter Mk 21, it was powered by the 1,735-hp Bristol Hercules XVIII engine, this gave the aircraft a top speed of 320 mph, range of 1,750 miles with a service ceiling of 29,000 ft.

Armament was four 20mm cannons, four 0.50-in machine-guns and either 1,000lb bombs or torpedoes or rocket projectiles.

The first flight of the Beaufighter Mk 21 was made on the 26th May 1944 from Victoria, Australia.

In total 365 examples would be built in Australia, with the 6th November 1945 seeing the Royal Australian Air Force receiving their final Beaufighter Mk 21.

The final variant was the Beaufighter TT.Mk 10. These were a number of different variants converted to target tugs. These would be the last of the type to serve with the Royal Air Force, its final sortie occurring on the 12th May 1960.

During its Royal Air Force career the Beaufighter would serve in a number of roles, including night fighter, torpedo bomber and ground attack.

During September 1942 Nos. 143, 236 and 254 Squadrons, who operated the type, formed the North Coates Strike Wing which would target North Sea shipping.

It would be Nos. 236 and 254 Squadrons who undertook the first operation for this new force, attacking a convoy on the 20th November 1942.

By the time the war in Europe ended on the 8th May 1945, the North Coates Strike Wing would be credited with sinking over 150,000 tons of shipping.

One of the most audacious operations of the Second World War (1939 - 1945) was carried out by Coastal Command. This saw a Beaufighter Mk IC of No. 236 Squadron, piloted by Flight Lieutenant Ken Gatward with Sergeant George Fern as his navigator, perform a low-level daylight operation on the 12th June 1942.

Known as Operation Squabble, they dropped a French Tricolore over the Arc de Triomphe in Paris, France.

The Beaufighter would be used by a number of other air forces, including the United States Army Air Force and Royal Canadian Air Force, and by the time production ended, a total of 5,928 had been built.

bristol-beaufighter-3.jpg


Beaufighter TF.Mk X at the Royal Air Force Museum, London

Technical DetailsClick on the aircraft image to view a larger version.


Top Speed

Range

Service Ceiling

Armament


Beaufighter Mk I

320 mph

1,500 miles

29,000 ft

four 20mm cannons
six 0.303-in machine-guns
2,000lb bombs


Beaufighter Mk II

327 mph

1,500 miles

29,000 ft

four 20mm cannons
six 0.303-in machine-guns
2,000lb bombs


Beaufighter Mk III

Was to be powered by the Bristol Hercules II, X or XI engine, none produced.

Beaufighter Mk IV

Was to be powered by the Rolls-Royce Merlin XX engine, none produced.

Beaufighter Mk V

Two examples built with a Boulton Paul turret with four 0.303-in machine-guns.

Beaufighter Mk VI

330 mph

1,500 miles

29,000 ft

four 20mm cannons
six 0.303-in machine-guns
and either torpedoes or
rocket projectiles


Beaufighter Mk VII

Was to be powered by the Bristol Hercules 26 engine and built in Australia, none produced.

Beaufighter Mk VIII

Was to be powered by the Bristol Hercules XVII engine and built in Australia, none produced.

Beaufighter Mk IX

Was to be powered by the Bristol Hercules XVII engine and built in Australia, none produced.

Beaufighter TF.Mk X

323 mph

1,500 miles

29,000 ft

four 20mm cannons
six 0.303-in machine-guns
and either 500lb bombs or
torpedoes or
rocket projectiles


Beaufighter Mk XI

Like the Beaufighter Mk X but without the provison for a torpedo.

Beaufighter Mk XII

Intended Beaufighter Mk XI version with a longer range, none produced.

Beaufighter Mk 21

320 mph

1,750 miles

29,000 ft

four 20mm cannons
four 0.50-in machine-guns
and either 1,000lb bombs or
torpedoes or
rocket projectiles


Beaufighter TT.Mk 10

Different variants converted to target tugs.


image.png

The Mighty BeauOne of the earliest multi-role aircraft of World War II, the British Bristol Beaufighter was always dependable.

This article appears in: June 2016

By Phil ZimmerThe day’s flight was to be a fairly typical “rhubarb,” or a fast freelance strike, for the two pilots in their Bristol Beaufighters. It was to be a quick running attack on the Japanese airfield at Toungoo in Burma followed by impromptu strikes at anything they saw on the long trip back home over enemy-held territory to safety at Agartala.

However, that February 13, 1943, mission was to be anything but routine for pilots Brian Hartness and Snowy Smith and their navigators.

They crossed the Irrawaddy River and then turned toward Toungoo. Spotting a Japanese supply train, they swooped down and attacked, leaving the crumpled locomotive in a cloud of escaping steam.

When they got to the airfield, Hartness dived on an enemy bomber as it was taxiing into its dispersal, destroying it with a fierce burst of cannon fire.

A second swing over the field enabled him to damage an enemy Nakajima Ki-43 Oscar fighter with his remaining .303-caliber bullets while dodging accurate Japanese flak and machine-gun fire.

Hartness was flying very low and momentarily took his eyes off the direct line of flight. To avoid the ground fire, he jinked the aircraft, but it was too late.

His “Mighty Beau” struck a teak tree stump left standing after being stripped of its bark to season before being harvested.

“I hit the tree fair and square,” Hartness remembered. “It smashed in the leading edge of my starboard wing between the fuselage and the engine nacelle and severely dented the exhaust collector ring which formed the front cowling of the engine. By some miracle the propeller was undamaged.”

Hartness checked all the instruments and decided to make for safety at Ramu, located more than 300 miles to the northwest.

There he gingerly landed his Beaufighter (No. EL286) to take on fuel and give the plane a good once over before flying on to his home base at Agartala, landing well after Snowy Smith’s plane had touched down.

Hartness got a good chewing out from his superiors over the damage to his aircraft and managed an offhand, low-key apology to the Scot corporal in charge of EL286’s ground crew. “Forget it,” came the reply, and turning to the other Scots the crew chief said: “There I told ye, our pilot will always come back!”

And many crews did come back, thanks in  good part to the proven toughness of the Mighty Beau, which was the Royal Air Force’s first effective twin-engine strike fighter of World War II.

The Bristol Beaufighter was a robust, pugnacious beauty of an airplane. It looked the role it played, that of a muscular, blunt-nosed pugilist that could take quite a beating while pounding the opposition to the ground.

Although it lacked the svelte lines of the British de Havilland Mosquito, the tough Beau proved it could handle nearly anything thrown against it in all types of conditions, whether in the freezing fjords of Norway, the sun-baked expanses of North Africia, or the humid and unforgiving jungles of Burma.

The Beau traced its lineage back to the Bristol Beaufort, first envisioned in the mid-1930s as a torpedo bomber and a general reconnaissance bomber.

The need for a stop-gap fighter was apparent, and the Bristol engineers looked for ways to adapt the Beaufort airframe for that role as well, saving crucial time and costs compared to developing an entirely new plane from scratch.

Designers Leslie Frise and Roy Faddon narrowed the fuselage, shortened the nose incorporating a single seat cockpit, added a dorsel position for a navigator/observer at midpoint on the fuselage, and added powerful but relatively quiet Hercules engines to the airframe.

By utilizing the Beaufort’s existing wing, tail unit, and landing gear, they were able to produce the first prototype Beaufighter in just six months.

The Beaufighter made its maiden flight on July 17, 1939, just a few short weeks before Germany invaded Poland and ignited World War II. The plane was to go on to become the most effective land-based antishipping aircraft the RAF had for the first three years of the war.


Ground crew loading ammunition for the cannon of an RAF Beaufighter Mk.VI night fighter

Four 20mm cannons mounted in the lower forward fuselage were fitted to the first 50 production Beaufighters, although subsequent planes were standarized with six .303-caliber Browning machines guns added in the wings, two on the port side and four on the starboard.

The later addition of rocket projectiles (RP) made the Beau’s punch even deadlier. The versatile plane was also modified to carry torpedoes and bombs.

The fact that the pilot was protected by armor plating and a bulletproof windscreen made the plane even more popular with most pilots.

The pilot sat high and clear of the engines, providing an unobstructed view for low-level attack.

The engines were set forward of the pilot, helping to protect the crew although the engine placement and power did give the plane a tendency to swing on take off and that caught a number of raw pilots by surprise.

The swing could become uncontrollable if not immediately corrected, and sometimes resulted in crashes.

But it was the forward-placed engines, the plane’s overall ruggedness and versatility, and its four cannons acting occasionally as protective skids that helped win the pilots over.

“I have seen a Beau go through a copse of trees [scything them down], through the earthworks surrounding an ammunition hut, through the brick-built hut, and finished up literally just an armored box, with the pilot sustaining only a broken leg and his observer uninjured,” reported one veteran pilot.

Modifications were made as the plane evolved. Its tail was restructured, and instructions were provided in the attempt to overcome the plane’s swing on takeoff.

Some later models were adapted to use the readily available inline Rolls Royce Merlin engine.

Some pilots remained skeptical. One noted that an American who had joined the RAF early in the war felt completely at home in a Beau “as he’d previously been a truck driver!”

Pilot Maurice Ball liked the ground-attack aircraft, which took the fight to the enemy and gave the craft high marks for its “front office,” or cockpit layout.

Flying a Beau made him feel like a “knight of old,” really “achieving something” rather than waiting passively for the enemy to come to you.

The navigator/observer was perhaps the most underrated component of the Beaufighter. He had limited vision is his cupola located some 18 feet behind the pilot.

He could see only two-thirds of the ground because of the craft’s nearly 58-foot wingspan, and often cloud cover, especially over Burma, would settle for weeks at a time.

Perhaps the most challenging was the fact that the four 20mm cannons were placed in the body of the plane and they were not belt fed.

That meant the navigator occasionally had to leave his position, either to unjam the cannon or arm wrestle fresh, heavy drums of 20mm shells into position, often while the plane was weaving to avoid enemy fire.

Not all the navigators were content to sit out an attack. Some toted along Thompson submachine guns on North Sea sweeps as something of an additional defense, although this meant smashing the navigator’s canopy before the gun could be used. Some later models incorporated Vickers or Browning machine guns and armor for the crucial second man.

The Beau was among the first of the multi-tasking planes of World War II. Its strong airframe proved readily adaptable to a wide range of weapons, and it was capable of carrying out a variety of missions against difficult targets and in deplorable weather conditions. It became one of the first land-based torpedo aircraft of the war and was instrumental in proving the operational capability of airborne interceptor radar, which was then in its infancy.

image.png

When this Bristol Beaufighter of RAF Coastal Command caught the German mine-detecting ship Sauerland in the open in the North Sea, it hammered the enemy vessel with accurate fire.

When the Luftwaffe increasingly turned from day to night bombing over Britain in the fall of 1940, the RAF turned to the Beaufighter as a night fighter.

With Mark IV radar fitted to its nose and a radar scope in the observer’s position, the pilot was guided to the target by intercom directions. The craft proved capable in that role, and within six months the Beaufighters had used the temperamental radar to bring down more than a dozen Nazi planes. The number of enemy aircraft downed increased significantly as British radar and night fighting techniques improved.

The crews of the Beaus proved themselves to be masters of the night. Air Marshal W. Sholto Douglas noted in early April 1941 that although Beaufighters fitted with radar “carried out only 21 percent of the sorties at night, they have been responsible for 65 percent of the enemy aircraft destroyed.” He went on to strongly urge that steps be taken to substantially increase the supply of Beaufighters.

The RAF and Bristol also looked to the Beaufighter as a way to take the fight to the Germans, using it as a long-range fighter and attack aircraft to hit enemy bases and shipping as distant as Norway.

The Beaus could cut a small craft in half and sink 800-ton vessels. Some observers said the Beaufighters were able to provide so much firepower in an attack “that the aircraft seemed to be halted in midair by the recoil.”


Two Beaufighters - one visible at the right on a staffing run in the North Sea. 14 October 1944

The firepower that a flight of Beaufighters could bring to bear was difficult to comprehend and even more difficult to overcome.

On June 15, 1944, just a few days after D-Day, some 44 Beaus, including nine outfitted with torpedoes, took off from Langham, England, and linked up with nine North American P-51Mustangs serving as fighter cover.

They had received word that two large enemy ships and 17 escort vessels were at Dan Helder, north of Amsterdam, preparing to sail.

The first wave of Beaus went in with their rockets firing and then opened with the cannons to make the ships’ gunners run for cover while the nine “Torbleaus” (or torpedo-equipped Beaus) came in to finish things off.

By the time they were done, the British had sunk two merchant vessels and one escort, seriously damaged six others, damaged four more, and left one escort calling for assistance. All the Beaus returned safely.

The Beaufighters also proved themselves in North Africa and the Middle East, handling a variety of roles from antishipping and bomber escort to low-level attacks on enemy transport and installations.

raf-bristol-beaufighters-at-work-shooting-up-a-german-coastal-vessel-1944-02.jpg


They protected convoys from Tobruk and Malta and flew antisubmarine patrols over Royal Navy ships in the Mediterranean. The Beaus excelled in ground strafing missions against enemy road convoys.

They would fly straight down the road at low altitude, letting loose with nearly everything they had.

Then, the number two plane would fly down and repeat the process as the surviving enemy drivers looked on in awe from the ditches.

“Only on two occasions,” reports Wing Commander C.V. Ogden of No. 272 Squadron, “did aircraft actually scrape the road with their airscrew tips, but in each case the Beau returned safely.”

Although that comment might have been tongue in cheek, the strafing runs did test the fortitude of the pilots as well as the strength of the planes.

A photo in the Imperial War Museum shows a Beau with 25-30 percent of its right wing clipped off after striking a telegraph pole at full speed while strafing a convoy on the Libyan coast. It flew another 400 miles and landed safely at its home base.

Another photo shows the three-foot top of an armed trawler’s mast firmly imbedded in the nose of a low-flying Beau that made it back safely from a September 12, 1944, strafing run at Den Helder.

The Bristol Beaufighter was used extensively in the Pacific Theater and on the Asian mainland. In this photo a formation of Royal Australian Air Force Beaufighters flies over the Finschhafen, New Guinea, area.

But it was in Burma and the Dutch East Indies that the plane really won over any remaining doubters and cemented its reputation as a tough, long-range plane capable of 1,500-mile missions that could take the fight to the enemy’s lair, consistently deliver damaging blows, and then bring the crew safely back.

The planes and crews more than held their own in fighting over jungles and open ocean in fierce climatic conditions that made maintenance and supply exceptionally difficult.

It was in the Far East that the Beau picked up its British-given moniker of “Whispering Death” because the quiet, fast, and low-flying plane could often be on top of the enemy before he had time to react.

According to one wartime account, the Beaufighters brought “a new kind of war against the Japanese. It was aggressive war, war of attack, war of accurate destruction.

Hirtherto he had been bombed by aircraft which flew at remote heights in the sky. Sometimes they were strafed by low-diving bombers. That kind of attack had given them time to take cover….

Now it was different. Aircraft which skimmed the trees hurtled through the steep valleys of Timor’s mountains, the hills screening the noise of their approach. They gave no signs of their coming and their guns’ fury destroyed everything it their path.”

Such an attack was perhaps best demonstrated by a Beaufighter pilot on a solo freelance sweep when he noted a full-dress ceremonial parade of Japanese at Myitkyina in northern Burma.

The troops were celebrating Emperor Hirohito’s birthday and were drawn up in a square around the flagpole.

The Beau made two passes, scattering mayhem and death among the gathered men and horses. The attack severed the flagpole, symbolically bringing the rising sun flag down over the bodies of the fallen color guard.

The Japanese resorted to a number of tactics to counter the Beaus and related Allied aircraft disrupting their supply lines in the effort to push them back from India and retake Burma.

One simple expedient was the stringing of steel cables between two trees in the hope of snaring a fast, low-flying Allied plane.

Such tactics had little impact, however, as the Allies continued their attacks and further weakened the already overstretched and overtaxed Japanese supply lines. RAF No. 27 Squadron alone managed to damage or destroy 66 locomotives between January and September 1943, along with more than 400 items of rolling stock.

As the last year of the war opened, the Japanese in Burma were pulling back in an attempt to avoid the oncoming British Fourteenth Army. The Japanese relied on riverboats, which opened them to additional attacks from long-range Beaus and Mosquitoes.

Author Jerry Scutts noted, “Although it was far from unique in the Far East, the Beaufighter’s tough, conventional construction took it past its logical phase-out in preference to that of the superior Mosquito, which had an Achilles heel not previously revealed in more temperate climates.” The high levels of humidity and heat affected the bonding agents on the Mosquitoes’ wooden airframe, occasionally causing the craft to be grounded because of structural failure.

“In certain instances, therefore, the Beaufighter replaced its replacement,” added Scutts with a touch of irony.

In Burma, especially, he observed that the Beaufighter maintained its position as an exceptionally effective twin-engine strike fighter. Its unrivaled cannons and gun power—coupled with its rocket and torpedo capabilities—presented a challenge that the enemy simply could not match or counter.

The Mighty Beau lived on after the war, seeing continued years of service in the armed forces of countries ranging from Israel and Turkey to Portugal and the Dominican Republic. The Beau also lived on in the minds and hearts of the men it returned home safely in World War II.

Phil Zimmer is a U.S. Army veteran and a former newspaper reporter. He has written on a number of World War II topics.

 
Last edited by a moderator:
Watkin's Wembley folly: London's 'Eiffel Tower' that never was
  • Published 26 December 2019
_110216006_d3bf572f-8d6c-41bc-add0-c51d9d7c80bb.jpg
IMAGE SOURCE, ALAMY

bbc.co.uk

Sir Edward Watkin's Tower would have been the centrepiece of his new park in Wembley

ByDuncan Leatherdale

BBC News

Before Wembley got its world famous football stadium, a Victorian railway magnate had even grander plans to turn the borough's marshy fields into London's answer to the Eiffel Tower.

Sir Edward Watkin's plan was simple but ambitious - build the tallest structure in the world.

The railway magnate had been inspired by the 984ft (300m) tall Eiffel Tower, which was unveiled beside the River Seine in 1889.

He wanted London to have one of its own.

"Like other Victorian men of the era he wanted to make his impact on the world," said Jason Sayer, of the London School of Architecture. "The tower was to be his legacy."

_110215350_gettyimages-90732164.jpg
IMAGE SOURCE, GETTY IMAGES

Image caption,

Sir Edward Watkin ran a number of railways in England and Canada

The Eiffel Tower was the world's tallest man-made structure when construction finished in 1889.

Initially derided by some for being a monstrous addition to the city's fine architecture, it went on to become a global tourist attraction, recouping its £260,000 construction costs in the first seven months and becoming the perennial back drop for Parisian postcards.

_110244458_gettyimages-1157646217.jpg
IMAGE SOURCE, GETTY IMAGES

Image caption,

The Eiffel Tower is one of the most visited tourist attractions in the world

Sir Edward wanted Great Britain to have an equivalent. But, instead of building a rival tower in central London, he believed a marsh on the city's outskirts would be the perfect spot.

He had bought 280 acres of land in the Wembley area as part of his grand scheme to build an entire new community, connected to the city of London by the Metropolitan Railway, of which he had been chairman since 1872.

His tower was meant to be the beacon for his new suburban paradise, comfortable homes set in pleasant parklands just a 12 minute train ride from Baker Street station.

The poor would be able to swap the over-crowded disease-infested streets of central London for healthy country air. His park would also encourage city-dwellers to enjoy days out on his railway, with a trip up the tower being the icing on the cake.

_110216012_56a17548-6505-4a1a-87af-5236afe0ee28.jpg
IMAGE SOURCE, ALAMY

Image caption,

The park opened in 1894 with the tower still under construction

"There was a lot of British pride going around at the time and he wanted to typify the country's global achievements,"

Mr Sayer said. "Part of it was down to him trying to do some public good, although how much the public needs a tower is debatable, but mostly it was down to his own ego."

His park, which included a boating lake, waterfall and various sporting grounds, opened in May 1894 and quickly became popular with some 100,000 visitors in its first few months.

Those ambling lazily around the large green gardens would have heard the heavy clanking of metal as work continued on Sir Edward's tower.

But work was not going well.

It had been designed by the London architects Stewart, McLaren and Dunn, who had seen off 67 competitors for the 500 Guinea prize.

_110197322_2f4b1f32-c9ba-42d4-b85b-e067af419a35.jpg
IMAGE SOURCE, PUBLIC DOMAIN REVIEW

Image caption,

Some of the proposed towers were somewhat fantastical

Sir Edward had actually approached Gustave Eiffel to take on his tower, but the architect of the Parisian masterpiece politely declined, fearing his compatriots might think him "not so good a Frenchman as I hope I am" if he helped the English build a bigger tower than France's.

Some of the designs had been fantastical and patently impractical, if not impossible.

One was a 2,000ft high tower shaped like a multi-tiered wedding cake with a working railway spiralling up it.

Another was described as an "aerial colony" complete with hanging vegetable gardens and a scale replica of the Great Pyramid on its summit.

Stewart, McLaren and Dunn's winning entry closely resembled the Eiffel Tower, although it was made of steel as opposed to iron and, at 1,150ft (350m), was some 165ft (50m) taller than the Parisian centrepiece.

It was to feature a 90-bedroom hotel, restaurant, theatre, shops, Turkish baths, winter gardens and promenades, as well as a weather station and observatory at the top.

_110197316_193e549f-6e18-4639-be28-743794c7a5d1.jpg
IMAGE SOURCE, PUBLIC DOMAIN REVIEW

Image caption,

The winning design on the left received a 500 guinea prize, the runners up 250 guineas

But Wembley was the wrong place for such a project for two main reasons. Firstly, the ground was muddy and marshy and prone to subsidence.

The first stage of the tower, consisting of four giant legs supporting a plateau 155ft (47m) in the air, was completed a short while after the park's opening.

But it was soon developing an ominous lean that was even more pronounced two years later.

_110216010_cb1c571d-53f7-44a4-9199-081ae3078636.jpg
IMAGE SOURCE, ALAMY

Image caption,

The first stage was the only section of the tower to be finished

Secondly, it was too far from central London.

"Wembley was not the equivalent of the location of the Eiffel Tower to put it mildly," said Christopher Costelloe, director of the Victorian Society. "People would get there and find there was not much to see, certainly no panoramic view of London.

"If he had built it in Hyde Park it would probably have been a roaring success."

Sir Edward's hopes that his even partially built tower would enjoy the same immediate success as the Eiffel Tower were quickly dashed.

Public interest in it waned with visitors donating only £27,000 of the £220,000 required. Sir Edward ploughed £100,000 of his own money into it, but by the end of 1894, work had ceased.

In a bid to reignite public excitement, lifts were installed in 1896 to allow people to get up to the platform. However, during its first six months only 18,500 people paid to do so.

The tower once mooted to be named after Queen Victoria became known instead as the "Shareholders' Dismay", "London Stump" and "Watkin's Folly".

_110216008_b67630bb-85b8-4c3a-9fb4-4a6ba953d028.jpg
IMAGE SOURCE, ALAMY

The footprints of Sir Edward's tower can be clearly seen as work was beginning on Wembley stadium in the 1920s

_110215348_gettyimages-463988625.jpg
IMAGE SOURCE, GETTY IMAGES

The first football match at the original Wembley stadium, complete with its famous twin towers, was the FA Cup Final in 1923

Sir Edward, who had also made an ill-fated attempt to dig a Channel tunnel in the 1880s, died in 1901. The following year his much-vaunted tower was closed to the public and in 1906 it was finally torn down.

Though Sir Edward's tower was a failure, his vision for Wembley was not. The park's leisure facilities proved popular and became a venue for large-scale gatherings.

Wembley's place in the list of global icons would be assured when, in 1923, a magnificent new stadium, complete with twin towers, opened to host the FA Cup final between Bolton Wanderers and West Ham United.

In 2002, when the stadium was torn down to be replaced by another landmark ground, workmen found large concrete foundations beneath the pitch.

They were the first and last pieces of London's answer to the Eiffel Tower.

The new Wembley stadium opened in 2007

 
Last edited by a moderator:
image.png

A dramatic view of the bombing of a railway bridge in Zenica, Bosnia, on 6th Sept 1944. South African Air Force aircraft attack the bridge as thick smoke rises over the surrounding countryside.

 
site_favicon_16_1761305380978.ico
Notable People
dorothy_spicer_primary_small.png
Dorothy Spicer - Notable PeopleDorothy Spicer was an English aviator and the first woman to gain an advanced qualification in aeronautical engineering. She was known for navigating the boundary between flying and technical aircraft
Save
share.png
Share

Dorothy Spicer

Dorothy Spicer is recognized for earning the first advanced aeronautical engineering licences held by a woman and for securing a technical appointment in civil aviation — work that proved women could hold technical authority in aviation engineering and opened institutional pathways for future generations.

Dorothy Spicer was an English aviator and the first woman to gain an advanced qualification in aeronautical engineering. She was known for navigating the boundary between flying and technical aircraft engineering at a time when formal training and licensing were largely closed to women. Through aviation work, professional accreditation, and public writing, she framed competence as something earned through expertise rather than granted by access. Her career also positioned her as a bridge between the spectacle of air travel and the rigorous culture of engineering practice.

Early Life and EducationDorothy Spicer was born in Hadley Wood, Middlesex, and grew up in an education-oriented environment that led her toward technical study. She attended the Godolphin School in Salisbury, Wiltshire, and later studied at University College, London. From the outset, her trajectory combined formal learning with a persistent drive to enter practical technical work.

Her early formation included a willingness to seek out training opportunities rather than waiting for institutional permission. That mindset later shaped her approach to flight and engineering qualifications, especially when advanced engineering education and course access were restricted. Even before her professional breakthroughs, she approached aviation as both a craft and a discipline.

CareerSpicer learned to fly in 1929 at the London Aeroplane Club at Stag Lane Aerodrome, where she met Pauline Gower. The connection between them became a durable professional partnership, grounded in shared ambition and complementary qualifications. In 1931, they started a business together, with Gower carrying passengers and Spicer qualifying as a ground engineer.

As their enterprise developed, Spicer worked through the practical realities of aviation commerce—renting aircraft, later acquiring a Gypsy Moth, and confronting the challenge of making the venture financially sustainable. When earnings proved difficult to secure, she redirected her work toward aviation performances, joining the Crimson Fleet air circus and later the British Hospitals’ air pageant. This phase emphasized public flight while keeping her technical education moving forward in parallel.

Spicer also deepened her engineering credentials through the Women’s Engineering Society (WES). She joined in 1932 and was recorded as a ground engineer connected with Gower, and she continued studying for higher-level engineering licensing during the years of touring. Through this work, she helped demonstrate that engineering qualification could be pursued without relinquishing the realities of flight operations.

During this touring period, she pursued the ‘B’ engineer’s licence despite formal advanced courses being restricted to men. By persuading Spartan aircraft manufacturers to allow practical and theoretical training at their workshops, she earned the licence and became the first woman in the world to do so. She also held a ‘C’ (ground engineer) licence, becoming the second British woman to achieve it, and then progressed to the ‘D’ licence in 1935.

Her attainment of the ‘D’ licence represented an engineering threshold rather than a purely pilot-focused milestone. The qualification authorized her to inspect, pass out, and repair both engines and airframes, and it positioned her to build aircraft components and oversee required materials. That technical scope reflected her insistence on being credentialed at the level where aircraft integrity and maintenance decisions would stand.

Spicer continued to translate her technical focus into professional engagement and public technical discourse. In 1937 she read a paper at the Women’s Engineering Society conference on the selection and treatment of steels for aero-engines, reinforcing that her identity was not limited to demonstration flying. Her professional presence also included a broader pattern of acceptance into civil aviation technical structures.

In 1938, she accepted a position with the Air Registration Board in London, which made her the first woman in the British Empire to receive a technical appointment in civil aviation. The same year, she and Pauline Gower jointly authored the book “Women with Wings,” which presented their experiences flying together and helped frame women’s participation in aviation as technical and operational. Her output therefore combined credentialed engineering with efforts to shape how audiences understood women’s place in the field.

As the Second World War unfolded, Spicer shifted toward research and applied aviation work. In late 1940, she took on flying work as an air observer and research assistant with the Royal Aircraft Establishment at Farnborough. Through this role, she contributed to the development of aircraft and equipment, aligning her practical flying knowledge with the research priorities of a wartime technical institution.

Her involvement at Farnborough placed her in a broader engineering environment during the critical years when aircraft performance and reliability depended on rapid experimentation. She worked while her husband, Flight Lieutenant Richard Pearse, also served in a related capacity as a test pilot at the same organization. Together, their professional lives reflected a shared dedication to aviation’s technical demands under operational pressure.

Spicer’s life ended in 1946, when she and Richard Pearse caught a flight to Rio de Janeiro and the aircraft crashed due to bad weather. She is remembered through memorial arrangements that followed the loss. Her career, compressed into a few decades, left behind a pattern of technical accreditation, engineering authorship, and institutional breakthroughs for women in civil aviation.

Leadership Style and PersonalitySpicer demonstrated a leadership style rooted in technical seriousness rather than performance alone. She approached constraints—especially gender-based restrictions in advanced training—as problems to be solved through persistence, negotiation, and technical readiness. Even when her work intersected with public spectacle, she maintained a disciplined focus on qualifications and engineering capability.

Her personality appeared practical and self-directed, marked by an ability to convert ambition into concrete steps: seeking appropriate training, earning licenses, and entering institutions where her expertise could be applied. She also showed collaborative leadership through her partnership with Pauline Gower, using shared planning to sustain both aviation work and long-term professional development. In professional settings, she reinforced credibility by contributing to technical discussion rather than limiting herself to demonstration roles.

Philosophy or WorldviewSpicer’s worldview emphasized competence as something earned through training, credentialing, and measurable technical responsibility. She treated aviation not as an accessory to engineering but as an arena where engineering authority must be demonstrated and trusted. By pursuing the highest levels of licensing available to her and by publishing technical experiences, she aligned her identity with the idea that expertise should be visible and transferable.

Her approach also suggested a belief that institutional barriers could be navigated without surrendering standards. She pursued access to workshops, theoretical instruction, and engineering authority when formal pathways were restricted. That stance connected her engineering philosophy to everyday action: she insisted on being prepared to inspect, repair, and approve, not merely to participate.

Impact and LegacySpicer’s legacy lay in expanding the boundaries of what women were seen as capable of doing within engineering and aviation. By becoming the first woman in the world to gain the ‘B’ engineer’s licence and then the first woman to achieve the ‘D’ licence in 1935, she changed the licensing narrative that had limited women’s formal technical standing. Her later appointment in civil aviation reinforced that the field could incorporate women into technical authority, not just auxiliary roles.

Her influence also extended through professional and public communication. Through participation in the Women’s Engineering Society and her technical paper on aero-engine materials, she helped model how women could contribute to the knowledge base that engineering depended on. Through “Women with Wings,” she contributed to the cultural explanation of aviation as an earned craft, offering a clearer picture of women’s roles in both flying and the technical systems that made flight dependable.

In the years following her death, institutions and communities continued to recognize the significance of her achievements. Her career offered a template for later progress: credential deeply, work operationally, and carry technical knowledge into public understanding. In that sense, her impact remained both symbolic and practical—an example of engineering legitimacy paired with aviation skill.

Personal CharacteristicsSpicer was characterized by determination and methodical ambition. She moved through multiple aviation contexts—business flying, touring air pageants, and technical qualification—while steadily building the professional foundation that would make her engineering authority undeniable. That pattern suggested a temperament that favored preparation over shortcuts.

She also presented as collaborative and socially engaged within the engineering community. Her work with Pauline Gower and her participation in WES activities reflected an orientation toward building shared opportunities, not isolating achievement as a personal exception. Even in technical forums, she conveyed a clear seriousness about the standards that aircraft engineering required.

References
  • 1. Wikipedia
  • 2. Oxford University Press (Oxford Dictionary of National Biography)
  • 3. Open Library
  • 4. Google Books
  • 5. Royal Air Force Museum
  • 6. National Archives
  • 7. Imperial War Museums
  • 8. Cambridge Core

 
SATURDAY 7 SEPTEMBER 1940image.png

Smoke rising from fires in the London docks following bombing on 7 September 1940.

Day bombing switched to London with a heavy attack on the capital.Night: Raids on London continue from dusk till dawn. Main objectives are the East End and Docks.

Weather: Fair with some haze.

Enemy Action by DayThe morning of Saturday, 7 September 1940, began with an eerie calm. Radar stations along the south coast reported no incoming formations, and, for the first time in weeks, operators stepped outside to enjoy the mild weather. But this silence was deceptive.

It marked the opening of a new and deadly phase of the air war.

Reichsmarschall Hermann Göring had declared himself commander of a new phase of the Luftwaffe campaign—codenamed Loge—which would now shift its focus from airfields to the destruction of London.

The third phase of the Battle of Britain had begun. Hitler and Göring were confident that one overwhelming blow against the capital would break British morale and force surrender

. Across the Channel, Göring entertained Luftwaffe commanders at a lavish picnic at Cap Blanc Nez, complete with champagne and white-linen-covered tables, while bomber formations assembled overhead.

First Probing Raids: Morning ActivityThe first signs of enemy action came mid-morning when around thirty aircraft crossed the coast near Lympne. These included Bf 109s and possibly Bf 110s in the Jabo role.

They did not penetrate far inland but struck targets at Dover and Hawkinge. Dive-bombing attacks caused minor damage to installations at Hawkinge, with 12 to 15 bomb craters reported near the officers’ mess and perimeter track.

No serious damage was recorded, although operations were briefly disrupted. Dover received bomb splinters and light damage to buildings near the harbour.

Reconnaissance flights followed shortly after. One aircraft crossed the Wash to Lincoln and exited over Skegness without interception.

At 09:20 hours, a Dornier Do 215 was intercepted by No. 266 Squadron and shot down off the Dutch coast following a pursuit across the North Sea.

Several convoys were shadowed in the Bristol Channel and off the Yorkshire coast, and another enemy aircraft patrolled East Anglia. One penetrated as far inland as Duxford, but evaded interception by diving into cloud.

Midday Activity: Kent Reconnaissance and SkirmishesFrom 11:00 to 12:00 hours, around seventy German aircraft assembled over northern France and crossed the coast near Folkestone.

The formation split—some heading toward Hastings along the coast, others fanning out over East Kent. This was followed by a period of relative quiet.

At 12:30 hours, a Ju 88A (4U+BL) of 3.(F)/123 was shot down by Sergeant L. S. Pilkington of No. 7 OTU during a reconnaissance mission over Liverpool and Bristol.

The aircraft force-landed at Hafotty-y-Bulch, Mallwyd, near Machynlleth; Oberlt. H. Kauter, Lt. E. Bohle, Fw. W. Kobold, and Uffz. G. Leisner were all captured.

From 13:00 to 15:00 hours, small patrols of six aircraft were plotted circling Calais and Boulogne, occasionally testing the coast near Lympne.

15:40–18:14 Hours: The Main RaidAt 15:40 hours, radar stations at Foreness, Dover, Rye, and Pevensey began detecting the build-up of what would become the largest raid of the war thus far. First, a wave of approximately 100 aircraft crossed the coast at 16:25 hours, spreading across Kent.

At 17:18 hours, a second and far larger wave followed—comprising some 250 bombers and fighters in five separate raids.

The entire armada is now estimated to have consisted of more than 1,100 aircraft: 372 bombers, 200 Bf 110 fighter-bombers, and 642 Bf 109s flying as escort. Their target was London.

As formations crossed the Channel and split over Kent, British sector controllers misjudged their objectives

. Nos. 1, 303, 501, and 504 Squadrons were scrambled to protect airfields, oil refineries, and sector stations, but the real target was still unrecognised.

Meanwhile, Duxford’s Big Wing was slow to form, taking 20 minutes to assemble its thirty-six aircraft and arriving too late to intercept the inbound bombers over Maidstone.

Park’s demand for immediate reinforcements went unanswered, as the formations pushed north.

Over Kent, Nos. 249 and 501 Squadrons made contact near Rochester. The Hurricanes attempted to disrupt the bomber stream, but No. 249 suffered heavily, losing six aircraft in combat with the fighter escort. Meanwhile, the German bombers—Heinkel He 111s, Dornier Do 17s, and Junkers Ju 88s—pressed on with minimal interference.

17:00–18:10 Hours: Attack on East LondonThe main bomber force followed the Thames upstream toward the docklands. At 17:00 hours, the first loads were released over the oil storage tanks at Thameshaven, which were still burning from the previous day.

At 17:15, waves of bombers reached Woolwich Arsenal, the Harland & Wolff shipyard, and the Siemens Brothers works. Bombs caused widespread destruction.

Gunpowder stores at Woolwich exploded, igniting fires visible for miles. Serious damage to a main sewer and road and rail infrastructure in the area resulted in major disruption.

Other formations rained bombs across the Royal Docks—Albert, Victoria, and King George V—, destroying warehouses, setting ships ablaze, and igniting forty miles of dockfront. Millwall, Poplar, Canning Town, West Ham, and Wapping suffered heavily.

Large industrial targets and working-class neighbourhoods alike were engulfed in fire. The Beckton gasworks was hit and severely damaged, reducing gas supply capacity across East London. One fire officer pleaded:

“Send all the pumps you’ve got, the whole bloody world’s on fire.”
As wave after wave of bombers approached, No. 609 Squadron intercepted a mixed formation over Dartford, destroying two Dorniers, two Bf 110s, and one Bf 109 without loss.

No. 303 (Polish) Squadron engaged bombers over Essex alongside No. 1 Squadron, claiming ten Do 17s and three Bf 109s destroyed, though P/O Daszewski was wounded and hospitalised.

Despite these interceptions, many bombers reached their targets unopposed, as their Bf 109 escorts had turned back due to fuel limitations.

This allowed RAF squadrons to engage returning bombers more effectively. The Big Wing, arriving too late to protect London, attacked the retreating formations of ZG 2 over the Thames Estuary.

At 17:10 hours, a Bf 110D/0 (W.Nr. 3334, A2+NH) of 2./ZG 2 was shot down by Flying Officer J. B. Holderness of No. 1 Squadron, Pilot Officer S. Janoušek of No. 310 Squadron, and Flight Lieutenant B. J. E. Lane of No. 19 Squadron.

The aircraft crashed at Park Corner Farm, Hacton Lane, Hornchurch. Both Lt. K. Schünemann and Uffz. H. Mescheder baled out but were killed.

Five minutes later, Squadron Leader D. R. S. Bader and Sub-Lieutenant R. J. Cork of No. 242 Squadron brought down a Bf 110D/0 (W.Nr. 3185, A2+BH) of 4./ZG 2. The aircraft crashed at Swan Lane, Downham Hall, Wickford, killing Lt. H.-D. Abert and Uffz. K. Scharf.

At 17:20 hours, Sergeant B. Furst of No. 310 Squadron shot down a Bf 110C-4 (W.Nr. 3570, A2+ML) of 6./ZG 2 over the Thames Estuary. The aircraft crashed into the sea off Birchington. Oblt. W. Brede was rescued by the lifeboat J.B. Proudfoot, but Uffz. A. Galla was killed.

At approximately the same time, Squadron Leader M. W. S. Robinson and Pilot Officer N. C. Langham-Hobart of No. 73 Squadron destroyed a Bf 110C-4 (W.Nr. 2216, 3M+LL) of 3./ZG 2 near Herne Bay. The aircraft crashed at Old Tree Farm, Hoath. Lt. F. Kislinger was killed, while Uffz. R. Dahnke baled out and was captured.

At 17:30 hours, another Bf 110D/0 (W.Nr. 3328, A2+JH) of 4./ZG 2 was shot down by Pilot Officer D. W. Crowley-Milling and Sub-Lieutenant (FAA) R. E. Gardner of No. 242 Squadron.

The aircraft crashed at Bullers Farm, Little Burstead. Lt. K. Stix baled out and was captured, but Gefr. H. Hetz was killed.

No. 234 Squadron lost two pilots, including its commanding officer, Squadron Leader J.S. O’Brien, who was shot down over St. Mary Cray and crashed near Biggin Hill.

Flight Lieutenant P.C. Hughes was killed after intercepting a Dornier Do 17 bomber. His Spitfire, X4009, crashed in a field between Sundridge and Bessels Green in Kent.

He apparently baled out, but his parachute failed to open; his body was discovered in a garden on Main Road, Sundridge, not far from the wreckage of his aircraft.

The exact circumstances of Hughes’s death remain uncertain, though it is widely believed that his close-range tactics played a significant role. He is generally thought to have collided with the German bomber he was attacking, rendering his Spitfire uncontrollable.

Pilot Officer Bob Doe, also of No. 234 Squadron, was credited with the destruction of a Heinkel He 111.

Between 17:45 and 18:10 hours, further bombing runs targeted Poplar, Limehouse, Barking, Tottenham, and Croydon. Incendiary and high-explosive bombs lit up entire boroughs.

Major damage was reported in Stratford and Silvertown, where the fires became so intense that a full evacuation was ordered. Over 600 fire engines and crews were deployed across the city.

Damage and CasualtiesCivilian casualties were severe. 448 people were killed in the day’s attacks, with 1,337 more seriously injured. In one act of heroism, Albert Ernest Dolphin, a hospital porter, was killed while shielding a nurse from a collapsing wall at South-Eastern Hospital, New Cross. He was posthumously awarded the George Cross.

Among the hardest-hit sites were the gasworks at Beckton, Siemens Bros. and Harland & Wolff in Woolwich, Thameshaven refinery, and the Royal Docks.

Silvertown was described as a “raging inferno,” and could not be brought under control until the following day. Water pressure for firefighting was compromised by low Thames levels and burst mains. Railway lines were twisted or buried under debris. Road transport was paralysed across large parts of East London.

Enemy Action by NightAt 20:22 hours, a new wave of bombers crossed the Kent coast at Beachy Head. These raids lacked escorts, relying instead on the glow of East London’s fires to guide their path.

Hugo Sperrle’s Luftflotte 3 launched continuous streams of single bombers, avoiding collisions at night. From dusk to dawn, 333 tons of high explosives and 13,000 incendiaries were dropped.

Major targets included Battersea Power Station, which sustained heavy damage, and London Power Company’s infrastructure. Southwark, Bermondsey, East and West Ham, Hackney, Lewisham, Stepney, Plaistow, Barking, Rotherhithe, and Finsbury reported extensive damage.

Reports of major infrastructure damage included severed water mains, collapsed buildings, derailed trains, and power outages. Beckton’s gasworks continued to burn.

Final SummaryBy 04:30 hours on 8 September, the last raiders withdrew. The bombing had lasted seven continuous hours. Fires still raged in multiple districts, and emergency services remained fully engaged. It was the beginning of the Night Blitz. London had endured its first all-out attack.

Fighter Command lost 25 aircraft during the day, with sixteen pilots killed or missing.

The Luftwaffe lost 41 aircraft, including 16 Bf 109s. Eleven German pilots became prisoners of war, including Oblt. Hans Krug (4./JG 26) and Ofw. Gotthard Goltzsche (1./JG 77); several other German aces were missing in action, including Ofw. Fritz Ströhlein (2./JG 51) and Uffz. Willi Melchert (5./JG 2).

Leading Luftwaffe aces added to their tallies: Major Mölders, Oblt. Helmut Wick (reaching 25 victories), and Major Hannes Trautloft. Ofw. Erich Rudorffer (2./JG 2) claimed three Spitfires. The RAF’s response was valiant but overstretched. Göring, falsely triumphant, claimed London had been struck to its core.

The 7 September raid marked a major turning point.

The Luftwaffe had failed to destroy Fighter Command, but it had shifted to a campaign of terror against London. In doing so, it may have inadvertently spared the RAF’s sector airfields and altered the course of the battle.

So began the Blitz.

London would now endure bombing every night for the next fifty-seven consecutive nights.

German Losses:
Airmen: 52 | Aircraft: 41

British Losses:
Airmen: 16 | Aircraft: 25

image.png

Armourers replenish the ammunition in Hawker Hurricane Mark I, P3143 ‘NN-D’, of No. 310 (Czechoslovak) Squadron at RAF Duxford, 7 September 1940. © IWM (CH 1297)

image.png

A Heinkel He 111 bomber flying over the Isle of Dogs in the East End of London, at the start of the Luftwaffe’s evening raids of 7 September 1940.

image.png

A still from camera-gun film taken from a Supermarine Spitfire Mark I of No. 609 Squadron RAF, flown by Flying Officer Tadeusz “Novi” Nowierski (formerly Polish Air Force) as he closes in on a formation of Dornier Do 17Zs of KG 3 south-west of London at approximately 5.45 pm on 7 September 1940, the first day of the Blitz. Tracer bullets from the intercepting Spitfires can be seen traveling towards the enemy aircraft which were heading back to their base after bombing East London and the docks. © IWM (CH 1820

image.png

Fires light up the docks along the River Thames on 7 September 1940 and bring into vivid relief the merchant ships lying alongside the many docks which line London’s busy port.

 
Last edited by a moderator:
Last week saw the premiere of the film Pressure. At the premiere were five veterans from WW2. The five are in the picture below and their names, ages and roles in WW2. I've met Colin a few times. Meeting footballers is good but nothing compared to meeting WW2 veterans and I've met a few over the years. I'll go and watch the film but it does make me laugh when the work of James Stagg and advising Ike and others in SHAEF is described as the true untold story. I don't think so. Anyone who has studied WW2 and especially D-Day will be aware of the role of Stagg. Why do film production companies treat us like idiots?!

792093588_1616397726588716_673637167740568430_n.png


From left to right:

Marie Scott, 100 – D-Day switchboard operator who relayed messages from the Normandy beaches from the tunnels under Fort Southwick

Colin Bell DFC, 105 – RAF Mosquito pilot who completed 50 bombing missions

Ruth Barnwell, 102 – Wren who served at HMS Quebec, where crews trained for D-Day

Mervyn Kersh BEM, 101 – who landed on Gold Beach aged just 19

Dorothea Barron, 101 – Wren and visual signaller who helped train landing craft crews.

 
Last week saw the premiere of the film Pressure. At the premiere were five veterans from WW2. The five are in the picture below and their names, ages and roles in WW2. I've met Colin a few times. Meeting footballers is good but nothing compared to meeting WW2 veterans and I've met a few over the years. I'll go and watch the film but it does make me laugh when the work of James Stagg and advising Ike and others in SHAEF is described as the true untold story. I don't think so. Anyone who has studied WW2 and especially D-Day will be aware of the role of Stagg. Why do film production companies treat us like idiots?!

792093588_1616397726588716_673637167740568430_n.png


From left to right:

Marie Scott, 100 – D-Day switchboard operator who relayed messages from the Normandy beaches from the tunnels under Fort Southwick

Colin Bell DFC, 105 – RAF Mosquito pilot who completed 50 bombing missions

Ruth Barnwell, 102 – Wren who served at HMS Quebec, where crews trained for D-Day

Mervyn Kersh BEM, 101 – who landed on Gold Beach aged just 19

Dorothea Barron, 101 – Wren and visual signaller who helped train landing craft crews.
Every one of them a hero.

Every, single, one.

 
image.png

Photograph of Monsieur Cartigny, seated and facing three-quarters left.

He wears a small black cap and supports his right hand on a cane. He wears two medals including the Legion d'honneur.

Emmanuel Louis Cartigny was born at Hyères on 1 September 1791 and died there on 21 March 1892. He was the last survivor of the Battle of Trafalgar which was fought on 21 October 1805.

During the battle he fought on the side of the French Empire, under the command of Napoleon Bonaparte, against the British.

Queen Victoria visited Hyères between 21 March and 25 April 1892, when she stayed at the Grand Hôtel de Costebelle.

Although her Journal gives no indication of the fact, during this visit she almost certainly would have heard of Monsieur Cartigny's recent death.

 
Back
Top